Quick answer
To paint the BattleTech Union-Class DropShip, start by cleaning mold lines, then prime with a light gray or white primer. Use a large brush or airbrush for the base coat, apply panel liner to recesses, and finish with drybrushing and optional weathering for a worn military look.
What you need before painting
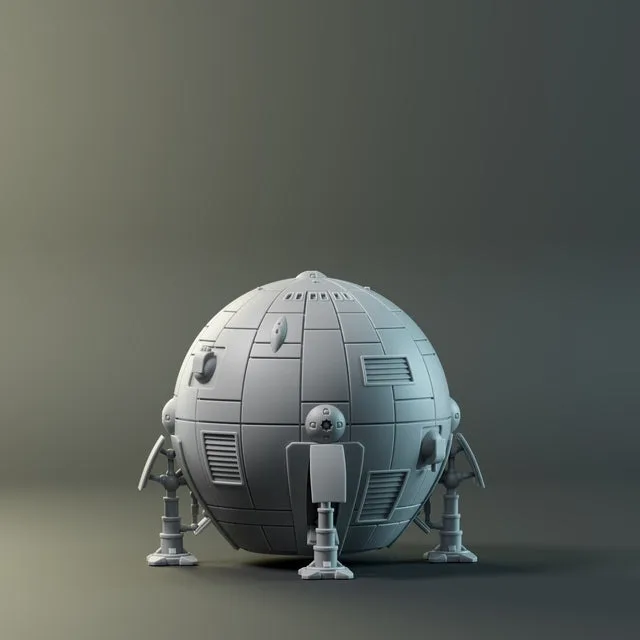
The Union-Class DropShip is a plastic model with incredible detail, measuring about 3.6 inches at its widest point. Before painting, remove any mold lines with a hobby knife or fine sandpaper. Wash the model in warm soapy water to remove release agents, then let it dry completely. You will need a primer (gray or white works best), acrylic paints in your chosen scheme, a panel liner or wash, and a clear coat for protection.
Choosing a color scheme
The Union DropShip is a common transport vessel in the Inner Sphere, so a military gray or olive drab base fits the lore. Alternatively, you can match it to a Great House or mercenary unit. The model has many panel lines and surface details, making it ideal for a two-tone or three-tone camouflage pattern. Keep in mind that the smaller scale (map scale) means you should avoid overly complex patterns that might get lost at arm's length.
Painting steps for the Union-Class DropShip
- Step 1: Clean and prime: Remove mold lines and wash the model. Once dry, apply a thin, even coat of primer. Light gray primer helps keep the base coat vibrant; white primer makes panel washes pop more. Common mistake: applying primer too thick, which fills in fine panel lines. Check that all recessed panel lines are still visible after priming.
- Step 2: Base coat: Use an airbrush or a large flat brush to apply the main color. Two thin coats are better than one thick coat. For a military look, use a neutral gray or olive drab. Let each coat dry fully. Common mistake: painting over partially dry paint, which creates streaks. If using a brush, thin your paint with a little water or medium.
- Step 3: Panel lining and wash: Apply a dark panel liner or a thinned wash to all recessed lines. Use a fine-tipped brush or a wash with good capillary action. Wipe away excess with a damp brush or cotton swab. Common mistake: letting the wash pool on flat surfaces, creating splotches. Work in small sections and clean up excess before it dries.
- Step 4: Drybrushing and highlights: Load a stiff brush with a lighter shade of your base color, wipe most of it off on a paper towel, then lightly brush over raised edges and panels. This brings out the model's surface detail. Common mistake: using too much paint, which covers the base coat rather than highlighting it. Test the drybrush on your hand first to ensure it's almost dry.
- Step 5: Weathering and final details: Add chipping with a sponge or fine brush using a dark brown or metallic paint. Apply a matte or satin varnish to seal the paint job. For extra realism, add soot marks near thruster nozzles with black pigment or airbrush. Common mistake: over-weathering, which makes the model look dirty rather than battle-worn. Less is more—you can always add more weathering later.
Product facts for this guide
- BattleTech: Union-Class Map Scale DropShip: Replacing the resin DIY model kit offered in the Clan Invasion campaign is this (plastic) UNION map-scale DropShip. Detail levels are incredible. It measures approximately 3.6" at the circumference, slightly smaller in volume than the resin kit in order to preserve scale difference with the OVERLORD class DropShip. The plastic construction makes assembly easier than resin, and the preserved scale difference means it will sit correctly next to other DropShips on the table. The high detail level rewards careful panel lining and drybrushing.