Quick answer
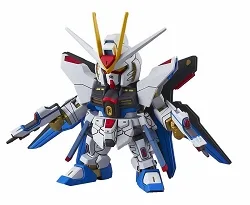
To paint SD Gundam kits, start with clean parts, use thin coats of hobby paint, and seal with a topcoat. Work in light layers rather than one heavy pass, and let each coat dry fully. This approach works on any SD kit, including the Strike Freedom Gundam EX-Standard SD.
Gather your paints and tools
For SD Gundam kits, you need hobby paints (acrylic or lacquer), primer, brushes or an airbrush, masking tape, and a topcoat. Acrylics are easier for beginners because they clean up with water and have low odor. If you plan to hand-brush, use a flat brush for large areas and a fine round brush for details. Always work in a well-ventilated space.
Prepare the parts before painting
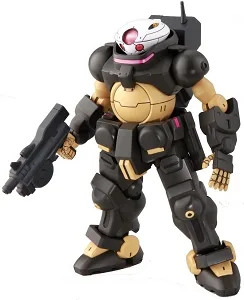
Wash the sprues with mild dish soap and warm water to remove mold release agents, then let them dry completely. Cut parts from the sprue and trim nubs with a hobby knife. For SD kits like the Grimoire Gundam HG, which has a compact design, you may want to paint parts while still on the sprue for easier handling. But painting on the sprue can leave unpainted areas where the gate connects, so touch up after assembly.
Apply primer for better adhesion
Primer helps paint stick and evens out the surface. Use a light gray or white primer in thin coats. Spray from about 15 cm away in short bursts. Let it dry for at least an hour before handling. Skipping primer often leads to paint rubbing off during assembly, especially on moving joints.
Paint in thin layers
Whether brushing or airbrushing, apply multiple thin coats instead of one thick coat. Thick paint fills panel lines and obscures detail. For hand-brushing, dip the brush halfway and wipe off excess. Let each coat dry to the touch before adding the next. Two to three thin coats usually give solid coverage. If you are painting a small figure like the Miorine Rembran Figure Rise Standard, use a fine brush and magnifier for face details.
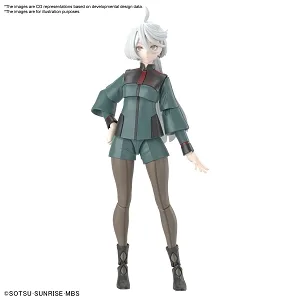
Miorine Rembran Figure Rise Standard
Mask areas for clean color separation
Use masking tape to protect areas you don't want painted. Press the tape down firmly to prevent paint bleeding underneath. For curved surfaces, cut the tape into thin strips. After painting, remove the tape slowly while the paint is still slightly tacky to avoid chipping. This is crucial for SD kits with multiple colors on small parts.
Seal with a topcoat
A topcoat protects the paint and unifies the finish. Use matte for a realistic look or gloss for a shiny appearance. Apply in thin coats, just like primer. Let it cure for 24 hours before handling. Avoid topcoating in high humidity, which can cause a frosty white haze.
Step-by-step painting process
- Wash and dry parts: Wash sprues with mild soap and warm water, then air dry completely. Skipping this step can cause paint to bead up or flake off.
- Prime the parts: Apply a thin coat of primer from 15 cm away in short bursts. Check for even coverage; missed spots lead to poor adhesion.
- Paint thin layers: Brush or spray thin coats, letting each dry before the next. Thick coats fill panel lines and look uneven.
- Mask and paint details: Use masking tape to protect areas, then paint secondary colors. Remove tape slowly while paint is tacky to avoid chipping.
- Apply topcoat: Seal with matte or gloss topcoat in thin coats. Let cure for 24 hours before posing or displaying.
SD Gundam kits to practice on
- Strike Freedom Gundam EX-Standard SD: EX-Standard SD format delivers a chibi-style silhouette with bold detailing. Its compact size and simple assembly make it ideal for learning to paint without a huge time investment.
- Grimoire Gundam HG: High Grade (HG) scale model kit of the Grimoire Gundam. Although not an SD kit, its HG scale offers more surface area for practicing painting techniques before tackling smaller SD parts.