Quick answer
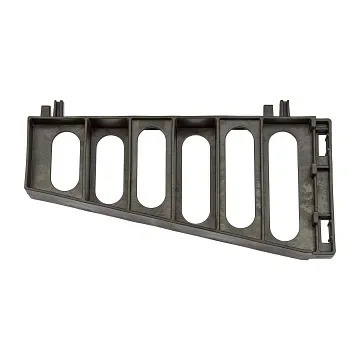
Unload the cart, remove the old brackets, confirm the new Universal Shelf Brackets seat flush on the cart uprights, and tighten fasteners evenly before reloading. The most common mistake is tightening one bracket fully before the others are aligned, which throws the shelf out of level. Work corner to corner, then load-test with a light load before returning the cart to service.
Before you start: clear the cart and gather what you need
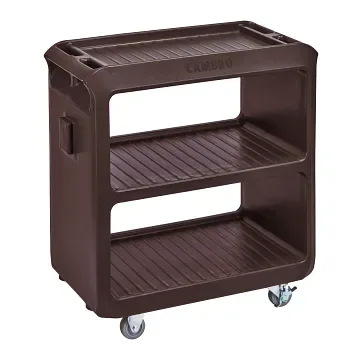
A Service Cart Pro carries bulk food, food pans, bus boxes, dish racks, catering equipment, and even maintenance supplies, so a half-loaded cart makes bracket work unsafe and inaccurate. Empty the cart completely, wipe down the uprights and shelf edges, and let the surfaces dry so you can see wear, rust, or elongation around the old mounting points.
Have the replacement Universal Shelf Brackets on hand before you remove anything, plus a compatible driver or wrench for the cart's fasteners and a level. If you are unsure which bracket position is failing, mark the current shelf height with tape on the upright so you can return the shelf to the same working height.
Remove the old brackets without damaging the uprights
Support the shelf with one hand or a helper, then loosen the fasteners on one bracket at a time. Do not remove all four brackets at once; the shelf can drop or twist and stress the remaining mounting points. Once the fasteners are out, lift the shelf clear and set it aside on a protected surface.
Inspect each upright where the old bracket sat. If the mounting holes are wallowed out or the upright is bent, a new bracket will not sit flush and the shelf will never level correctly. That is a cart-level repair, not a bracket swap, and it is worth addressing before you install anything new.
Test-fit the new brackets before tightening anything
Universal Shelf Brackets are designed to fit a variety of Cambro shelving systems, but that versatility means you should dry-fit them first. Slide each bracket onto the upright at the marked height, check that the shelf cradle sits square, and confirm the fastener holes line up without forcing. If a bracket binds, stop and check orientation rather than driving the fastener through.
Set the shelf into the brackets and check level side to side and front to back. Small adjustments now are far easier than correcting a loaded, out-of-level shelf later.
Tighten in a cross pattern and load-test the cart
Snug all fasteners first, then tighten them in a cross pattern, the same way you would torque a wheel. This keeps the shelf from pulling to one side as the last fastener seats. Do not over-tighten; the goal is a firm, rattle-free seat, not a crushed upright.
Reload the cart gradually. Start with the lightest items you normally carry, roll the cart a short distance over a threshold or uneven floor, and listen for rattles or shifting. If the shelf stays level and quiet, return the cart to full service. If it does not, re-check bracket seating before adding more weight.
Bracket replacement steps
- Unload and mark the shelf height: Empty the Service Cart Pro completely and tape the current shelf height on the upright so you can return the shelf to the same working position. Checkpoint: the cart should be empty and stable before you touch any fastener.
- Loosen one bracket at a time: Support the shelf, then remove fasteners from a single bracket before moving to the next. Never pull all four brackets at once. Common mistake: dropping the shelf onto the remaining brackets and bending an upright.
- Inspect the upright mounting points: Look for wallowed holes, rust, or bends where the old bracket sat. If the upright is damaged, the new bracket will not seat flush. Checkpoint: if the upright is deformed, stop and address the cart structure first.
- Dry-fit the Universal Shelf Brackets: Slide each bracket onto the upright at the marked height and confirm the shelf cradle sits square with the fastener holes aligned. Common mistake: forcing a bracket that is installed in the wrong orientation.
- Set the shelf and check level: Place the shelf into the brackets and check level side to side and front to back before tightening anything down. Checkpoint: adjust now, not after the fasteners are tight.
- Tighten in a cross pattern: Snug all fasteners first, then tighten corner to corner so the shelf does not pull to one side as the last fastener seats. Common mistake: over-tightening and crushing the upright or stripping the fastener.
- Load-test before returning to service: Reload with light items, roll the cart over a threshold or uneven floor, and listen for rattles or shifting. Next step: if the shelf stays level and quiet, return the cart to full service; if not, re-check bracket seating.
Product facts that matter for this repair
- Universal Shelf Brackets: Cambro Universal Shelf Brackets are designed to fit a variety of Cambro shelving systems and provide sturdy support for organizing supplies in commercial kitchens, warehouses, or other professional environments. The universal fit is what lets one bracket part serve multiple Cambro shelving setups, so you can keep a spare set on hand for cart and shelving repairs instead of sourcing cart-specific hardware.
- Service Cart Pro: The Service Cart Pro is a complete line of small, medium, or large carts built to hold and transport bulk food, food pans, bus boxes, dish racks, catering equipment, office supplies, and maintenance equipment. Because the same cart line handles both food and non-food loads, bracket wear patterns differ by use. A cart used for dish racks may wear differently than one used for office supplies, so inspect brackets on a schedule that matches your heaviest typical load.
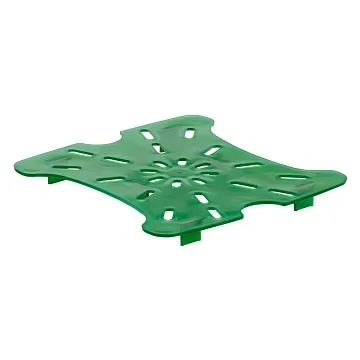
- Camsquares® FreshPro Drain Shelves – Translucent: Camsquares FreshPro Drain Shelves are designed to promote air circulation and drainage and are compatible with the Camsquares system. If your cart is used to move or stage food, drain shelves are a separate accessory decision from bracket repair. Do not assume a drain shelf will fix a wobbly shelf; fix the bracket first, then consider drainage accessories.