Quick answer
Assemble the crossbar sections, attach air-cushioned stands, raise the frame to desired height, then drape and secure your backdrop for a wrinkle-free setup.
Why a Proper Setup Matters
A correctly assembled backdrop stand prevents sagging, uneven lighting, and accidental collapse during a shoot. Taking a few extra minutes to level the stands and tension the backdrop saves time editing later.
Step-by-step backdrop stand setup
- 1. Lay out the crossbar sections: On a clean floor, connect the 4 crossbar sections by inserting each male end into the next female end until you hear a click. Ensure all locking collars are hand-tightened. A loose connection can cause the crossbar to separate under the weight of a heavy backdrop.
- 2. Attach the stands to the crossbar: Open each stand’s legs fully and lock the spreaders. Slide the crossbar’s end brackets onto the top stud of each stand, then secure with the thumbscrews. Always tighten thumbscrews by hand—over-tightening with tools can strip the threads.
- 3. Raise the stands to working height: With one person on each stand, loosen the air-cushioned locking knobs and lift the upper sections simultaneously. Lock each section at the same height to keep the crossbar level. Raising one side faster than the other can tilt the crossbar and risk the backdrop sliding off.
- 4. Drape the backdrop: Unfold the backdrop and drape it evenly over the crossbar. Adjust so the fabric hangs straight and the bottom edge is parallel to the floor. For wrinkle-prone backdrops, steam or iron before draping for a cleaner look.
- 5. Secure the backdrop with clamps: Attach backdrop clamps or spring clamps every 2–3 feet along the crossbar, gripping both the backdrop and the bar. This prevents sagging and keeps the fabric taut. Clamping only at the ends causes the center to sag; distribute clamps evenly.
- 6. Final adjustments and safety check: Verify all knobs are tight, legs are stable on the floor, and the backdrop hangs without folds. If shooting on a slippery surface, add sandbags to the stand legs. A weighted base is essential for outdoor or high-traffic studio setups to prevent tipping.
Product facts
-
Promaster 12' x 12' Heavy Duty Background Kit: The ProMaster Heavy Duty Background Support Kit extends up to 12’ high and supports backdrops as wide as 12’, with air-cushioned stands and a 4-section crossbar that snaps together. Air-cushioned stands add safety by preventing sudden drops, and the modular crossbar lets you configure the width to match your backdrop size exactly.
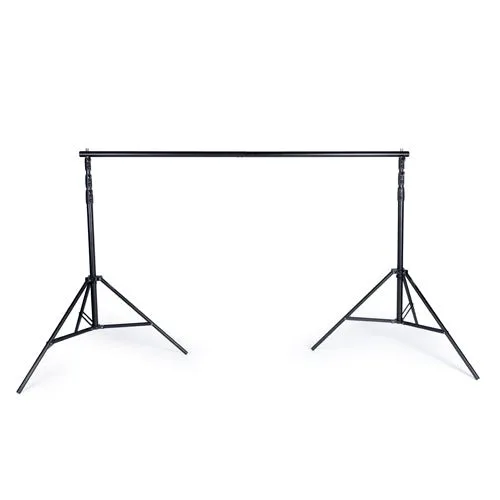
Promaster 12' x 12' Heavy Duty Background Kit