Quick Answer
Attach the finder base to your telescope's focuser housing using two 8-32 screws, but always verify screw length first to avoid damaging the anodized surface.
Why Screw Length Matters
The most common mistake during finder base installation is using screws that are too long. Overly long screws can press into the focuser housing and permanently scratch or dent the anodized coating. This not only looks bad but can lead to corrosion or reduced light baffling. Always test-fit the screws before tightening.
Choosing the Right Finder Base
Not all finder bases are universal. Some are designed for specific focuser brands or tube diameters. The Cloud Break Optics Finder Base uses standard 8-32 threads and a compact footprint, making it compatible with most refractors and Schmidt-Cassegrain telescopes. If your focuser has an unusual hole pattern, measure the spacing before ordering.
Step-by-Step Finder Base Installation
- 1. Gather Tools and Inspect Screws: You will need a Phillips or flathead screwdriver and the two 8-32 screws that came with your finder base. Hold each screw next to the threaded hole on the focuser housing; the screw should protrude no more than 5–6 mm beyond the hole's inner edge. If it is longer, obtain shorter screws before proceeding. A screw that is too long will scrape the anodized surface inside the focuser. Always test length first.
- 2. Align the Finder Base: Place the finder base on the focuser housing so its two holes line up with the threaded holes. Orient the base so the finder scope will sit parallel to the main optical tube. For a straight-through finder, the base's dovetail slot should face upward or to the side depending on your preference. If your finder has a right-angle eyepiece, rotate the base so the eyepiece is comfortable to use.
- 3. Hand-Tighten the Screws: Insert both screws and turn them by hand until they are snug. Do not use the screwdriver yet. This step ensures the base is seated flat and the screws are not cross-threaded. If a screw does not turn smoothly, remove it and realign the base. Cross-threading can strip the focuser's threads. Hand-tighten first to feel for resistance.
- 4. Tighten Evenly with a Screwdriver: Alternate between the two screws, turning each a quarter-turn at a time, until both are firmly seated. Stop as soon as you feel solid resistance—overtightening can strip threads or crack the base. The base should not wiggle, but you should still be able to rotate the finder scope in its ring with moderate effort. Overtightening is a common mistake. Firm but not maximum force is the goal.
- 5. Attach and Align the Finder Scope: Slide the finder scope's mounting ring onto the base's dovetail and lock it with the thumbscrew. Point the telescope at a distant daytime target (e.g., a telephone pole or chimney). Look through the finder and adjust its ring screws until the crosshairs center on the same target. Tighten the ring screws gently. For final alignment, use a bright star at night and center it in both the main eyepiece and the finder. Recheck after a few minutes to confirm the base did not shift.
Product Details
-
Finder Base: The Finder base uses two 8-32 screws to attach to the focuser. When attaching the finder base to the focuser housing, check that the screws are the proper length. Failure to do so may result in damage to the anodized surface of the focuser housing. Using the correct screw length prevents permanent cosmetic and functional damage to your telescope's focuser.
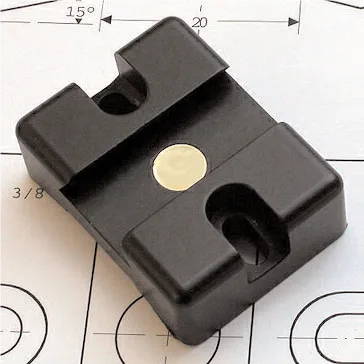
Finder Base