Quick Answer
To set up a patio cooler for outdoor entertaining, choose a level, shaded spot near your serving area, pre-chill the cooler, stock it with ice and drinks in the right order, and maintain ice levels throughout the event.
Why Placement and Pre-Chilling Matter
Where you place your patio cooler affects how long it keeps drinks cold. Direct sunlight can raise the internal temperature by several degrees, causing ice to melt faster and forcing you to restock more often. A shaded, level area also prevents the cooler from tipping or sliding, which is especially important when it's loaded with ice and beverages.
Pre-chilling the cooler before adding drinks and ice is a simple step that many hosts skip. A warm cooler will melt the first batch of ice quickly, diluting your drinks. By cooling the interior beforehand, you give your ice a head start and keep beverages colder for longer.
Choosing the Right Cooler for Your Patio
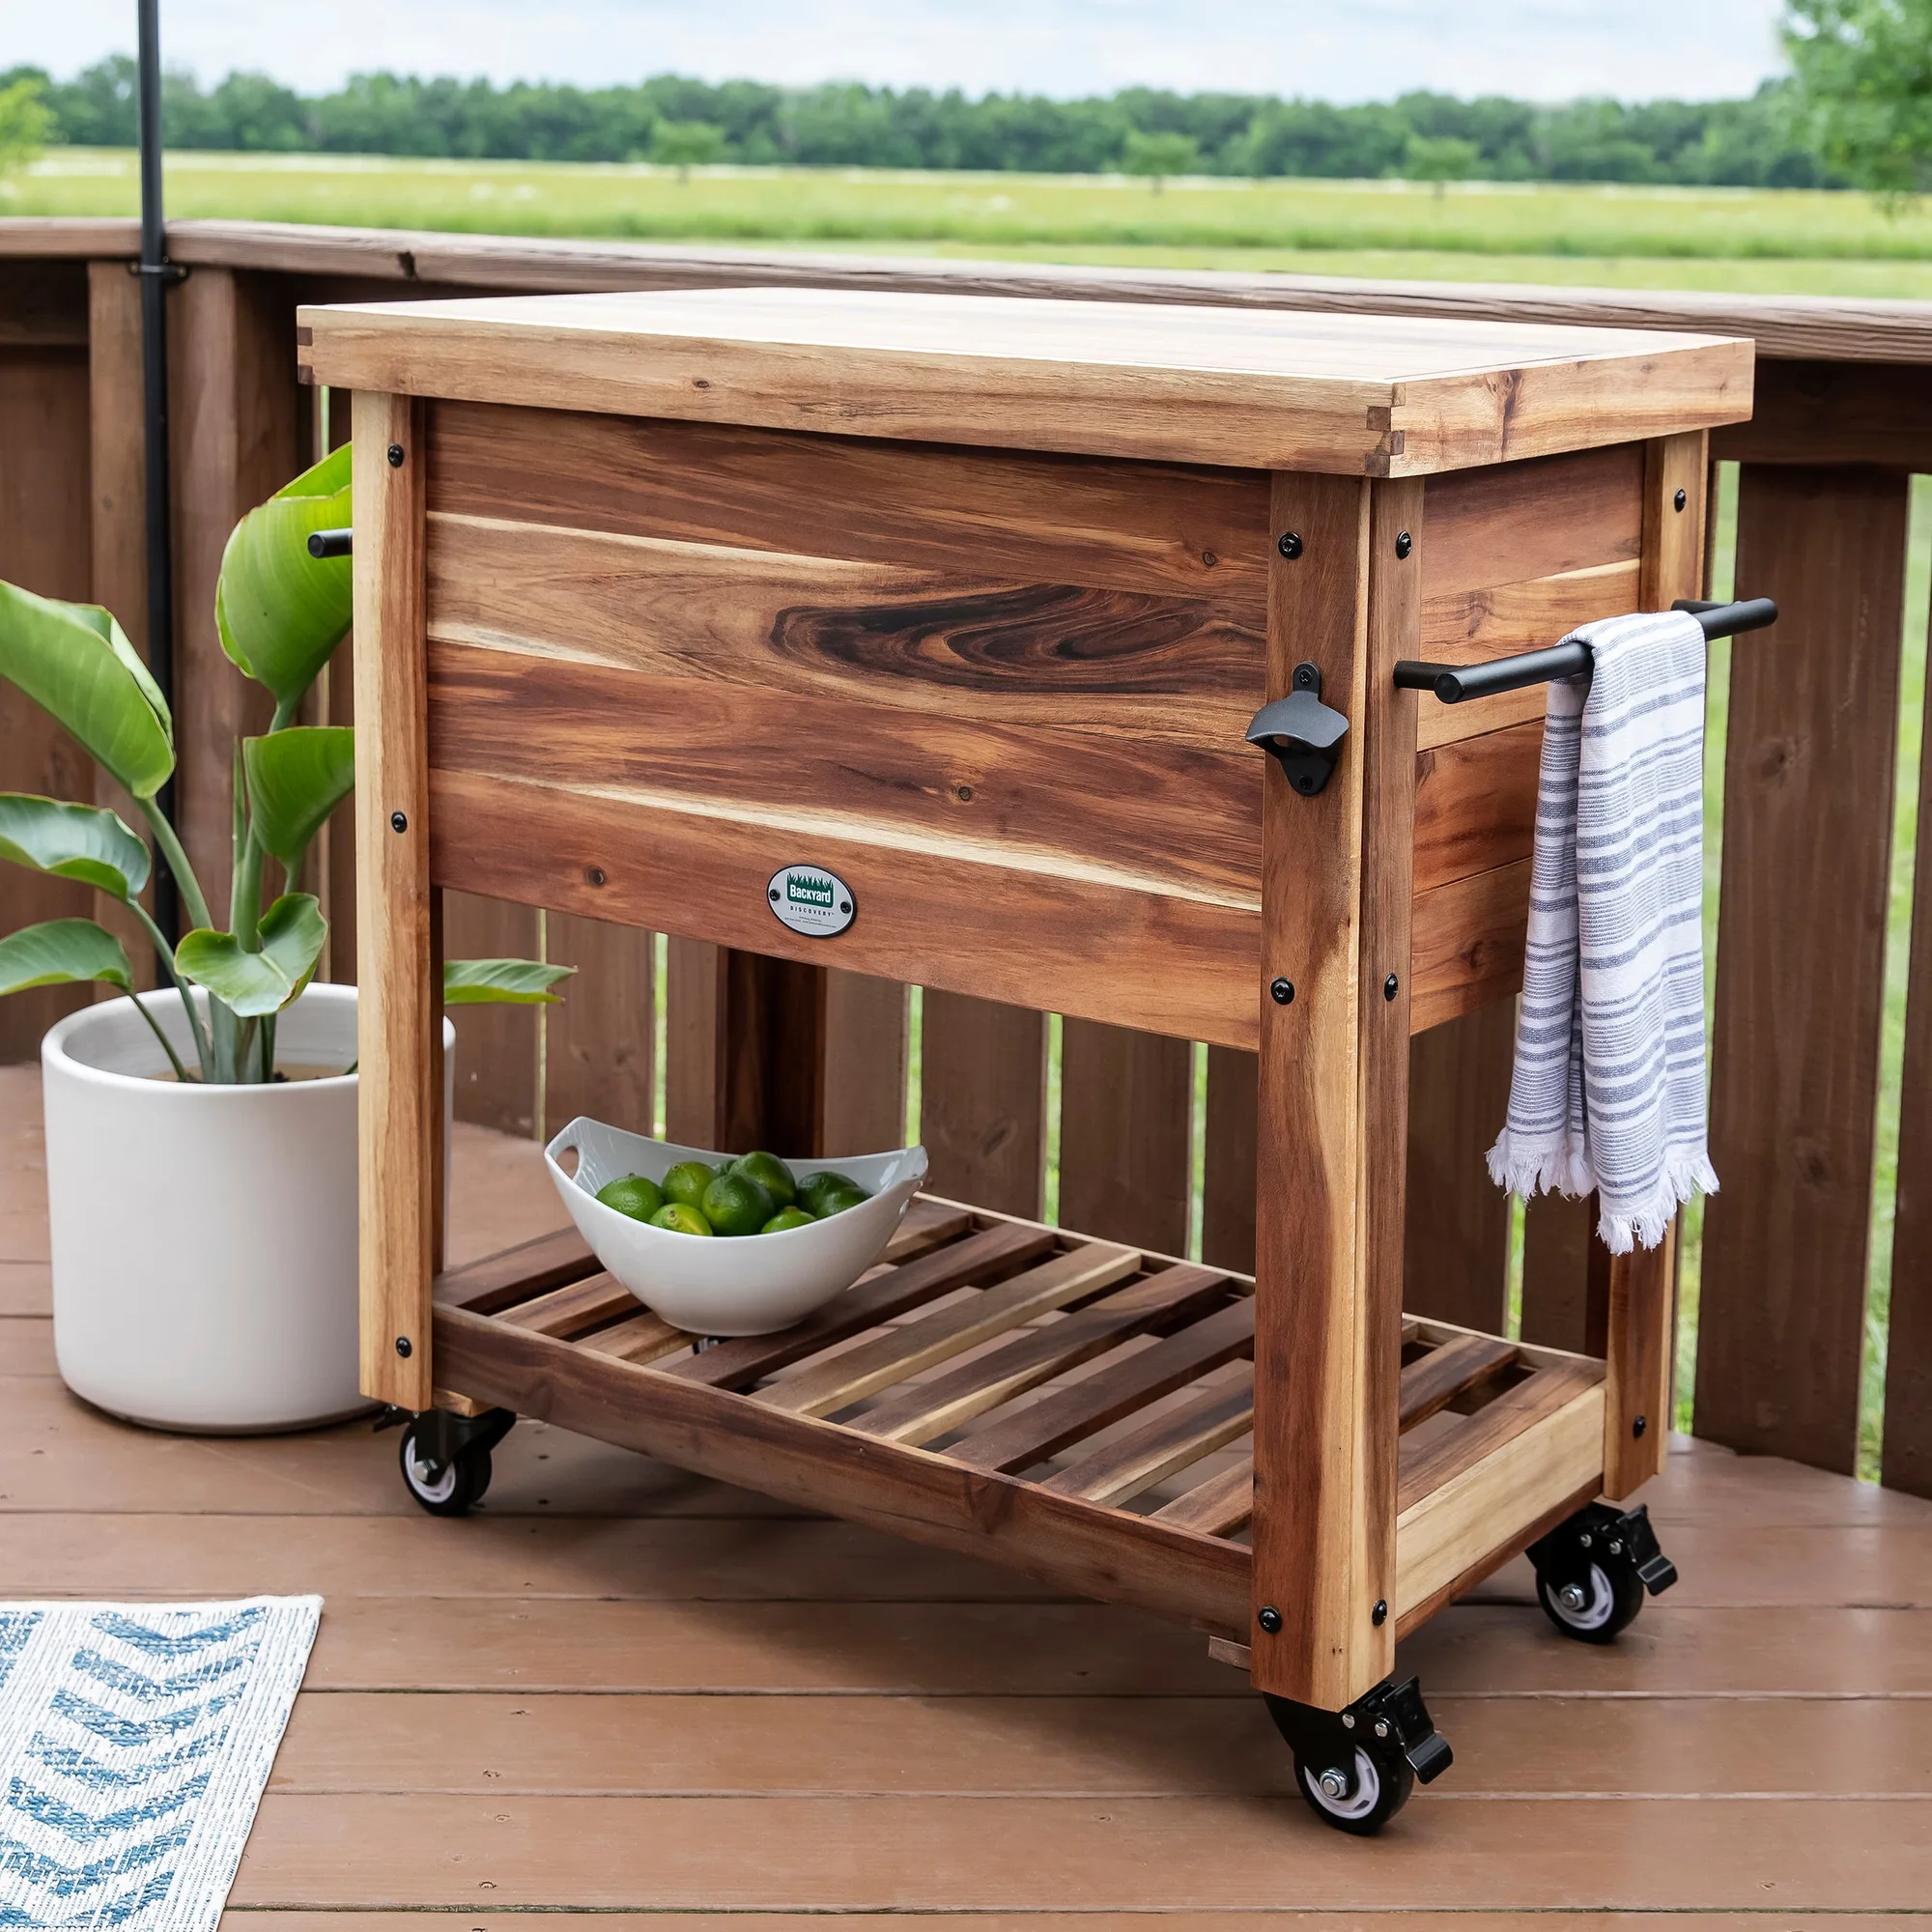
For larger gatherings, a high-capacity cooler with wheels makes setup and movement easier. Look for models with sturdy casters that lock, so the cooler stays put when guests are reaching in. A solid tabletop on top of the cooler also gives you a convenient surface for setting down cups or prepping garnishes, which keeps the serving area tidy.
If you're planning to keep the cooler outdoors for the season, consider materials that can handle sun and rain. Acacia wood is naturally water-resistant, making it a good choice for patios that see a mix of weather. Just remember that no wood is completely waterproof, so covering the cooler or storing it in a dry spot during heavy storms extends its life.
Step-by-Step Patio Cooler Setup
- Choose the right spot: Place the cooler on a level surface in a shaded area, close to where you'll be serving. Avoid direct sun to reduce ice melt. Lock the casters (if available) to prevent movement. Check that the spot stays shaded during peak party hours; if not, have a plan to move the cooler or add shade.
- Pre-chill the cooler: Add a bag of ice or a few frozen gel packs to the empty cooler 30 minutes before the event. Close the lid and let the interior cool down. Dump any melted water before adding drinks. Don't skip this step—it can extend ice life by up to 50%.
- Layer ice and drinks: Start with a layer of ice at the bottom, then add drinks. Alternate layers of ice and drinks, ending with ice on top. This ensures even cooling and keeps drinks submerged. Avoid filling the cooler to the brim; leave some space for extra ice or hands reaching in.
- Manage ice and drainage: Keep the drain plug closed during the event to retain cold water, which helps keep drinks cold. If you need to add ice, do so before the old ice is completely melted. Open the drain only to remove excess water when needed. Monitor ice levels every hour; have backup ice bags ready in a separate cooler.
- Maintain and clean after the event: After the party, empty any remaining ice and water. Wipe down the interior and exterior with a mild soap solution. For wood coolers, dry thoroughly to prevent moisture damage. Store with the lid slightly open to allow air circulation. Regular cleaning prevents odors and extends the life of your cooler.
Recommended Patio Cooler
-
100 Quart Patio Cooler - Acacia: This 100-quart cooler cart is built from naturally water-resistant acacia wood and features a solid block tabletop, premium locking casters, and all-weather durability. The locking casters let you roll it into the shade and keep it stable, while the tabletop doubles as a prep surface, so you don't need a separate serving cart.
100 Quart Patio Cooler - Acacia