Quick Answer
To sew a bag from a pattern, start by reading the instructions fully, then cut fabric accurately, mark all details, and sew in the order given—skipping ahead is the most common beginner mistake.
Why following the order matters
Bag patterns are engineered so that earlier steps create the foundation for later ones. For example, the Campfire Messenger Bag Pattern includes an optional top zipper closure that must be installed before the lining is attached. If you sew the lining first, you cannot add the zipper without unpicking work.
Skipping ahead or rearranging steps often leads to misaligned pockets or inaccessible seams. Trust the sequence even if a step seems counterintuitive.
Choosing the right fabric and tools
Most bag patterns recommend quilting-weight cotton for the exterior and a sturdy lining. The Campfire Messenger Bag Pattern is designed for cotton, so a medium-weight woven works best. Avoid stretchy or very heavy fabrics unless the pattern explicitly allows them.
You will need a walking foot for thick layers, sharp scissors or a rotary cutter, and a seam gauge to measure seam allowances precisely. A magnetic snap or zipper foot may be required depending on the closure you choose.
Step-by-Step: Sewing Your First Bag from a Pattern
- Read the entire pattern first: Study the instructions, layout diagrams, and glossary of terms before cutting anything. Note the seam allowance (usually 1/4 or 1/2 inch) and which pieces need interfacing. Common mistake: cutting fabric before understanding the order leads to wasted material.
- Prepare and cut your fabric accurately: Wash, dry, and press your fabric. Use pattern weights or pins to hold the pattern pieces in place on the grainline. Cut with a rotary cutter for straight edges or sharp shears for curves. Checkpoint: transfer all notches, dots, and grainlines onto the wrong side of the fabric using a fabric marker or chalk.
- Interface and stabilize key pieces: Fuse interfacing to the bag exterior, flap, and strap pieces. This gives structure and prevents stretching. For the Campfire Messenger Bag Pattern, the flap benefits from interfacing to hold its shape when showing a favorite print. Common mistake: skipping interfacing on the strap causes it to stretch out of shape over time.
- Sew pockets and details in the order given: Start with interior pockets (zippered, slip, pleated) before joining the lining to the exterior. Install any zippers or magnetic snaps at the step specified—do not delay them. Checkpoint: press each seam after sewing for crisp edges and easier assembly later.
- Assemble the bag body and lining separately: Sew the exterior pieces together (sides, bottom, gussets) and the lining pieces the same way. Leave an opening in the lining for turning. Do not attach the lining to the exterior until instructed. Common mistake: attaching lining too early makes it impossible to install strap connectors or top zippers.
- Join exterior and lining, then finish: With right sides together, sew the lining to the exterior around the top edge. Turn through the opening, press the top edge, and topstitch if desired. Attach the strap and any final closures. Checkpoint: after turning, use a point turner to push out corners and seams fully before pressing.
Product Spotlight
-
Campfire Messenger Bag Pattern: The Campfire Messenger Bag Pattern includes an adjustable strap, zippered, pleated, and slip pockets, plus an optional top zipper closure. These features let you practice different bag-making skills in one project, from installing zippers to creating pleats, making it a great learning tool for beginners.
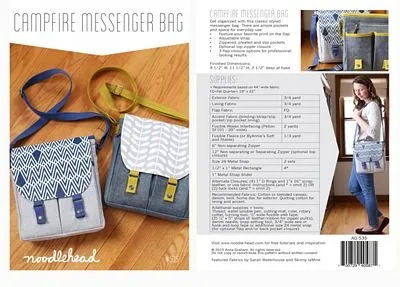
Campfire Messenger Bag Pattern