Quick answer
Inspect your drivetrain after every few runs, not just when something breaks. Work front to rear: check for play at the transmission outputs, listen for a changed whine or click, and pull the axle covers to look for polished or chipped gear teeth. If you find movement, noise, or metal paste, replace the worn part before the next run.
Most drivetrain failures on a crawler do not happen without warning. They start as a small amount of play, a slightly different sound, or a thin film of metal paste that is easy to miss if you only look at the truck when it stops moving.
A short, repeatable inspection routine catches those early clues. The goal is not to rebuild the truck every weekend. It is to know which parts are wearing, how fast, and when a cheap replacement now is better than a broken trail day later.
Step 1: Check for play at the transmission outputs
With the truck off, hold the chassis and rock each wheel by hand. Watch the transmission outputs where the driveshafts connect. A small amount of rotational play is normal, but if the output moves side to side or the driveshaft yoke rocks on the shaft, the output or its bearing is worn.
Do this check with the suspension at ride height, not fully drooped. Droop can hide play because the driveshaft angle changes. If you feel a distinct clunk that was not there before, note which side it comes from and inspect that output first.
- Common mistake: judging play with the truck powered on. Motor cogging and gear lash make it impossible to feel true wear.
- Checkpoint: any side-to-side movement at the output is a replacement signal, not a maintenance item.
Step 2: Listen for changed drivetrain noise
Run the truck slowly on a bench or stand and listen. A healthy drivetrain has a steady, predictable sound. A new whine, a rhythmic click, or a grinding note that changes with speed points to a specific area: pinion mesh, portal gears, or a dry bearing.
Noise alone does not confirm a failure, but it tells you where to look. Combine it with the play check from step 1. If a noisy area also has movement, you have found the worn part.
- Common mistake: chasing noise by tightening everything. Over-tightened gear mesh creates its own whine and wears parts faster.
- Checkpoint: note the speed and direction that produce the noise so you can reproduce it after any repair.
Step 3: Open the axles and read the gear teeth
Pull the diff cover or portal cover and look at the gear teeth. Early gear set wear signs include a polished, mirror-like contact patch, a sharp lip on the tooth edge, and gray paste in the grease. Chipped or pitted teeth mean the gear is done.
Wipe the old grease onto a white paper towel. Fine gray tint is normal break-in material. Gritty particles or visible flakes mean a gear or bearing is shedding metal and should be replaced before it damages the ring and pinion.
- Common mistake: reusing contaminated grease after inspection. Clean the housing and repack with fresh grease.
- Checkpoint: if one gear in a set is chipped, replace the set, not just the damaged gear.
Step 4: Measure axle shaft and cross pin wear
On portal and straight axles, remove the wheel and check the axle shaft where it enters the housing. Look for a worn step on the shaft, a loose pin retainer, or play where the cross pin sits. These are common wear points on high-torque crawlers.
If the shaft wobbles in the housing or the cross pin slides freely with visible flats, the shaft is worn. Replacing a shaft early is far cheaper than replacing a housing or ring and pinion after a failure.
- Common mistake: ignoring a slightly bent shaft because it still drives. It will wear the bearing and seal.
- Checkpoint: compare left and right shaft play. A difference between sides is a strong wear indicator.
Step 5: Inspect small hardware and fasteners
Worn drivetrain parts are not only gears and shafts. Loose or stretched fasteners let parts move, which accelerates wear everywhere else. Check servo mounts, motor plate screws, and any washer-head hardware for stripped heads or crushed washers.
A fastener that will not hold torque is a wear item. Replace it rather than adding thread lock and hoping. Small hardware is inexpensive and prevents the movement that destroys expensive parts.
- Common mistake: reusing a screw with a rounded head because it still threads in. It will not hold proper torque.
- Checkpoint: if a fastener backs out twice, replace it and check the threaded hole.
Step 6: Log what you find and set a replacement interval
Write down the date, the part, and the wear you found. After a few inspections you will know which parts wear fastest on your truck and how many runs you get from them. That turns guesswork into a schedule.
Replace wear items on your schedule, not on the trail. Keeping one spare set of the parts that wear most on your rig means a worn part is a ten-minute fix at home instead of a tow back to the truck.
- Common mistake: replacing parts without noting why they failed. The same cause will wear the new part.
- Checkpoint: if the same part fails twice, look for a bent housing, bad bearing, or incorrect mesh.
Your six-step drivetrain inspection routine
- Rock the wheels and feel for output play: With the truck off and at ride height, rock each wheel and watch the transmission outputs for side-to-side movement or a new clunk. Any side-to-side output movement means replace the output or bearing before the next run.
- Listen for new whine or rhythmic clicks: Run the truck slowly and note the speed and direction that produce any new noise. Noise tells you where to look, not what to replace. Confirm with a play check.
- Open the axles and read the gear teeth: Look for polished contact patches, sharp tooth edges, chips, and gritty metal paste in the grease. Chipped or pitted teeth mean replace the gear set, not just one gear.
- Check axle shaft and cross pin wear: Remove the wheel and look for a worn step on the shaft, a loose pin retainer, or free play at the cross pin. Compare left and right. A difference between sides confirms wear.
- Inspect fasteners and small hardware: Check servo mounts, motor plate screws, and washer-head hardware for stripped heads or crushed washers. A fastener that will not hold torque is a wear item. Replace it.
- Log the finding and set a replacement interval: Record the date, part, and wear type so you learn how many runs each part gives you. If the same part fails twice, find the root cause before replacing it again.
Parts that solve common wear findings
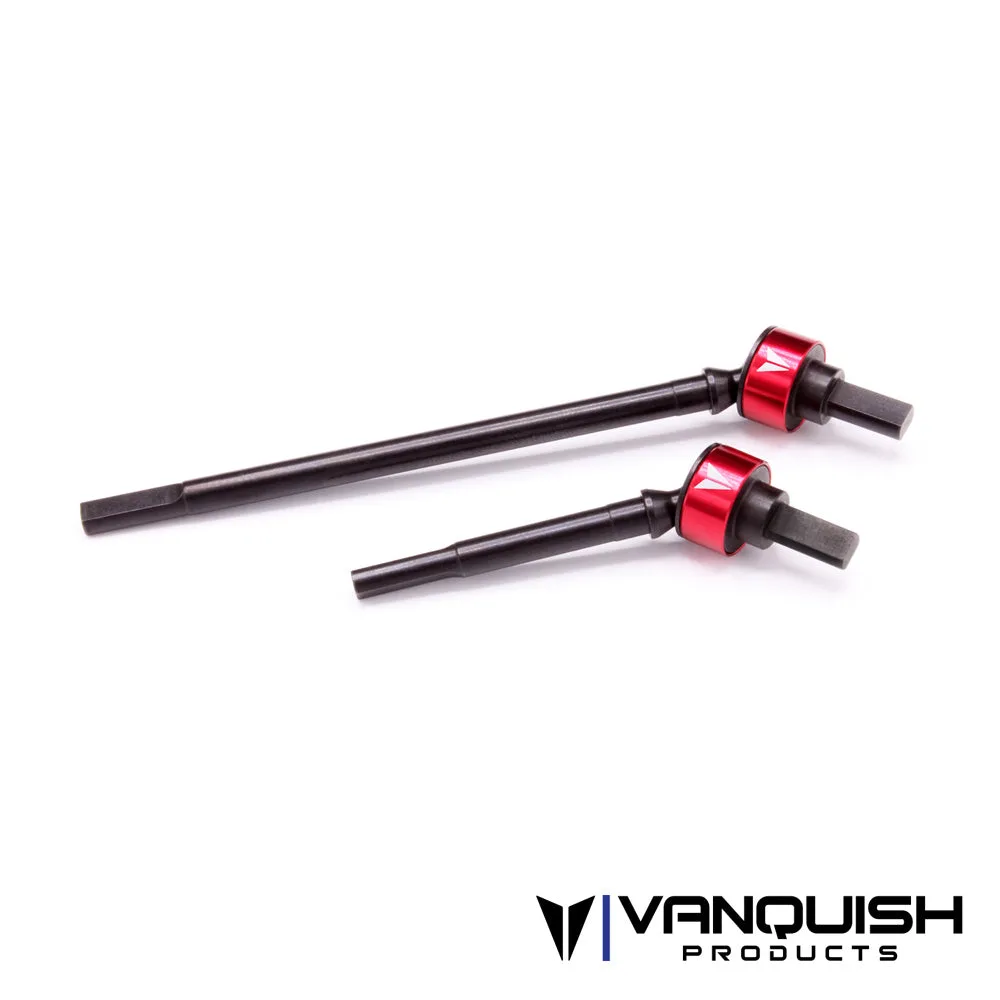
- Offset Currie F9 Portal VVD Set: Replacement axle shafts for the VS4-10 Ultra offset front Currie F9 axle, machined from chromoly steel with ultra high strength cross pins and an anodized, laser engraved aluminum pin retainer ring. If step 4 shows a worn step or loose cross pin on your front Currie F9 axle, this set restores the shaft and pin interface instead of risking a housing or gear failure.
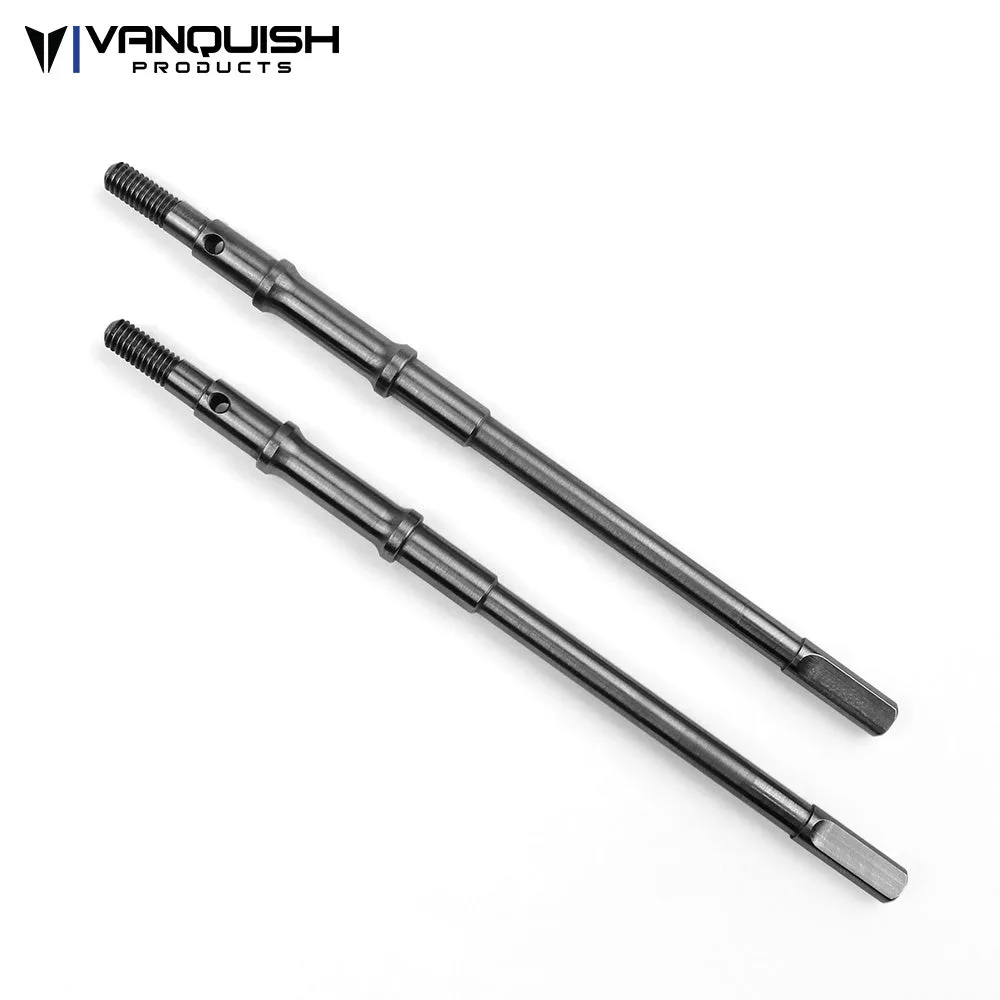
- Rear Axle Shafts for VS4-10: Chromoly rear axle shafts, two per package, compatible with F10, F10T, Currie D44, Currie HD44, Currie F9, SCX10ii Rock Jock, and Axial SCX10ii AR44 stock plastic axles. A matched pair lets you replace both rear shafts at once when inspection shows uneven wear or a bent shaft on one side.
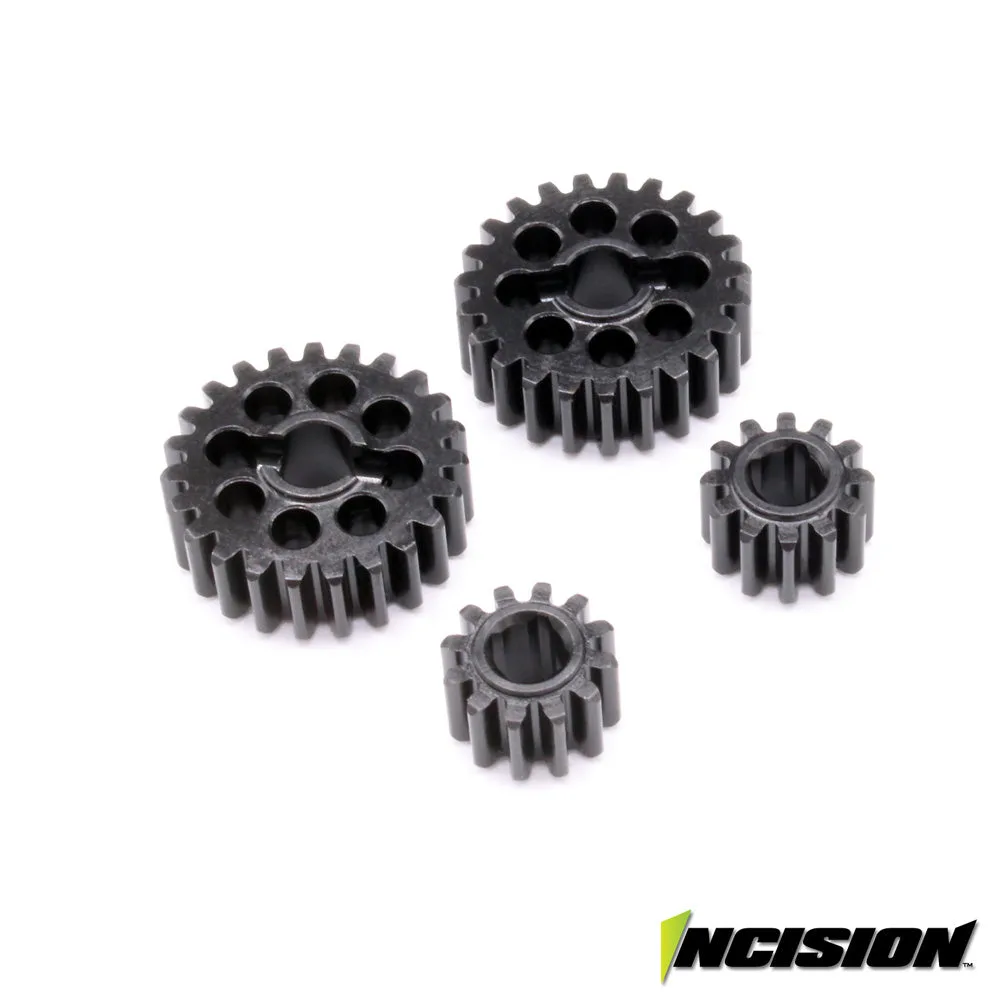
- Axial Portal Standard Gear Set (12/23): Standard ratio portal gear set for SCX10-III and Axial Capra axles with a 1.92:1 ratio, compared to the 1.33:1 ratio of overdrive gears. It does not fit Vanquish VS4-10 Ultra or Vanquish SCX10-II axles. If step 3 finds chipped portal teeth on a compatible Axial axle, this set restores the standard ratio. Check your axle model first, because it will not fit VS4-10 Ultra or SCX10-II axles.
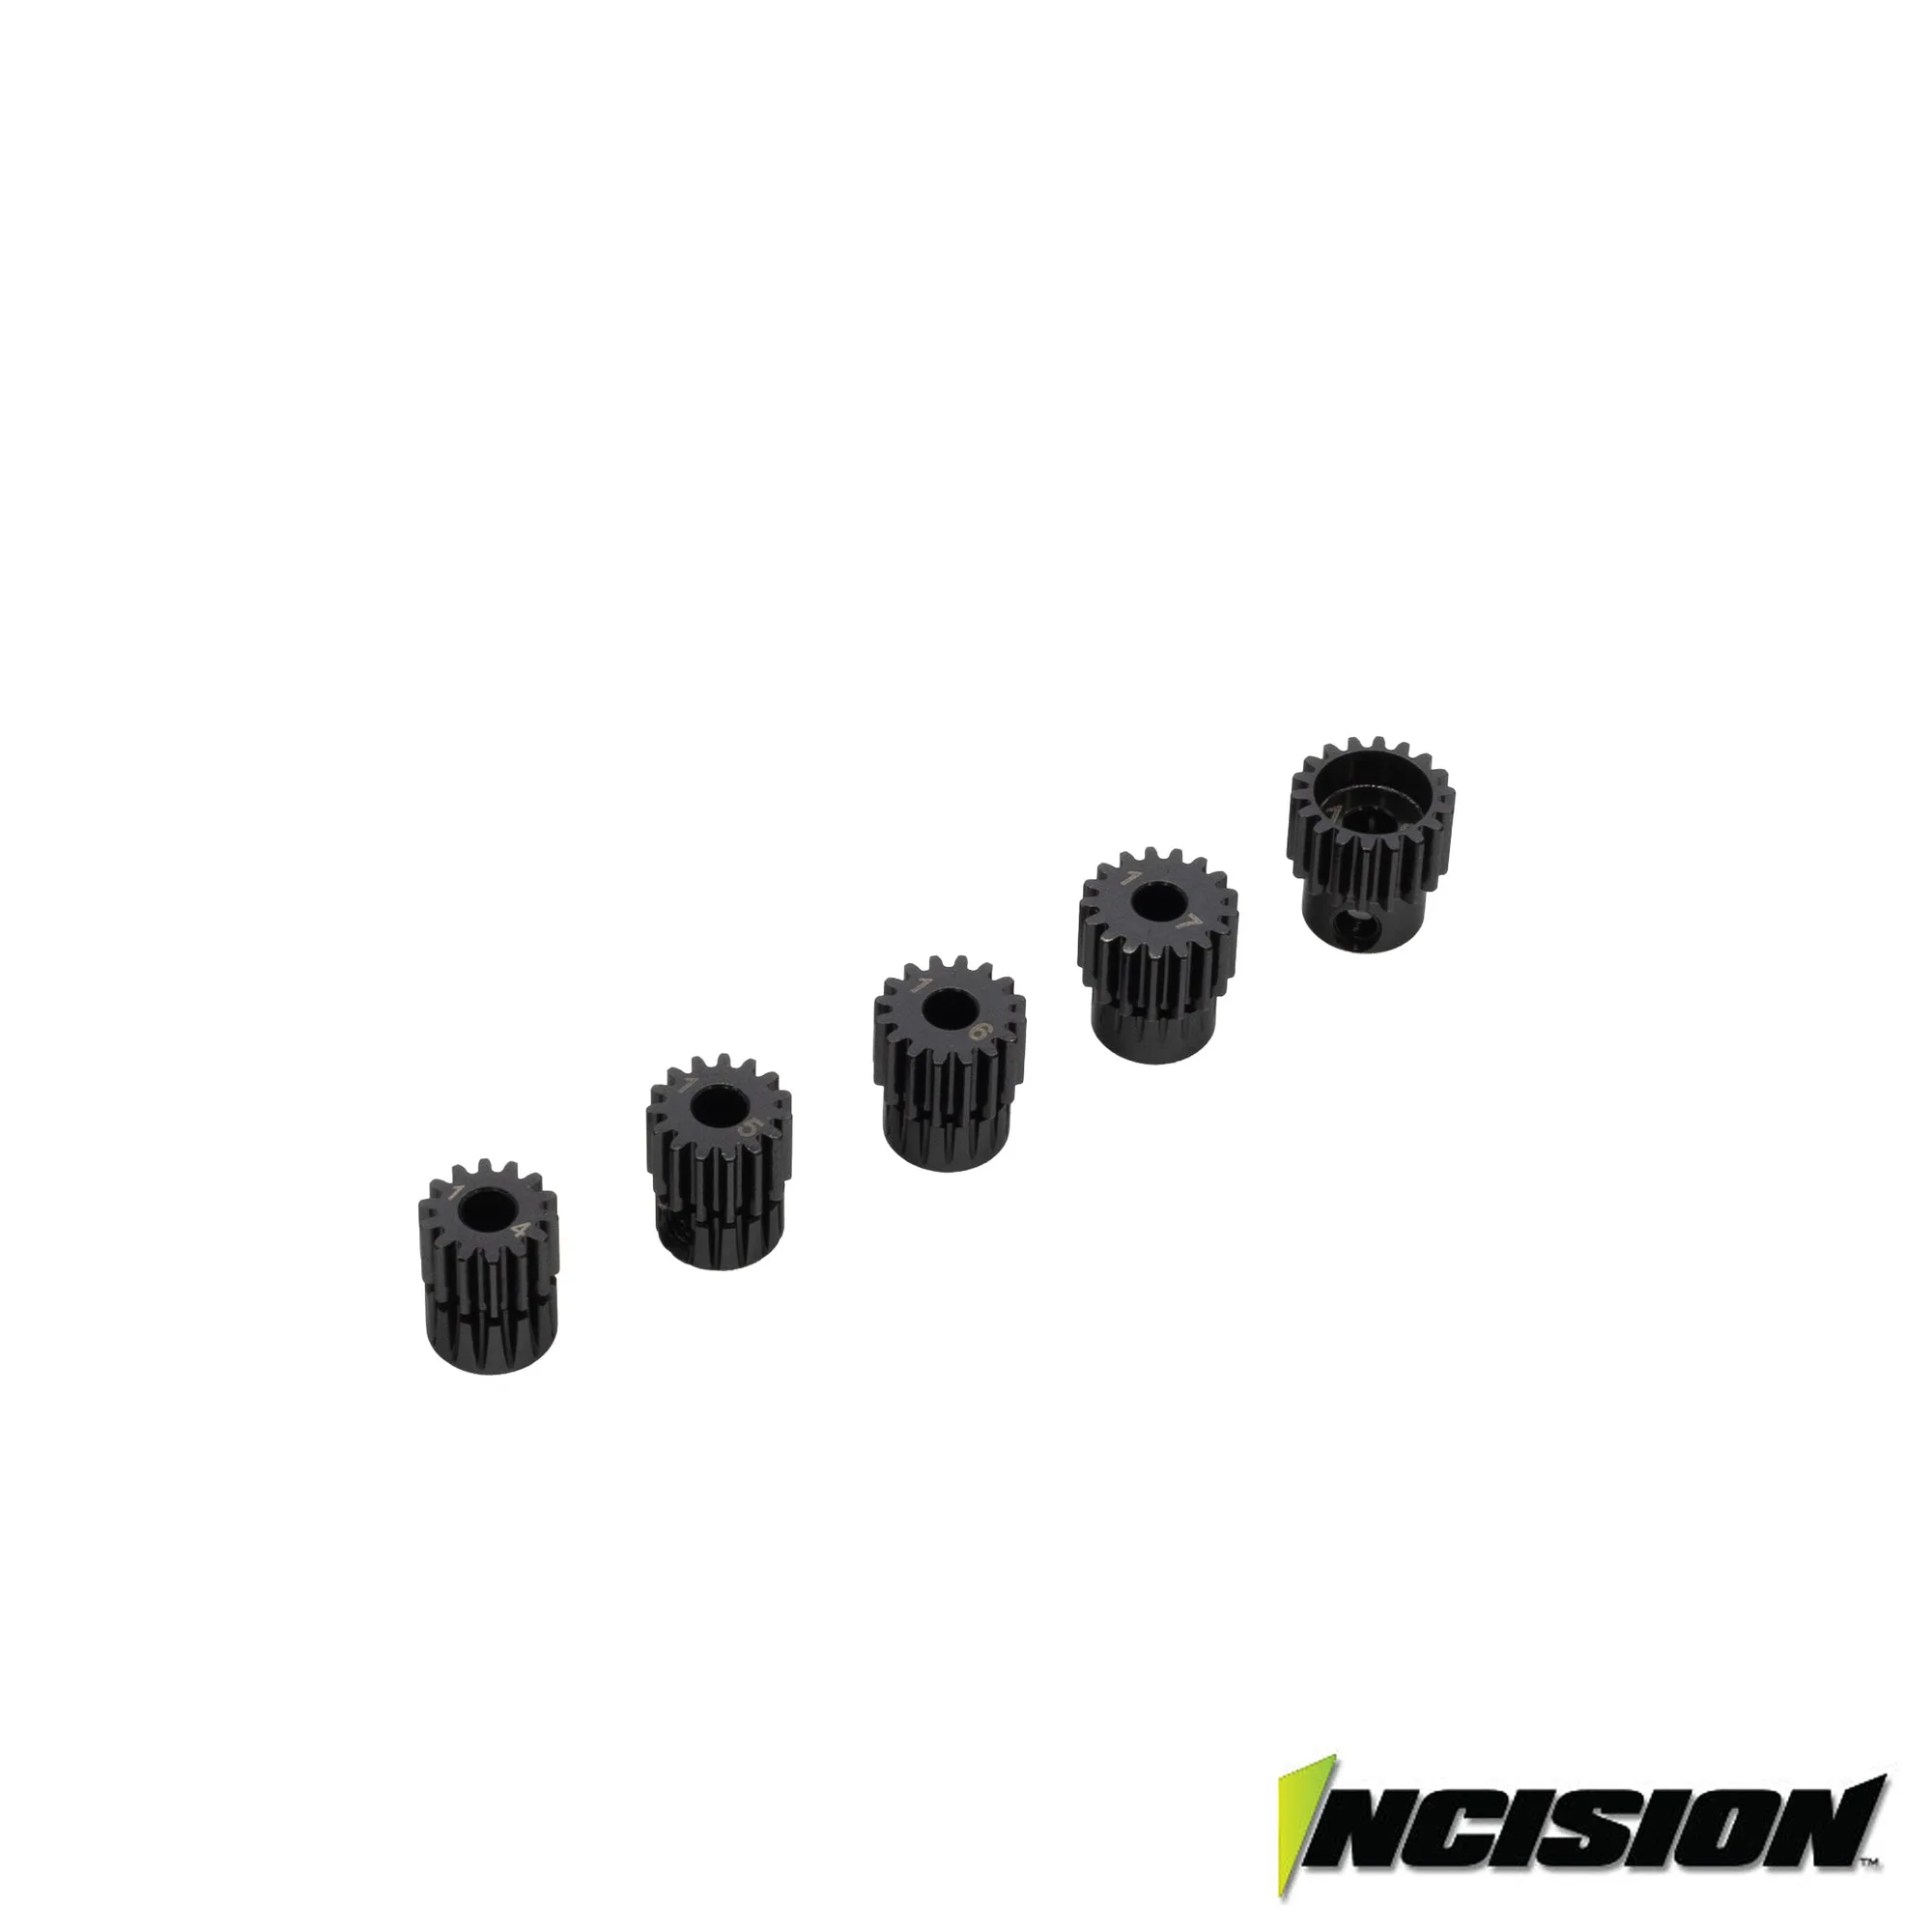
- 48p Hardened Steel Pinion Gear: Machined hardened steel pinion gear for 48-pitch setups with a 1/8 inch bore, available in 14T, 15T, 16T, 17T, and 18T, and includes the pinion gear and M3 set screw. When inspection shows a polished or chipped pinion, replacing it with the correct tooth count restores proper mesh and avoids wearing the matching gear.
A ten-minute inspection after a few runs is the cheapest insurance you can buy for a crawler. Catch worn drivetrain parts while they are still just play, noise, or a polished tooth, and you replace a small part at home instead of a whole axle on the trail.