Quick answer
To stitch the 1-LOVE Tennis Tote canvas, start by familiarizing yourself with the included stitch pamphlet and project card, then work the hand-painted design using the recommended silk and wool threads on the 18-mesh canvas.
Understanding the 1-LOVE Tennis Tote Canvas
The 1-LOVE Tennis Tote is a hand-painted, stitch-painted needlepoint canvas on 18 mesh. The design measures 3.5 x 3.5 inches, making it a manageable project for both beginners and experienced stitchers. The canvas comes with a stitch pamphlet, a WIP (Work In Progress) project card, and a reusable PVC protective baggy to keep your project safe.
Because the canvas is hand-painted, each one may have slight variations in color or detail. This adds a unique touch but also means you should check the stitch pamphlet for the exact thread colors and stitches recommended for each area.
Step-by-step stitching guide
- Step 1: Gather your materials: Unpack your 1-LOVE Tennis Tote kit. You should have the hand-painted canvas, a stitch pamphlet, a WIP project card, a reusable PVC baggy, and if you ordered the thread kit, the silk and wool fibers, a thread ring, a tapestry needle, and a stitch brochure. Check that everything is present before you start. Missing a component? Contact support before beginning to avoid delays.
- Step 2: Read the stitch pamphlet: Open the stitch pamphlet and review the recommended stitches for each section of the design. The pamphlet includes one of seven stitch guides that come with the canvas. Note any special instructions for the tennis racket, ball, or background areas. Common mistake: Skipping the pamphlet leads to inconsistent stitch direction or thread tension.
- Step 3: Prepare your threads: If using the thread kit, separate the silk and wool fibers onto the thread ring. For 18 mesh, you'll typically use 1-2 strands of wool or silk, depending on the stitch. Refer to the stitch brochure for strand counts. Cut lengths about 18 inches to avoid tangling. Using too many strands can distort the canvas. Test a small area first.
- Step 4: Thread your needle and start stitching: Thread your tapestry needle with the chosen fiber. Begin stitching from the center of the canvas or as indicated on the stitch pamphlet. Use a tent stitch or basketweave for the background to maintain even tension. Work in good light to see the painted lines clearly. Checkpoint: After the first few stitches, flip the canvas to ensure the back is neat and threads aren't pulling too tight.
- Step 5: Manage your project on the go: Use the reusable PVC protective baggy to store your canvas and threads when you're not stitching. The WIP project card helps you track which stitches you've completed. This is especially useful if you work on the tote in multiple sessions. Storing the canvas loosely in the bag prevents creases and keeps threads clean.
- Step 6: Finish and block your canvas: Once all stitches are complete, remove the canvas from the bag and gently block it to even out any tension. Lay it face down on a padded surface, mist with water, and pin the edges to the correct dimensions. Let it dry completely before mounting on the tote. Don't skip blocking—it ensures the design sits flat and the tote retains its shape.
Product facts
-
1-LOVE Tennis Tote: The 1-LOVE Tennis Tote is a hand-painted, stitch-painted needlepoint canvas on 18 mesh, measuring 3.5 x 3.5 inches. The 18-mesh canvas means you'll use finer thread and smaller stitches, resulting in a detailed, durable design that fits perfectly on a tote bag.
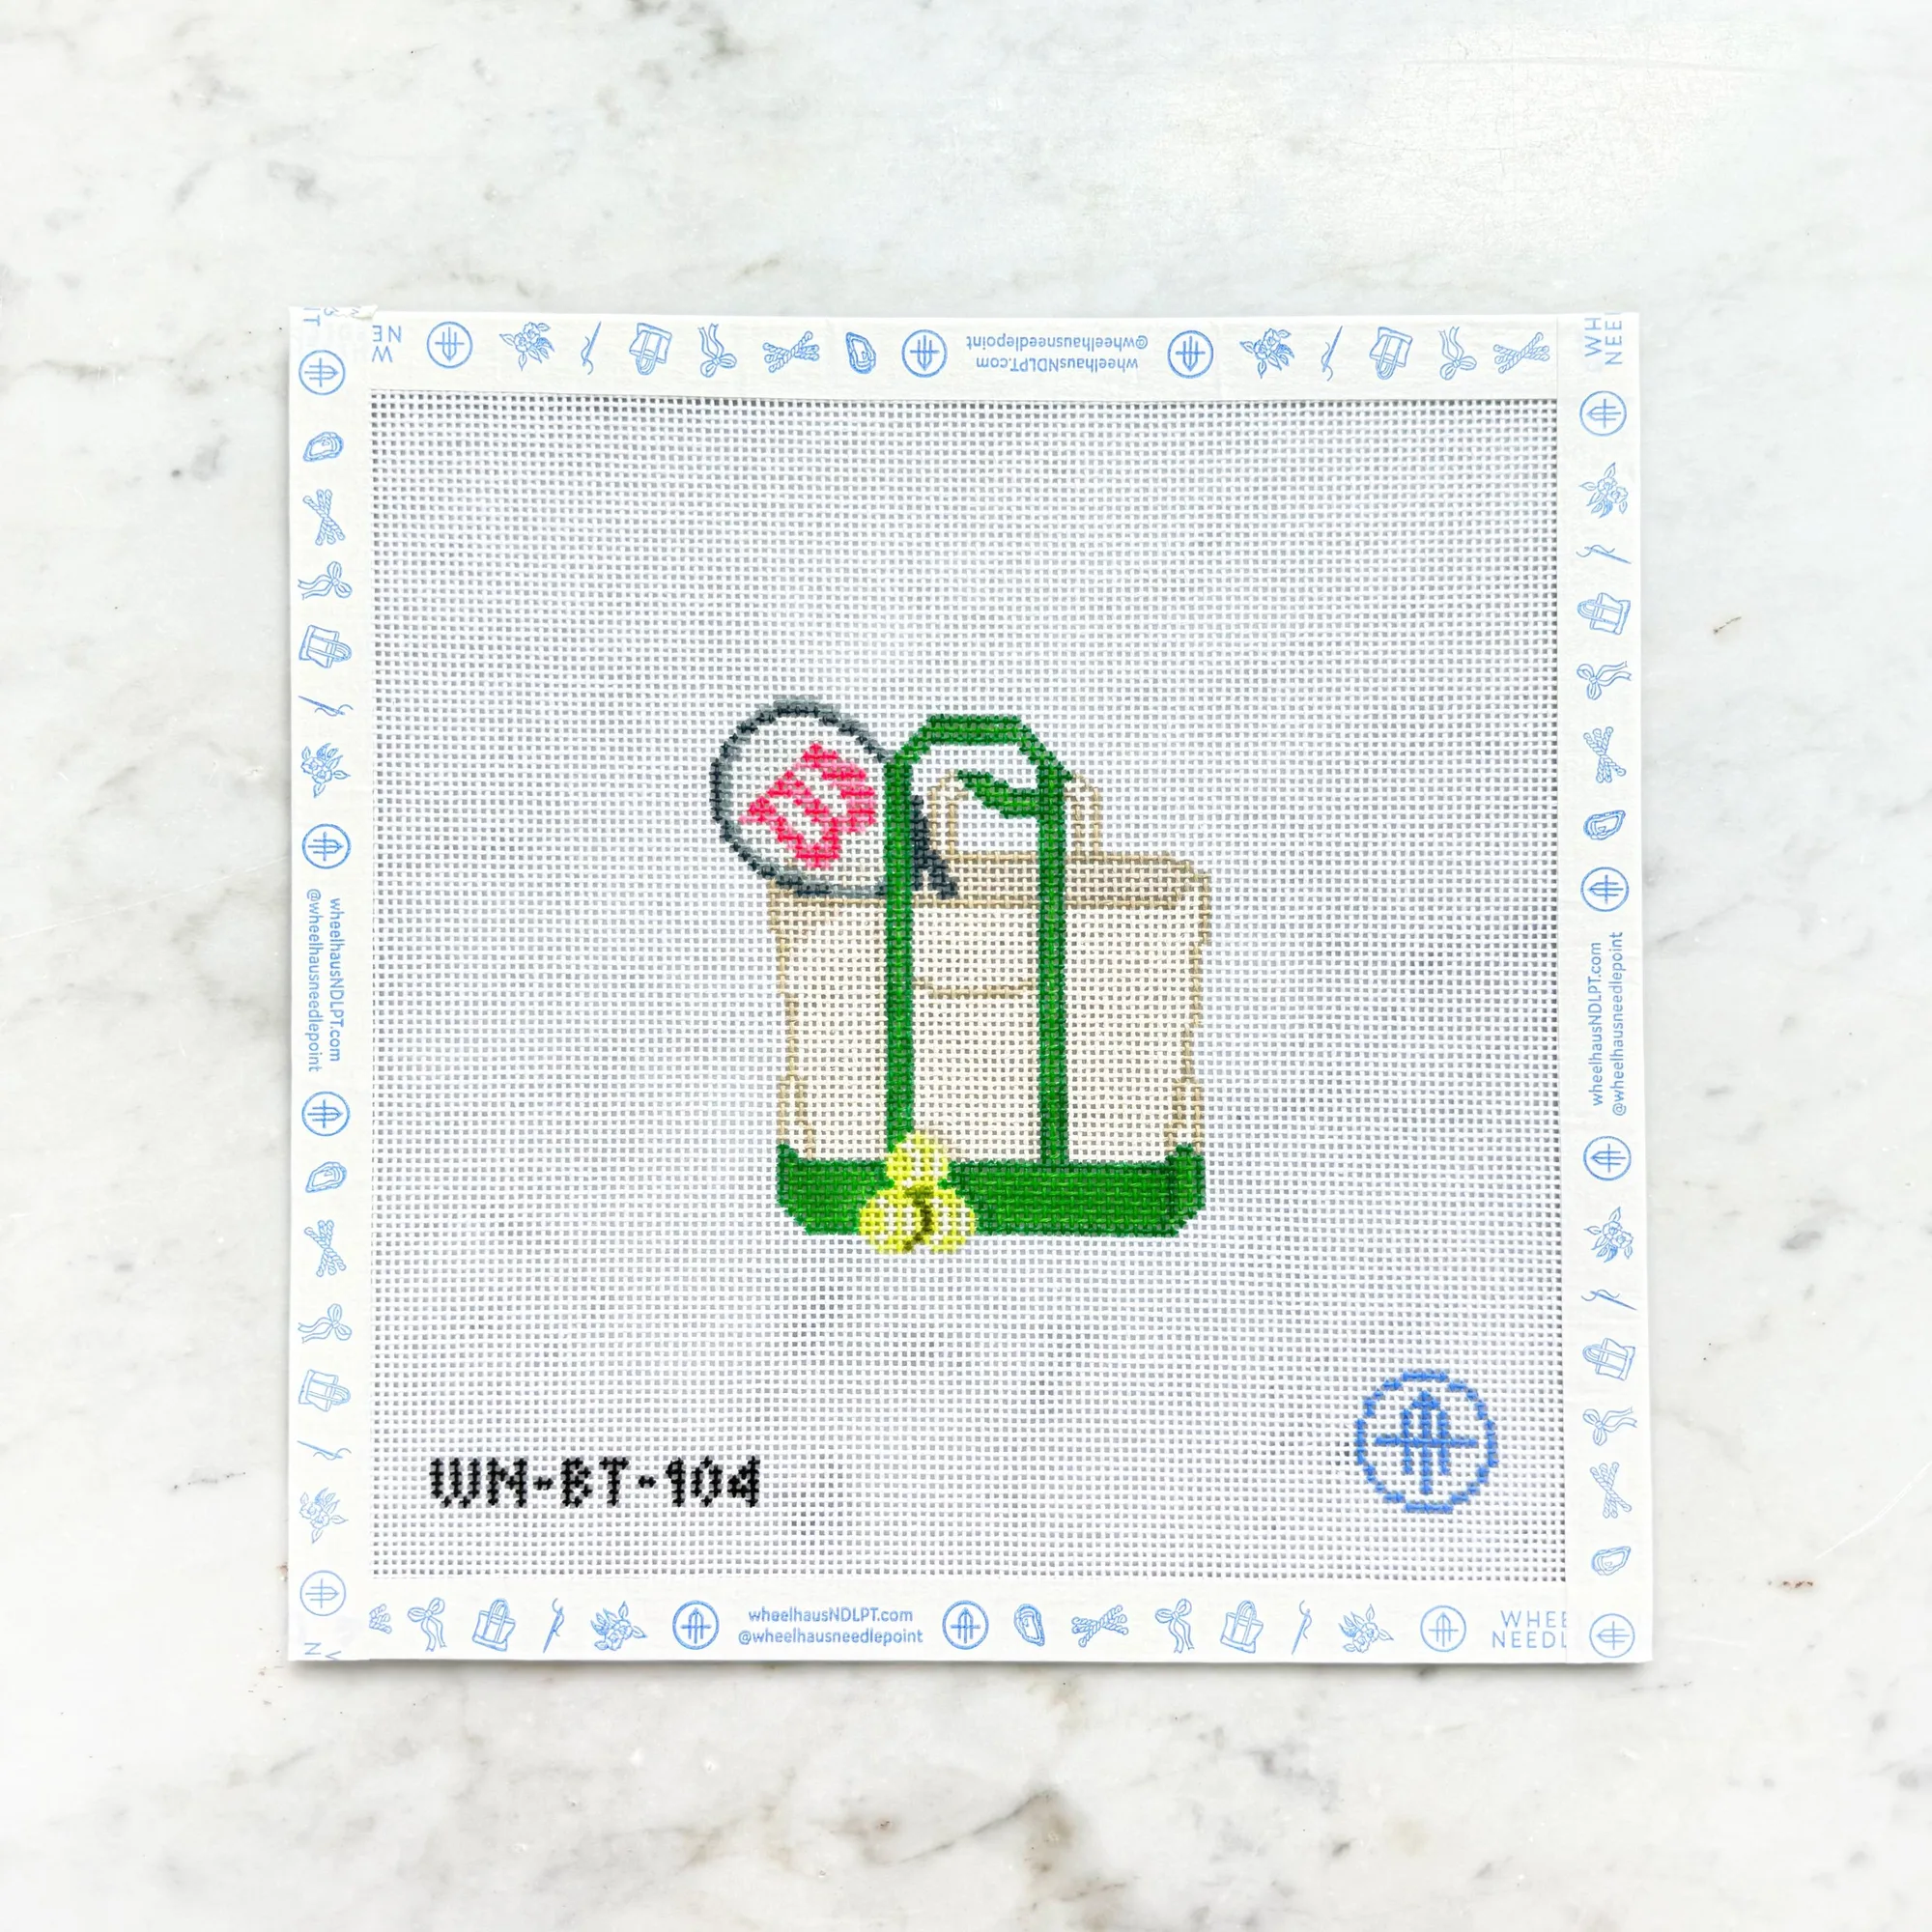
1-LOVE Tennis Tote