Quick answer
Start by gathering your supplies and examining the hand-painted canvas. Then, follow these steps to stitch the Diana Black Sheep design on 13 mesh, paying attention to thread coverage and color placement.
Understanding the Diana Black Sheep Canvas
The Diana Black Sheep needlepoint canvas is a hand-painted 13 mesh design inspired by the iconic Black Sheep sweater worn by Princess Diana. Each canvas is unique due to the hand-painting process, so expect slight variations in color and pattern.
This 9 x 9 inch canvas features a 5 x 5 inch design area, making it a compact project ideal for a pillow, frame, or ornament. Because the canvas is hand-painted, the paint may occasionally bleed or be slightly uneven—this is normal and adds character.
Choosing Thread and Needle for 13 Mesh
For 13 mesh canvas, you'll need thread that covers the intersections well without being too bulky. Common choices include #5 perle cotton, tapestry wool, or a single strand of Persian yarn. A size 18 or 20 tapestry needle works best.
Since the canvas does not come with thread, you have full control over your color palette. Match the painted areas as closely as possible, or choose your own interpretation. Test a few stitches on a scrap area to ensure coverage.
Step-by-Step Stitching Guide
- Prepare the Canvas: Tape the raw edges with masking tape or bind them with a sewing machine to prevent fraying. Mark the center of the canvas with a temporary marker or thread to help align your design. Skipping edge binding can cause the canvas to unravel as you stitch.
- Select and Cut Thread: Choose your thread based on the painted areas. For 13 mesh, cut lengths about 18 inches long to avoid tangling. Thread your needle and make a knot at the end, or use a waste knot to start. Longer threads tangle more easily and can wear out faster.
- Start with the Background: Begin stitching the background areas (e.g., the sweater or sky) using a simple tent stitch or basketweave. This establishes the base and helps you gauge tension. Work from the center outward. Stitching the background first prevents the main design from being distorted by uneven tension.
- Stitch the Sheep Design: Follow the painted sheep shape using a contrasting thread. Use a tent stitch for smooth curves or a continental stitch for more texture. Pay attention to the direction of your stitches to keep the design crisp. Stitching in the same direction throughout creates a uniform look.
- Add Detail and Highlights: Once the main sheep is stitched, add any details like the face or sweater pattern using a smaller needle or split stitch. This is where the design comes to life. Over-stitching can make the canvas stiff; keep details minimal for a softer finish.
- Finish and Block the Canvas: After all stitching is complete, remove any tape and gently block the canvas by pinning it to a board and steaming it. This corrects any distortion and gives a professional finish. Blocking is essential for 13 mesh canvas to ensure the final piece lies flat.
Product Details
-
Diana Black Sheep - Needlepoint Canvas (Wholesale): 9 x 9 canvas size, 5 x 5 design size, 13 mesh, hand-painted. The compact design size makes this a quick project, but the hand-painted nature means you should check each section for paint coverage before stitching.
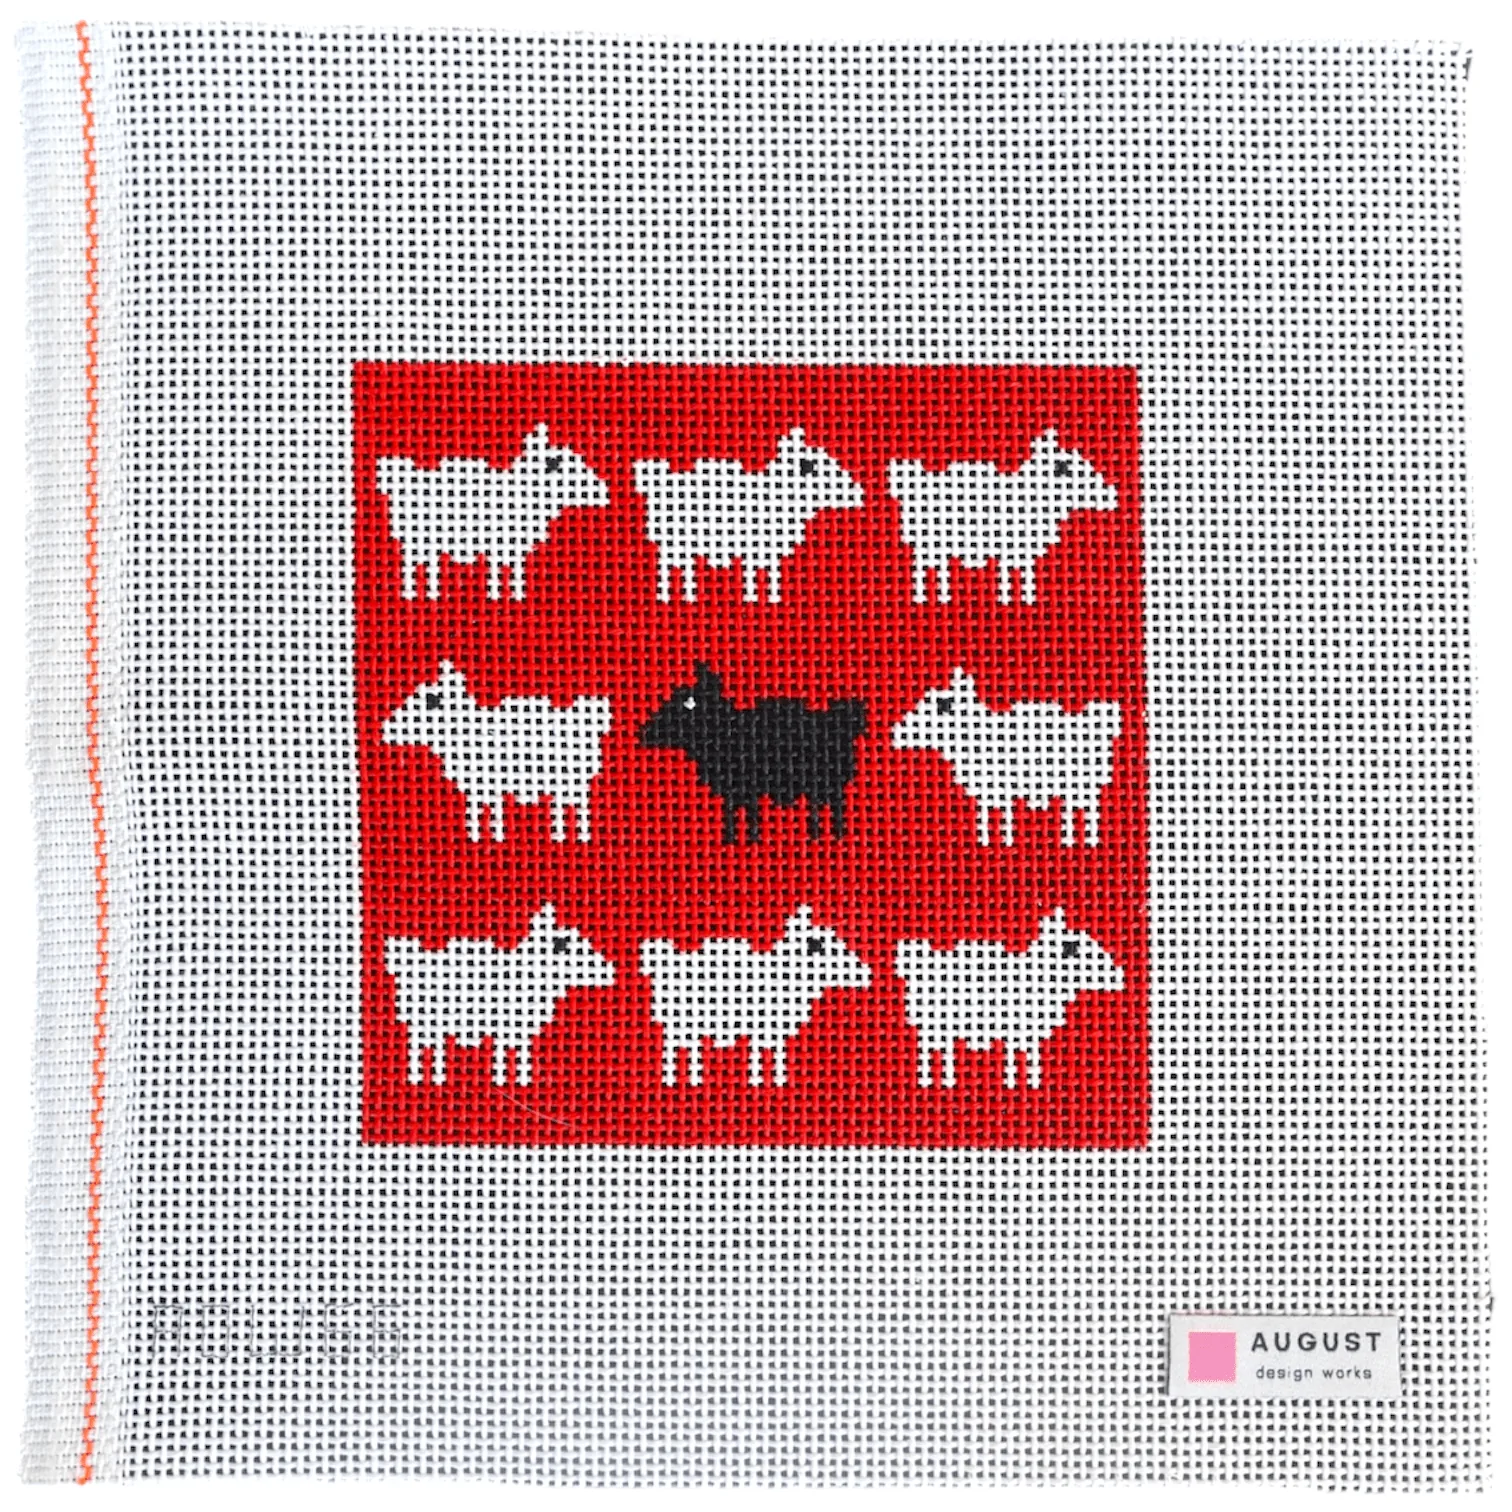
Diana Black Sheep - Needlepoint Canvas (Wholesale)