Quick Answer
Use archival negative pages designed for 4x5 film, handle negatives by the edges, load them into pages carefully, and store the filled pages in a cool, dry place away from light.
Why Archival Pages Matter for 4x5 Negatives
Standard plastic sleeves can contain PVC or other acids that cause negatives to yellow, stick, or become brittle over time. Archival-quality pages are made from polyethylene or polypropylene, which are chemically stable and safe for long-term storage. For 4x5 negatives, you need pages that hold the film securely without bending or scratching the emulsion.
Archival negative pages also allow you to make contact prints or view your negatives without removing them from the sleeve, reducing the risk of fingerprints and dust. Look for pages with strong seams and the right thickness: a 3-mil top sheet and 1.8-mil bottom sheet offer a good balance of protection and clarity.
Trade-Offs: Page Fit and Handling
Not all 4x5 negative pages are identical. Some are designed for sheet film with slight border variations, while others accommodate transparencies. Pages that are too tight can make loading difficult and may stress the film; pages that are too loose allow the negative to shift inside the sleeve. Choose pages that match your film's exact dimensions.
Also consider the thickness of the pages. Thicker pages offer more physical protection but take up more space in a binder or storage box. Thinner pages are more flexible but may not protect against accidental bending. The choice depends on whether you store your negatives in a binder or a flat storage box.
How to Store 4x5 Negatives in Archival Pages
- Prepare Your Workspace and Hands: Clean your hands thoroughly or wear cotton gloves. Work in a dust-free area with a soft, clean surface. Avoid handling negatives near fans or vents. Oily fingerprints can permanently damage the emulsion; use gloves or wash hands well before touching negatives.
- Load Each Negative Into the Page: Hold the negative by the edges only. Slide it gently into a slot of the archival page, making sure the emulsion side faces away from the clear top sheet if you plan to make contact prints. Repeat for the other slots. Never force a negative into the sleeve; if it sticks, check the orientation or smooth out any static by gently blowing air into the sleeve first.
- Label the Page Immediately: Use a soft pencil or archival marker to write the date, film type, and subject on the white area of the page or on a separate label attached to the page. Never write directly over the negative area. Ink from regular pens can bleed through or transfer to the negatives; always use archival-safe labels or pencils.
- Store Filled Pages Flat or in a Binder: Place the loaded pages in a dark, cool, dry storage box or a three-ring binder designed for archival pages. Keep pages flat to prevent warping. Avoid stacking heavy objects on top of them. High humidity and temperature fluctuations accelerate film degradation; aim for a consistent environment around 70°F (21°C) and 30-40% relative humidity.
Recommended Product for Archival Storage
-
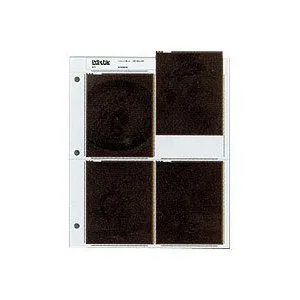
Archival Negative Pages Holds Four 4x5" Negatives or Transparencies - 25 Pack: Holds four 4x5 negatives or transparencies. The top sheet is 3 mil and the bottom sheet is 1.8 mil. Archival quality polyethylene - NO PVC. This page gives you a clear, safe sleeve that allows contact printing without removing the negative, and the thin backing reduces bulk in binders.
Archival Negative Pages Holds Four 4x5" Negatives or Transparencies - 25 Pack