Quick answer
Store Dwarvenite pieces flat, sorted by footprint, in shallow bins with a soft liner so nothing stacks point-to-point. For transport, pack heavy wall and floor pieces at the bottom of a rigid case, fill gaps so nothing slides, and keep painted pieces from rubbing against hard edges. A consistent sorting system matters more than any single container.
Dwarvenite is tough, but tough is not indestructible. The pieces that break at the table usually break in the bag on the way there, not during play. Crenellations snap, painted surfaces scuff, and small dressing pieces vanish into the gap between a bin wall and a car seat.
This guide gives you a repeatable process for dwarvenite storage and transporting terrain safely. It covers sorting, padding, case setup, and the checks that keep modular terrain storage from turning into a pile of loose rubble.
Start by sorting pieces by footprint, not by set
The single biggest cause of damage is mixed-size stacking. A 12-inch wall sitting on a pile of small scatter pieces concentrates weight on a few contact points, and that is where cracks start. Sort by footprint first: large floors and long walls together, medium walls together, small scatter and dressing pieces together.
Once sorted, store each group in its own shallow bin or tray. Shallow is intentional. Deep bins invite tall stacks, and tall stacks mean the bottom pieces carry the load. If you can see every piece from above when you open the bin, you have sorted correctly.
- Keep a separate small container for pieces under two inches; they are the ones that disappear.
- Label bins by footprint and set name so a rebuild does not require dumping everything out.
Line bins and cases before anything goes in
A bare plastic bin transfers every bump straight into the piece touching it. A cheap liner changes that. Felt, closed-cell foam, or even a folded towel along the bottom and sides absorbs vibration and stops pieces from sliding into each other.
Pay special attention to corners and crenellations. These are the thinnest, most exposed parts of a wall section, and they take the first hit in a drop. If a bin has hard internal dividers, pad them or remove them. A soft divider is better than a rigid one.
- Cut foam slightly oversize so it stays in place when the bin is empty.
- Do not use loose packing peanuts with painted pieces; they migrate and leave gaps.
Pack heavy and flat on the bottom, light and tall on top
Load order matters. Floors, long walls, and other dense pieces go in first, laid flat. They form a stable base and they are the least likely to be crushed. Taller or more delicate pieces, like a thatched roof or a suspended parapet, go on top where nothing presses down on them.
Never stand a long wall on its end for storage. The weight of the piece above it bears on the crenellations, and over time that is how a clean break happens. Flat storage also keeps large sections from warping under their own weight.
- If a bin is only half full, fill the empty space with foam or cloth so nothing shifts in transit.
- Keep a rigid tray for roofs and parapets so they can travel without stacked weight.
Build a transport case that matches how you actually travel
There is no single best terrain transport case. A rigid tote with a lid that locks works for car travel. A wheeled case helps if you carry a full table's worth of coverage. A padded bag is fine for a short walk to a friend's house but not for a trunk that will be packed and repacked.
Match the case to the trip. If you are running a one-shot, take only the pieces that build the encounter. If you are running a campaign session, take the modular core and leave the dressing pieces at home. Less in the case means less to damage and less to repack.
- Test the lid: if it flexes when you press the center, it will not protect the top layer.
- Keep a small repair kit in the case: super glue, a few spare small pieces, and a soft cloth.
Protect paint, magnets, and small parts on the road
Painted pieces need a little more care than unpainted ones because the surface is the part you cannot easily fix. Do not let painted walls rub face-to-face. A sheet of thin foam or a cloth between layers stops paint transfer and scuffing.
Small parts are a separate problem. Dressing pieces, inserts, and toppers should travel in a sealed bag or a small lidded container inside the main case. If a bag opens in transit, you will find out at the table, not at home.
- Bag small pieces by type so a missing one is obvious before you start building.
- If your pieces use magnets or inserts, check that they are seated before closing the case.
Set up a home storage spot that survives real life
The best storage system is the one you will actually use after a late session. Shelves at waist height beat floor stacks, because you are far more likely to put pieces back correctly when you do not have to bend down and dig. Keep the most-used footprint bins at the front.
Heat and direct sun are the long-term enemies. Store Dwarvenite and resin away from radiators, car trunks in summer, and windowsills. A cool, dry, shaded shelf keeps pieces stable between sessions.
- Do a five-minute sort after each session rather than a two-hour sort before the next one.
- Keep a dedicated 'unknown pieces' bin and empty it into the right bins monthly.
Your storage and transport routine, step by step
- Sort by footprint: Separate large floors and long walls from medium walls and small dressing pieces. Use shallow bins so you can see every piece from above. Checkpoint: if you cannot see the bottom of the bin, you have stacked too deep.
- Line every bin: Add felt, closed-cell foam, or a folded towel to the base and sides. Pad or remove hard internal dividers. Checkpoint: corners and crenellations should never touch bare plastic.
- Load heavy and flat first: Put floors and long walls in flat on the bottom. Place tall or delicate pieces like roofs and parapets on top with nothing pressing down. Checkpoint: no long wall should ever stand on its end in storage.
- Fill the gaps: If a bin is not full, pack the empty space with foam or cloth so nothing slides when the case moves. Checkpoint: shake the closed bin gently. If you hear movement, add padding.
- Match the case to the trip: Use a rigid, locking tote for car travel and a wheeled case for a full table. Take only the pieces the session needs. Checkpoint: press the center of the lid. If it flexes, it will not protect the top layer.
- Separate painted and small pieces: Put a thin foam or cloth layer between painted walls so they do not rub. Bag small parts and inserts by type in a sealed container inside the case. Checkpoint: do a quick count of bagged small pieces before you close the lid.
- Store cool, dry, and at waist height: Keep bins on shelves away from radiators, windowsills, and hot cars. Put the most-used bins at the front. Checkpoint: if a shelf is above eye level or on the floor, you will stop using it correctly.
Pieces that shape your storage plan
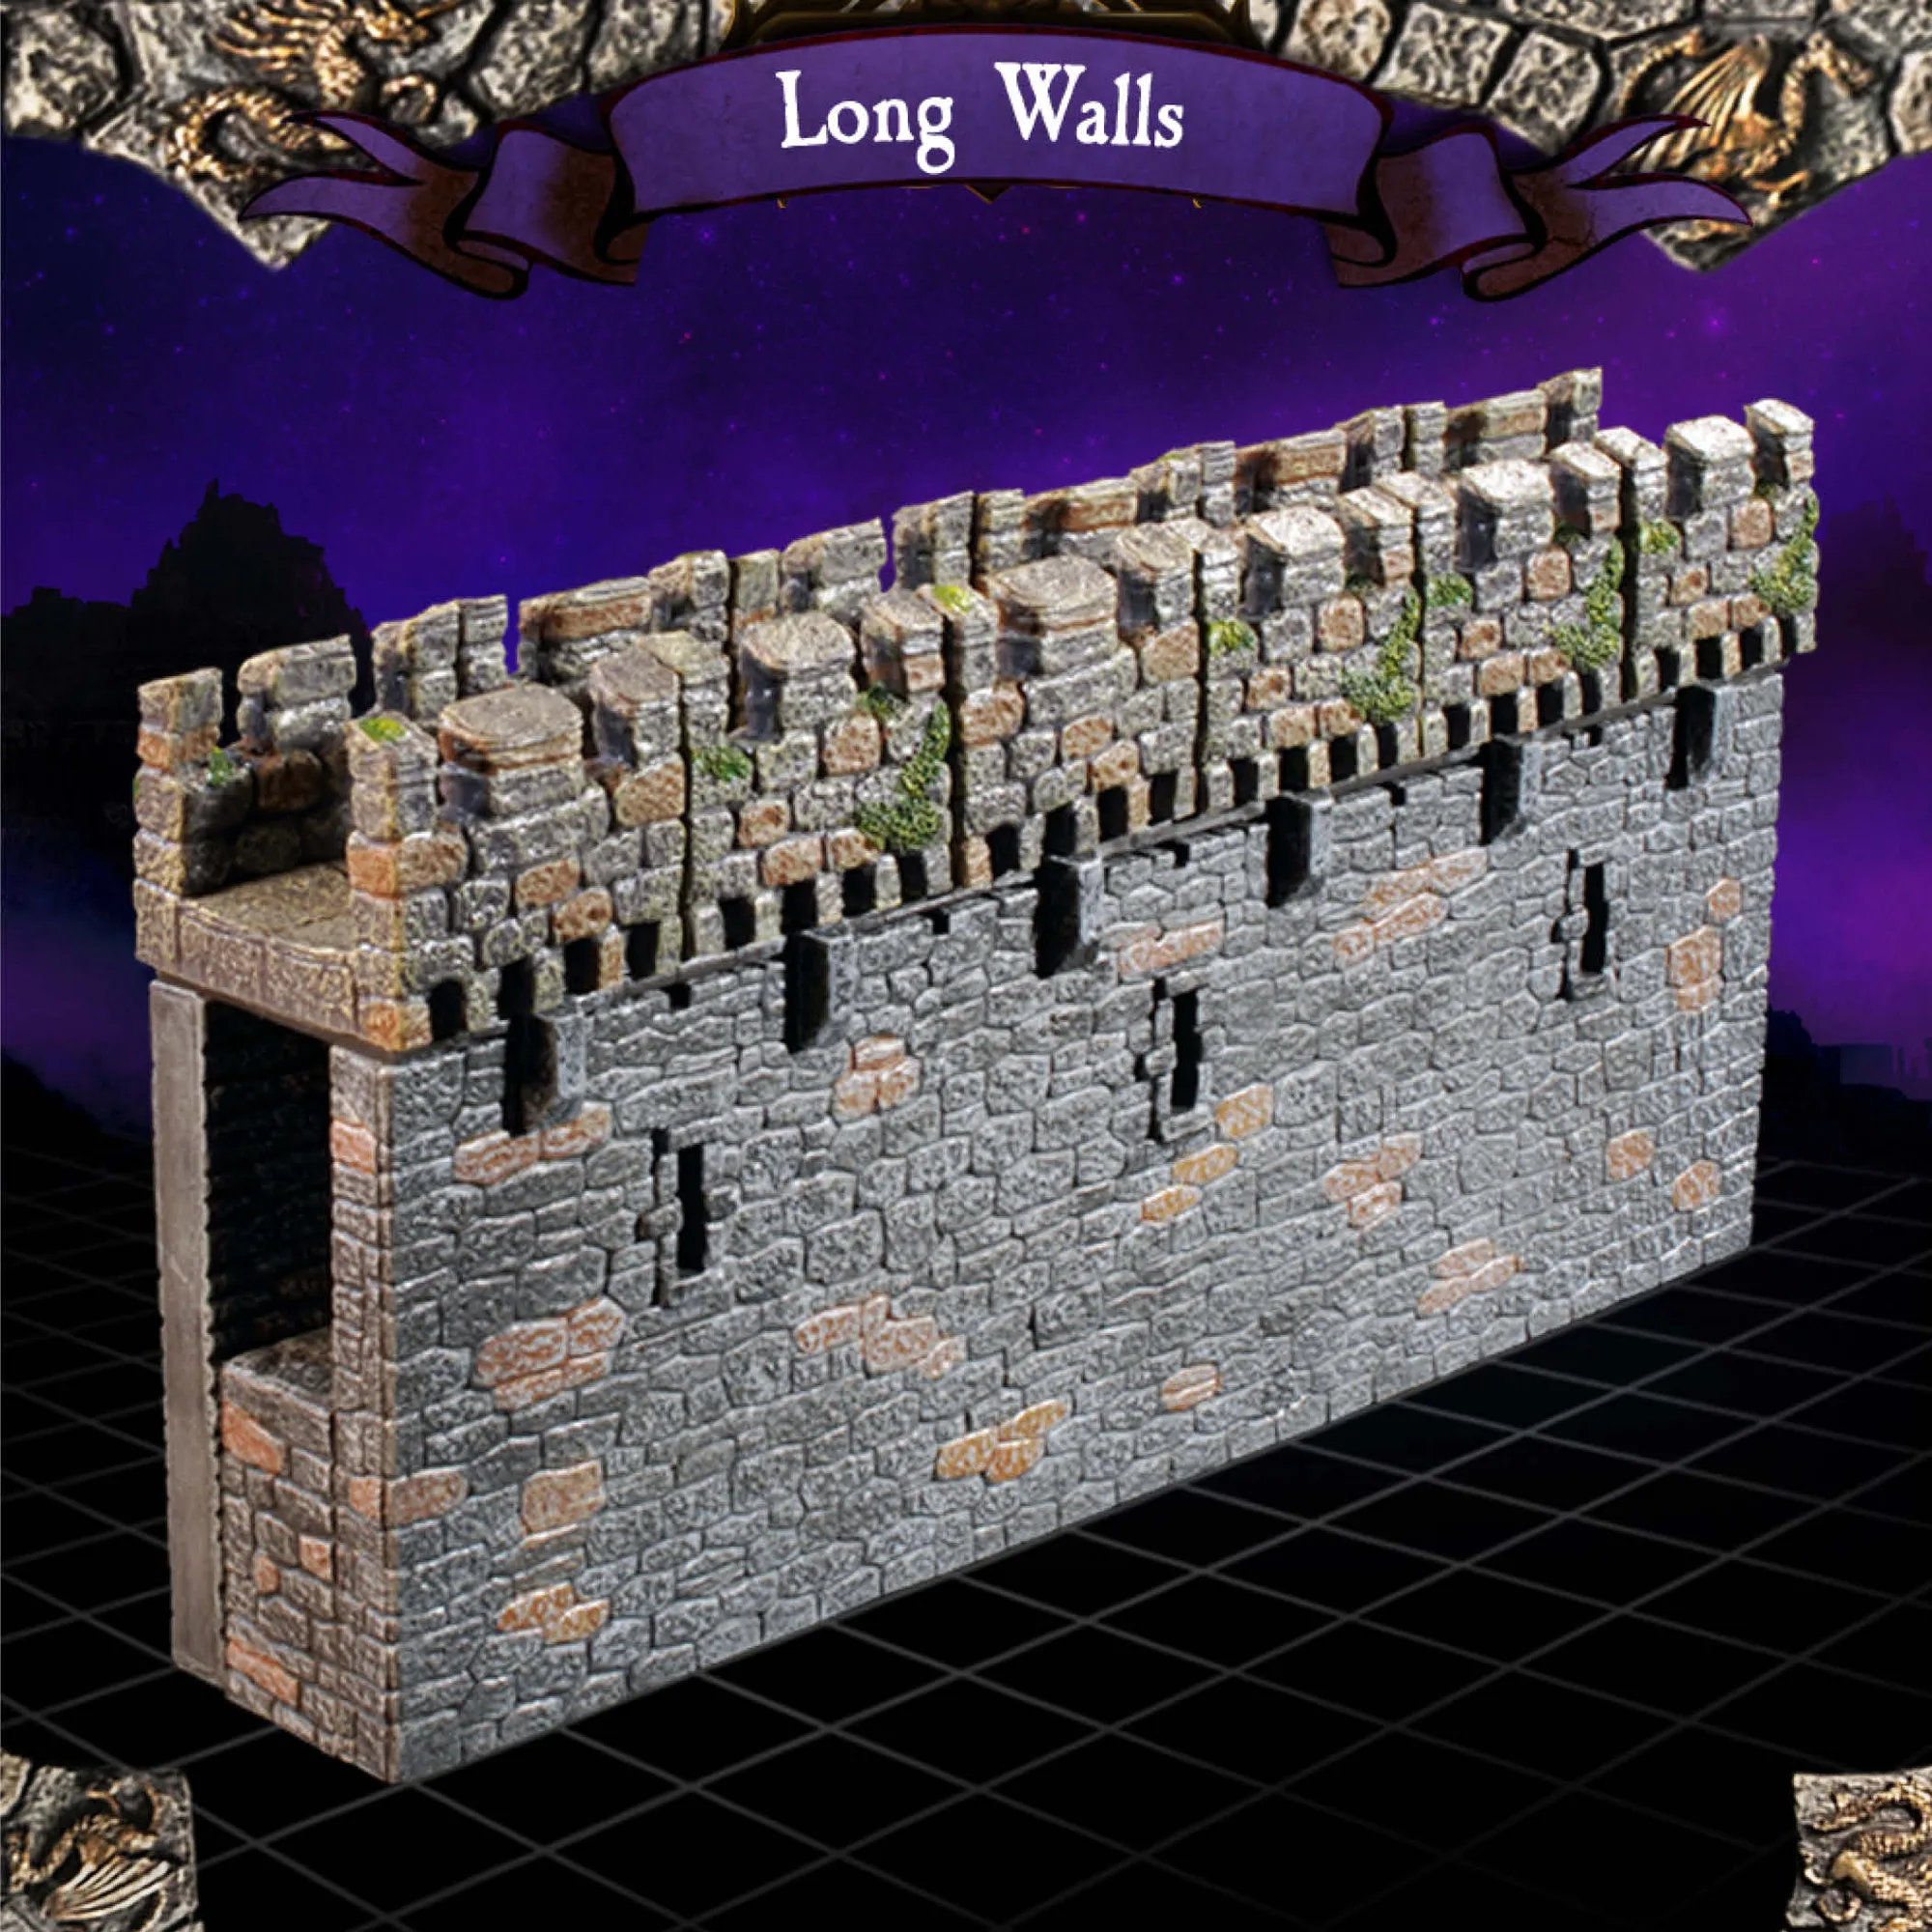
- Long Wall (Unpainted): One, massive 12-inch wall section topped with crenellations, described as the fastest way to make epic builds and long wall runs. Its length and crenellated top make it the piece most likely to be stored on its end and snapped. Store it flat, on the bottom layer, and never under a stack.
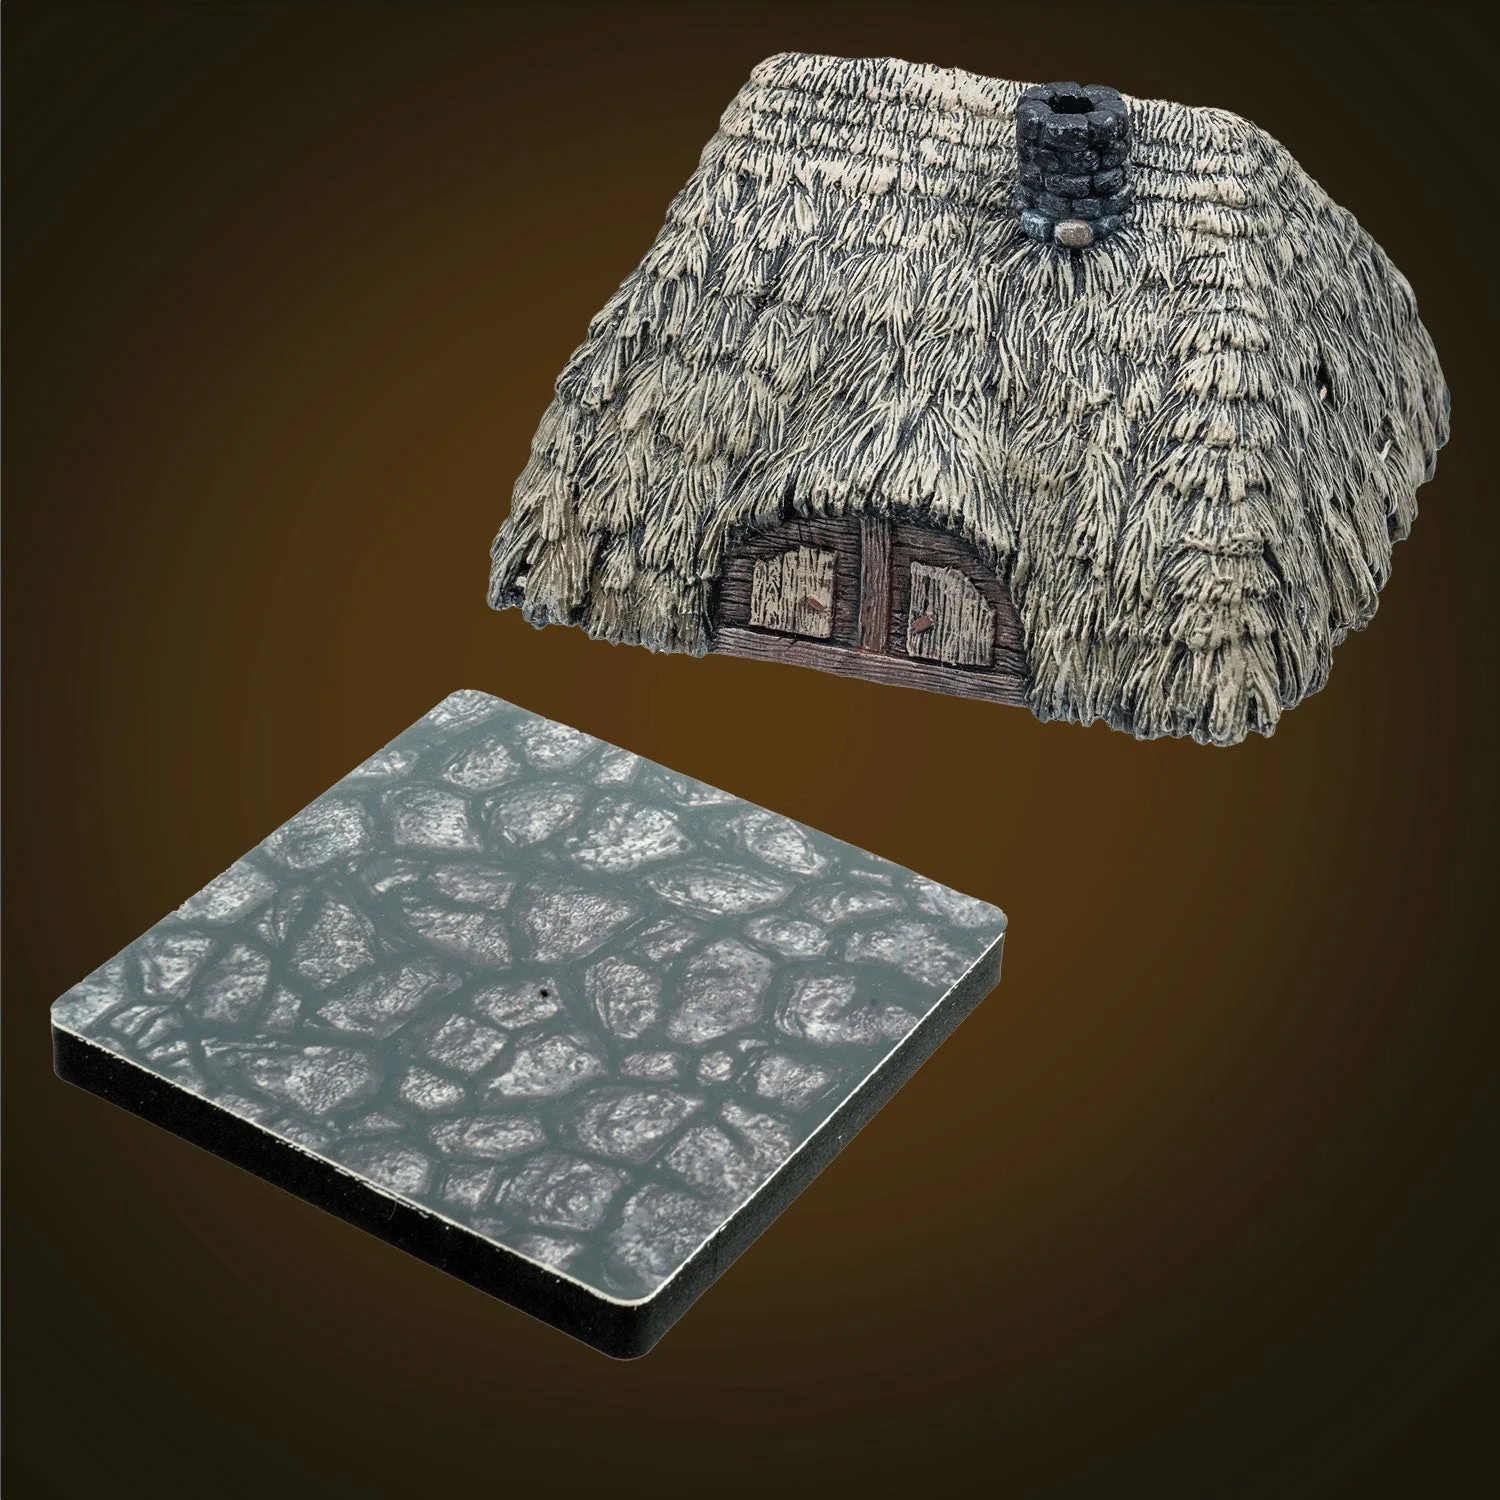
- Thatched Roof (Unpainted): A more humble rooftop with a massive 5-inch footprint that fits and functions with the DF Floor Fogger; a foamcore riser can be used in place of the fogger. A wide roof is awkward to stack and easy to crush. Give it its own padded tray or the top layer of a case, and keep the riser with it so you do not lose the fit.
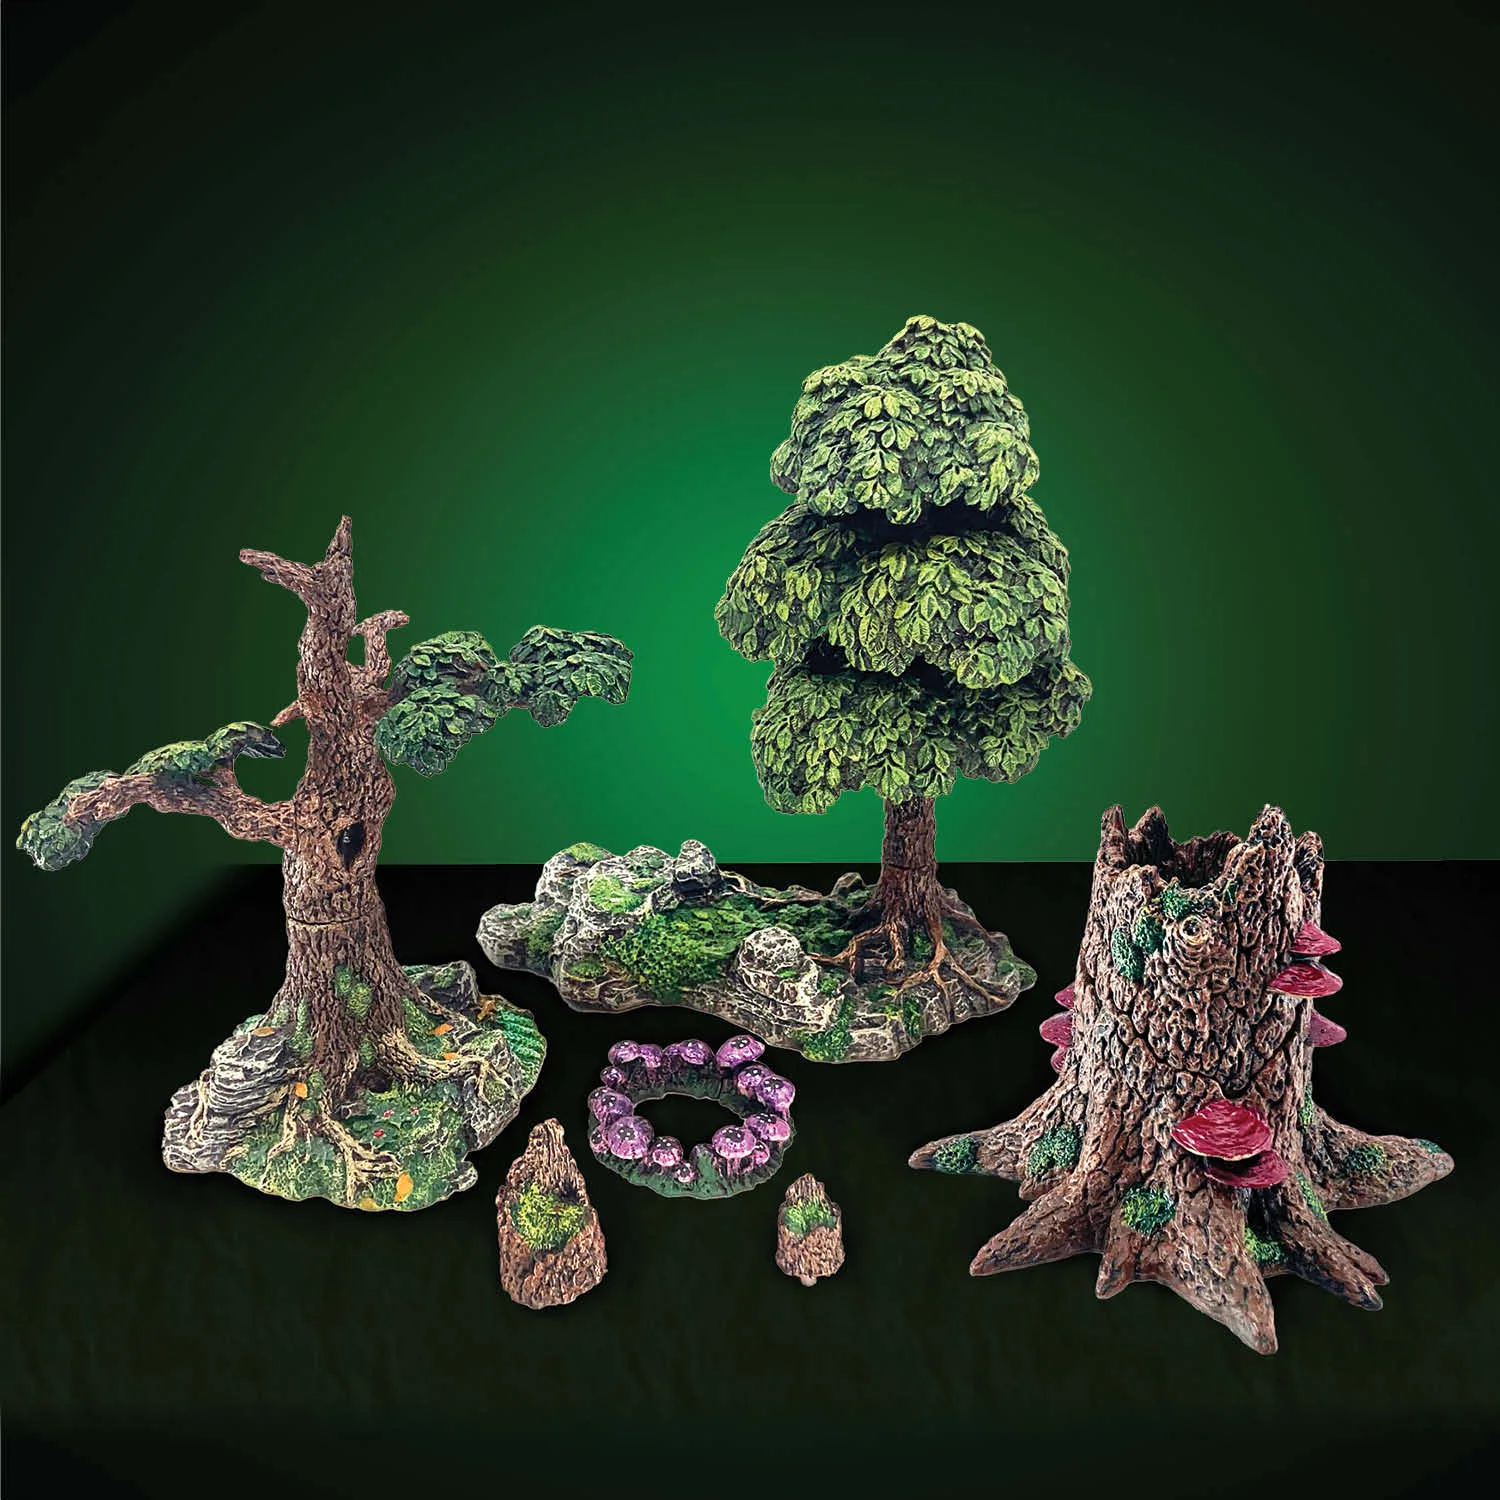
- Dreadhollow Dressing (Unpainted): A collection of freestanding scatter pieces for forest builds, including modular deciduous pieces, stump patches, and a Hollow Stump with a removable lid. Small freestanding pieces and a removable lid are the easiest things to lose in transit. Bag them together by type so the stump and its lid stay paired.
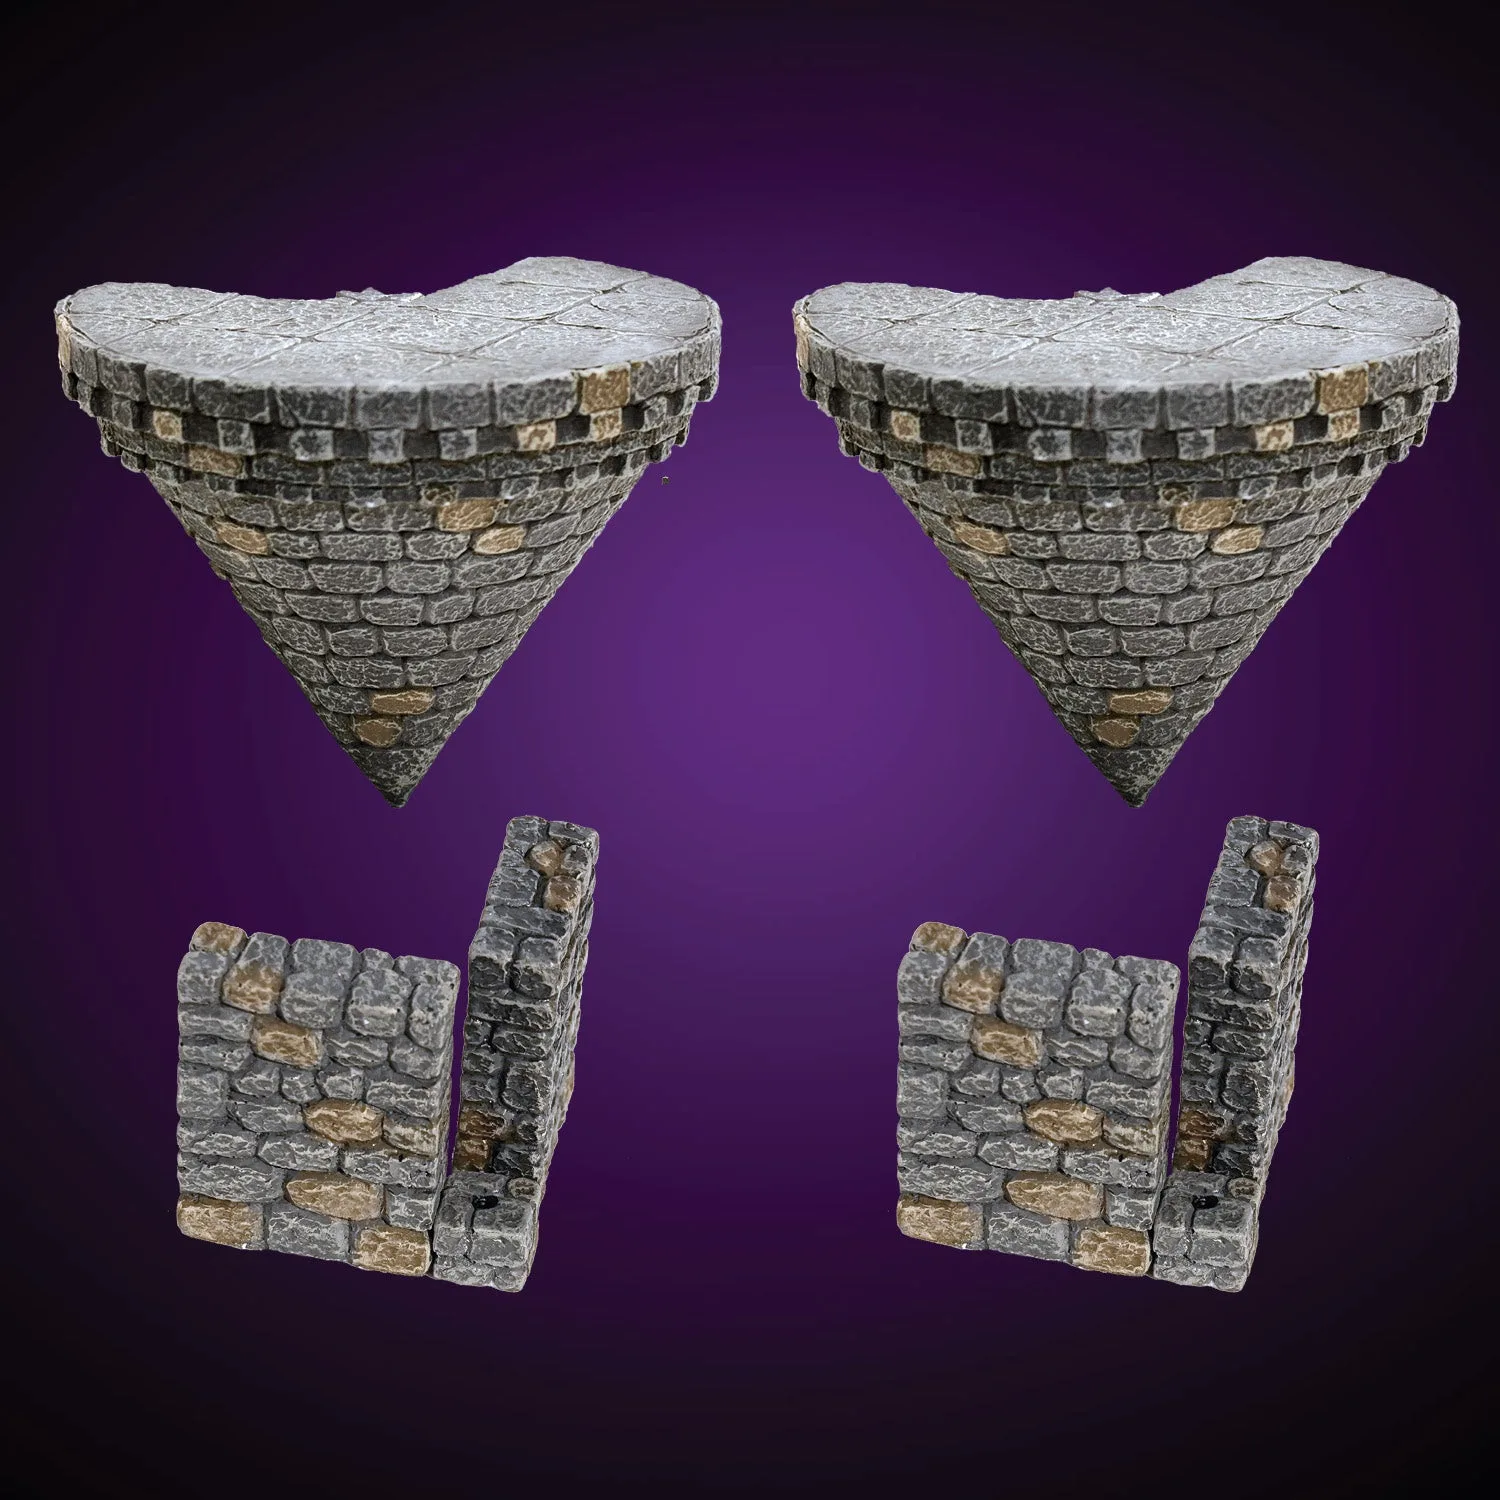
- Suspended Parapet Pack (Unpainted): A four-piece stone structure that mounts into a City Builder post hole to suspend a turret, and can combine with Small Curved Crenellations Pack for a corner defense. These are projecting, thin-walled pieces. Store them in a rigid tray rather than a soft bag so the mount points and edges do not deform.
Dwarvenite rewards a simple routine: sort by footprint, line the bin, load flat and heavy first, and fill the gaps. Do that consistently and your modular terrain storage will protect the pieces you actually use, session after session.