Quick answer
Store stamp sheets flat and separate from patches. Keep paper items in acid-free sleeves inside a rigid box, and keep patches backed with felt or cardboard in a cool, dry drawer. Check both every few months for moisture, pests, or pressure marks.
Why paper and fabric need different storage
Stamp sheets and patches fail for different reasons. Paper absorbs moisture, cockles, and can stick to itself or to plastic if it is sealed under pressure. Fabric patches fray, crease, and pick up oils from hands. If you store them together, the rigid edge of a stamp sheet can press a fold into a patch, and a patch's adhesive or embroidery backing can catch on paper.
A simple split works: paper goes flat and rigid, patches go soft and backed. That single decision prevents most long-term damage before it starts.
Set up a low-humidity, low-light spot
Choose the driest room you have, away from windows and exterior walls. A closet shelf or a closed drawer in a climate-controlled room is better than a garage or attic. Light fades printed colors, and humidity swings do more damage than steady cool air. If the room feels damp, add a small reusable silica packet to each storage box and swap it every three to four months.
Handle with clean, dry hands and a flat surface
Work on a clean table with no food or drinks nearby. Wash and dry your hands before touching paper or fabric, and avoid lotion. If you are handling a stamp sheet, slide a rigid board underneath before lifting it. Never pick up a sheet by one corner; the paper can crease along the diagonal.
Step-by-step storage routine
- Flatten stamp sheets between rigid boards: Place the stamp sheet between two clean pieces of acid-free board or mat board. Do not use corrugated cardboard directly against the paper; it can leave a texture imprint over time. Checkpoint: the sheet should lie flat with no curl at the corners before you box it.
- Sleeve paper items in acid-free protection: Slide the flattened sheet into an acid-free sleeve or envelope. Avoid PVC sleeves, which can off-gas and stick to paper. If the sheet is larger than standard sleeves, use an archival folder sized for it. Mistake to avoid: sealing a slightly damp sheet in plastic traps moisture and can cause foxing.
- Back each patch with felt or card: Cut a piece of felt or acid-free card slightly larger than the patch. Place the patch face up on the backing so the embroidery does not flatten against a hard surface. Checkpoint: the patch should not slide or bend when you lift the backing.
- Store paper and patches in separate boxes: Use a rigid, lidded box for stamp sheets and a separate soft or rigid box for patches. Keep boxes off the floor and away from exterior walls. Add a silica packet to each box if the room is humid. Mistake to avoid: stacking heavy boxes on top of paper storage, which can crush and crease sheets.
- Check every three to four months: Open each box, look for moisture, pests, or new creases, and swap silica packets. For patches, confirm the backing has not shifted and the fabric is not compressed. Next step: note the date on the box so you know when the next check is due.
Product facts to keep in mind
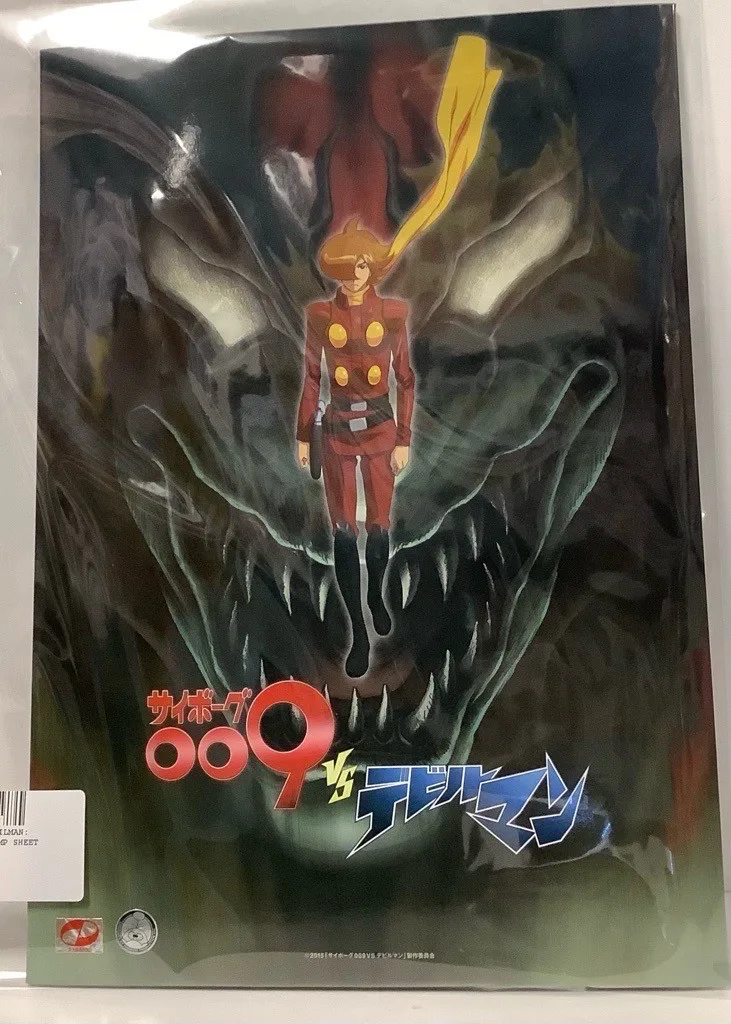
- Cyborg 009 vs Devilman: Commemorative Stamp Sheet(105025547) - Entertainment Hobby Shop Jungle: Cyborg 009 vs Devilman: Commemorative Stamp Sheet is a second-hand item, approximately 8.25in x 11.75in, and the stamps are only usable in Japan. Because it is pre-owned and oversized, store it flat and do not fold it into a standard sheet protector. The Japan-only stamp use means its value is collectible, not postage, so preservation matters more than mailing.
- Ouran High School Host Club - Sd Kaoru Patch(105085962) - Entertainment Hobby Shop Jungle: Ouran High School Host Club - Sd Kaoru Patch is a 2023 GE Animation patch, about 3 inches, packaged in a 1.5 x 3.5 inch box. Keep the box if you want the original packaging intact. If you remove the patch, back it with felt and store it flat so the embroidery does not crush.
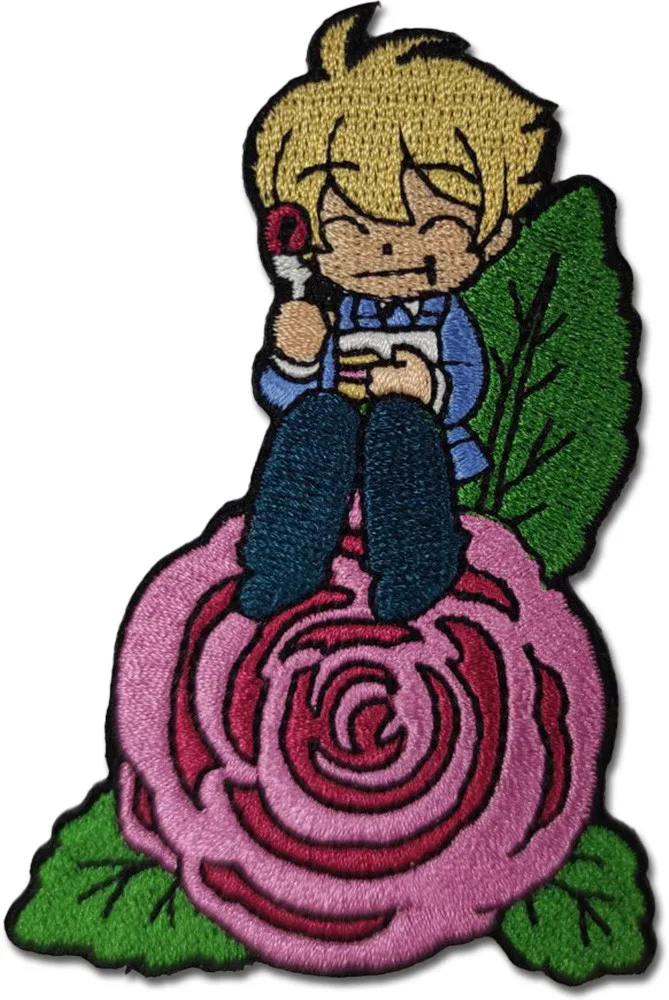
- Ouran High School Host Club - Sd Mitsukuni Patch(105061288) - Entertainment Hobby Shop Jungle: Ouran High School Host Club - Sd Mitsukuni Patch is a 2023 GE Animation patch, about 3 inches, packaged in a 2 x 3.5 inch box. The slightly larger box gives a little more room, but the patch still needs a flat backing. Do not stack heavy items on top of the box or the patch inside.