Quick answer
Start with day-two hair or a light spritz of texture spray, gather your hair low or at the nape, twist it loosely, and clamp the clip so the teeth sit flat against your scalp. For a yarn skein claw clip, keep the twist relaxed so the playful thread detail stays visible instead of buried. Check the grip with a gentle head shake, then adjust before you walk out the door.
A yarn skein hair claw clip is a small, playful way to show off your love of making without wearing a project. The trick is styling it so the clip holds comfortably all day and the yarn detail actually reads from a normal distance.
This hair claw clip tutorial walks through a five-step routine you can repeat in under two minutes, plus the grip checks and common mistakes that make claw clips slip, pull, or look messy by lunchtime.
Prep your hair so the clip can grip
Claw clips hold best on hair with a little texture. Freshly washed, silky hair slides out of even a well-made clip, so start with day-two hair or mist in a light texture spray and rough it up with your fingers. If your hair is very fine, a small amount of dry shampoo at the roots adds grip without weight.
Brush through once to remove tangles, then decide where you want the clip to sit. Low at the nape is the most secure for everyday wear and keeps the yarn skein detail visible from the side. A high half-up placement works too, but it needs a tighter gather to stay put.
- Checkpoint: run your fingers through your hair. If it slips through with no resistance, add texture before you clip.
Gather and twist loosely
Collect your hair into a low ponytail or a loose twist, depending on how much length you have. For a low ponytail, gather at the nape and give the tail one soft twist so it folds into itself. For shorter hair, gather a half-up section and twist it once toward the crown.
The most common mistake is twisting too tightly. An over-twisted section becomes a hard rope that the clip cannot grip evenly, and it also hides the yarn skein shape. Keep the twist relaxed, roughly the thickness of two fingers, so the clip has something to hold without straining.
- Checkpoint: the gathered section should feel soft and slightly springy, not tight against your scalp.
Clamp the clip flat against your scalp
Open the clip and slide it over the gathered hair from the side, not straight down from above. Position the teeth so they sit flat against your scalp and the hinge is level. Press until you feel the clip close evenly on both sides.
If the clip feels loose, do not force it. Reposition the gather so more hair sits inside the jaws, or switch to a smaller section. A clip that closes easily but slides is usually holding too little hair, while a clip that will not close is holding too much.
- Checkpoint: the clip should feel snug but not pinch. If you feel pulling at the roots, open it and re-gather.
Do a two-second grip test
Before you leave, tilt your head side to side and give it one gentle shake. If the clip shifts, tighten the gather by pulling a little more hair into the jaws and re-clamping. If it stays put through the shake, it will usually hold through a normal day.
This test matters more than it sounds. Most claw clip failures happen because the clip was never seated properly in the first place, not because the clip itself is weak. Fixing the placement takes seconds and saves you from re-clipping in a bathroom mirror later.
- Checkpoint: if the clip moves more than a centimeter during the shake, re-gather before you go.
Match the clip to the rest of your outfit
A yarn-themed clip is a statement piece, so let it be the focal point. Pair it with a plain tee, a denim jacket, or a simple cardigan so the pink iridescent thread and engraved details stand out. If you are wearing a busy print, choose a smaller clip or place it lower so it reads as a quiet accent.
For a coordinated maker look, echo the clip's colors in one other small accessory, like a sticker on your water bottle or a keychain on your bag. Keeping the rest of the outfit simple makes the clip look intentional rather than cluttered.
- Checkpoint: step back from the mirror. If the clip is the third or fourth busy detail you notice, simplify one other element.
Your five-step claw clip routine
- Step 1: Add texture: Start with day-two hair or mist in texture spray and rough up the roots with your fingers. Smooth, freshly washed hair is the number one reason claw clips slide out. Checkpoint: hair should have a little grip, not feel silky-smooth.
- Step 2: Gather low and twist once: Collect hair at the nape or into a half-up section, then twist once loosely. Keep the twist about two fingers thick so the clip can close evenly. Checkpoint: the gather should feel soft and springy, never tight.
- Step 3: Clamp from the side: Slide the clip over the gather from the side so the teeth sit flat against your scalp and the hinge is level. Press until it closes evenly on both sides. Checkpoint: snug, not pinching. If it pulls, re-gather.
- Step 4: Shake test: Tilt your head side to side and give one gentle shake. If the clip shifts more than a centimeter, pull a little more hair into the jaws and re-clamp. Checkpoint: a clip that passes the shake test usually holds all day.
- Step 5: Simplify the outfit: Let the clip be the focal point by pairing it with plain colors or one coordinating maker accessory. If the outfit feels busy, remove one other detail. Checkpoint: the clip should be the first thing you notice, not the fourth.
Product facts that matter for styling
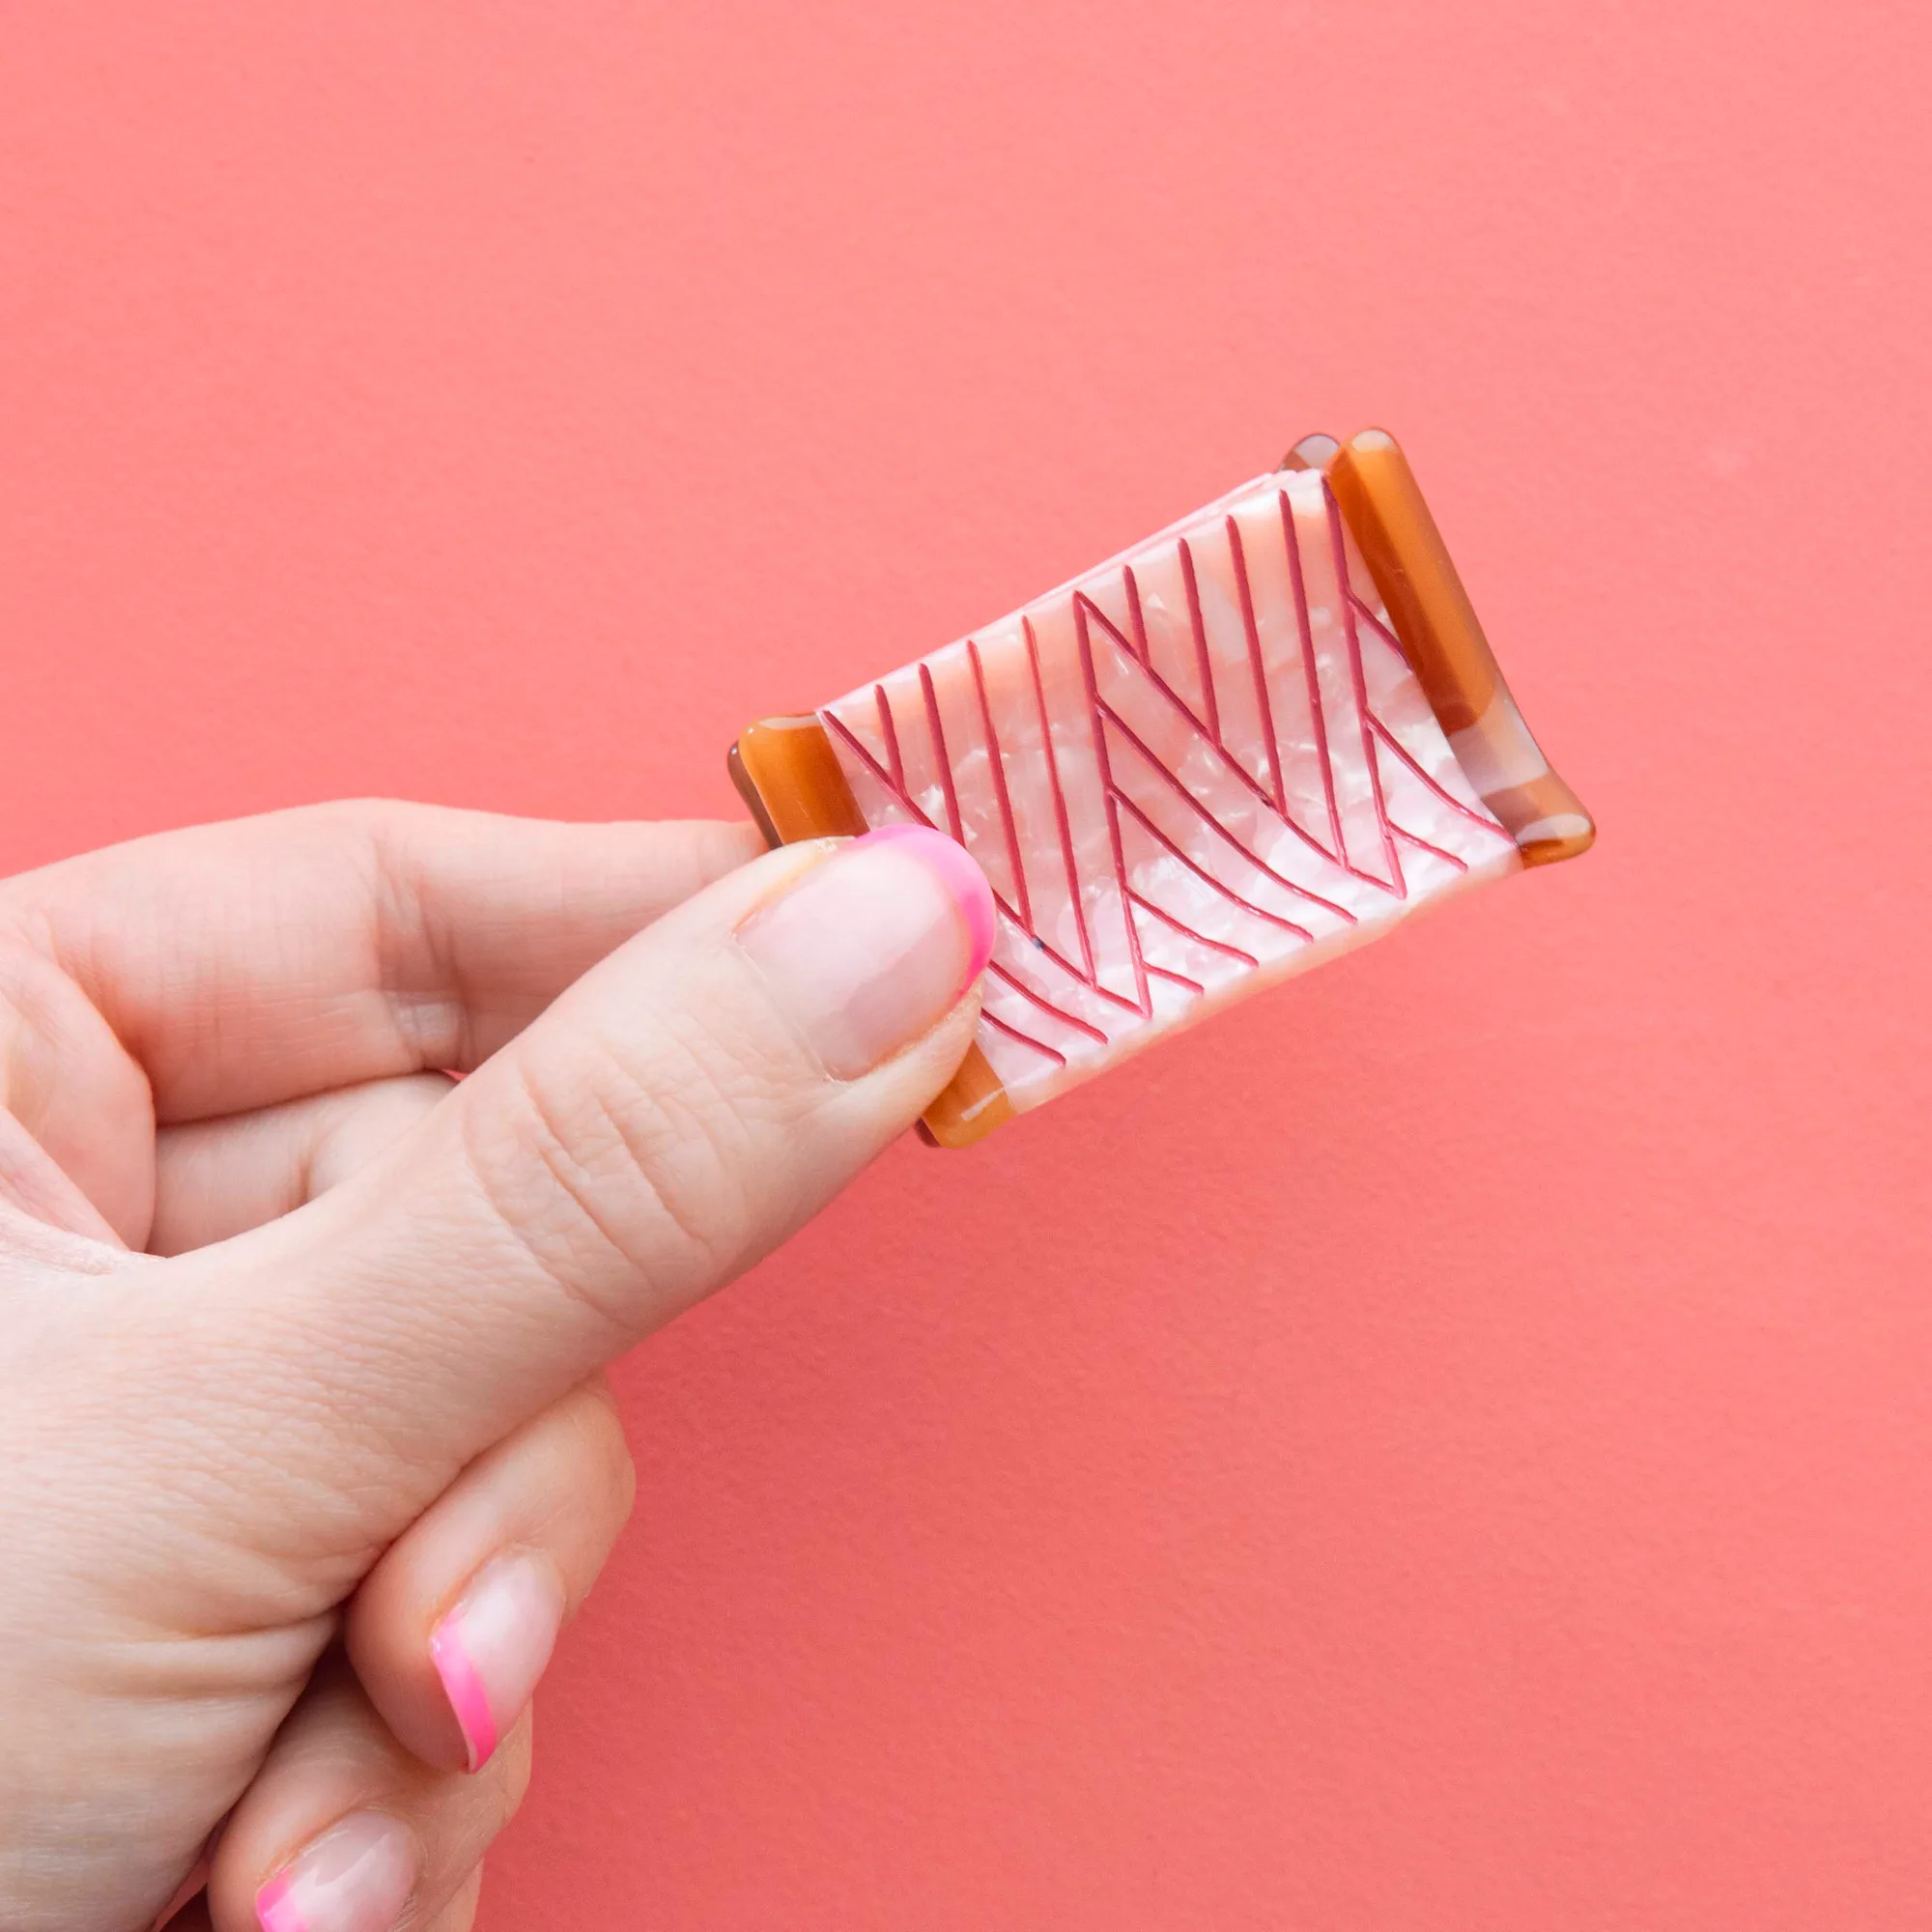
- Thread Spool Mini Hair Claw Clip: Crafted from eco-friendly plant-based acetate, this small, playful clip showcases pink iridescent thread with engraved and hand-painted details. The small size and smooth acetate surface make it a good choice for half-up styles and fine hair, where a larger clip would overwhelm the gather. The pink iridescent thread is the visual focus, so keep the twist loose enough to show it.
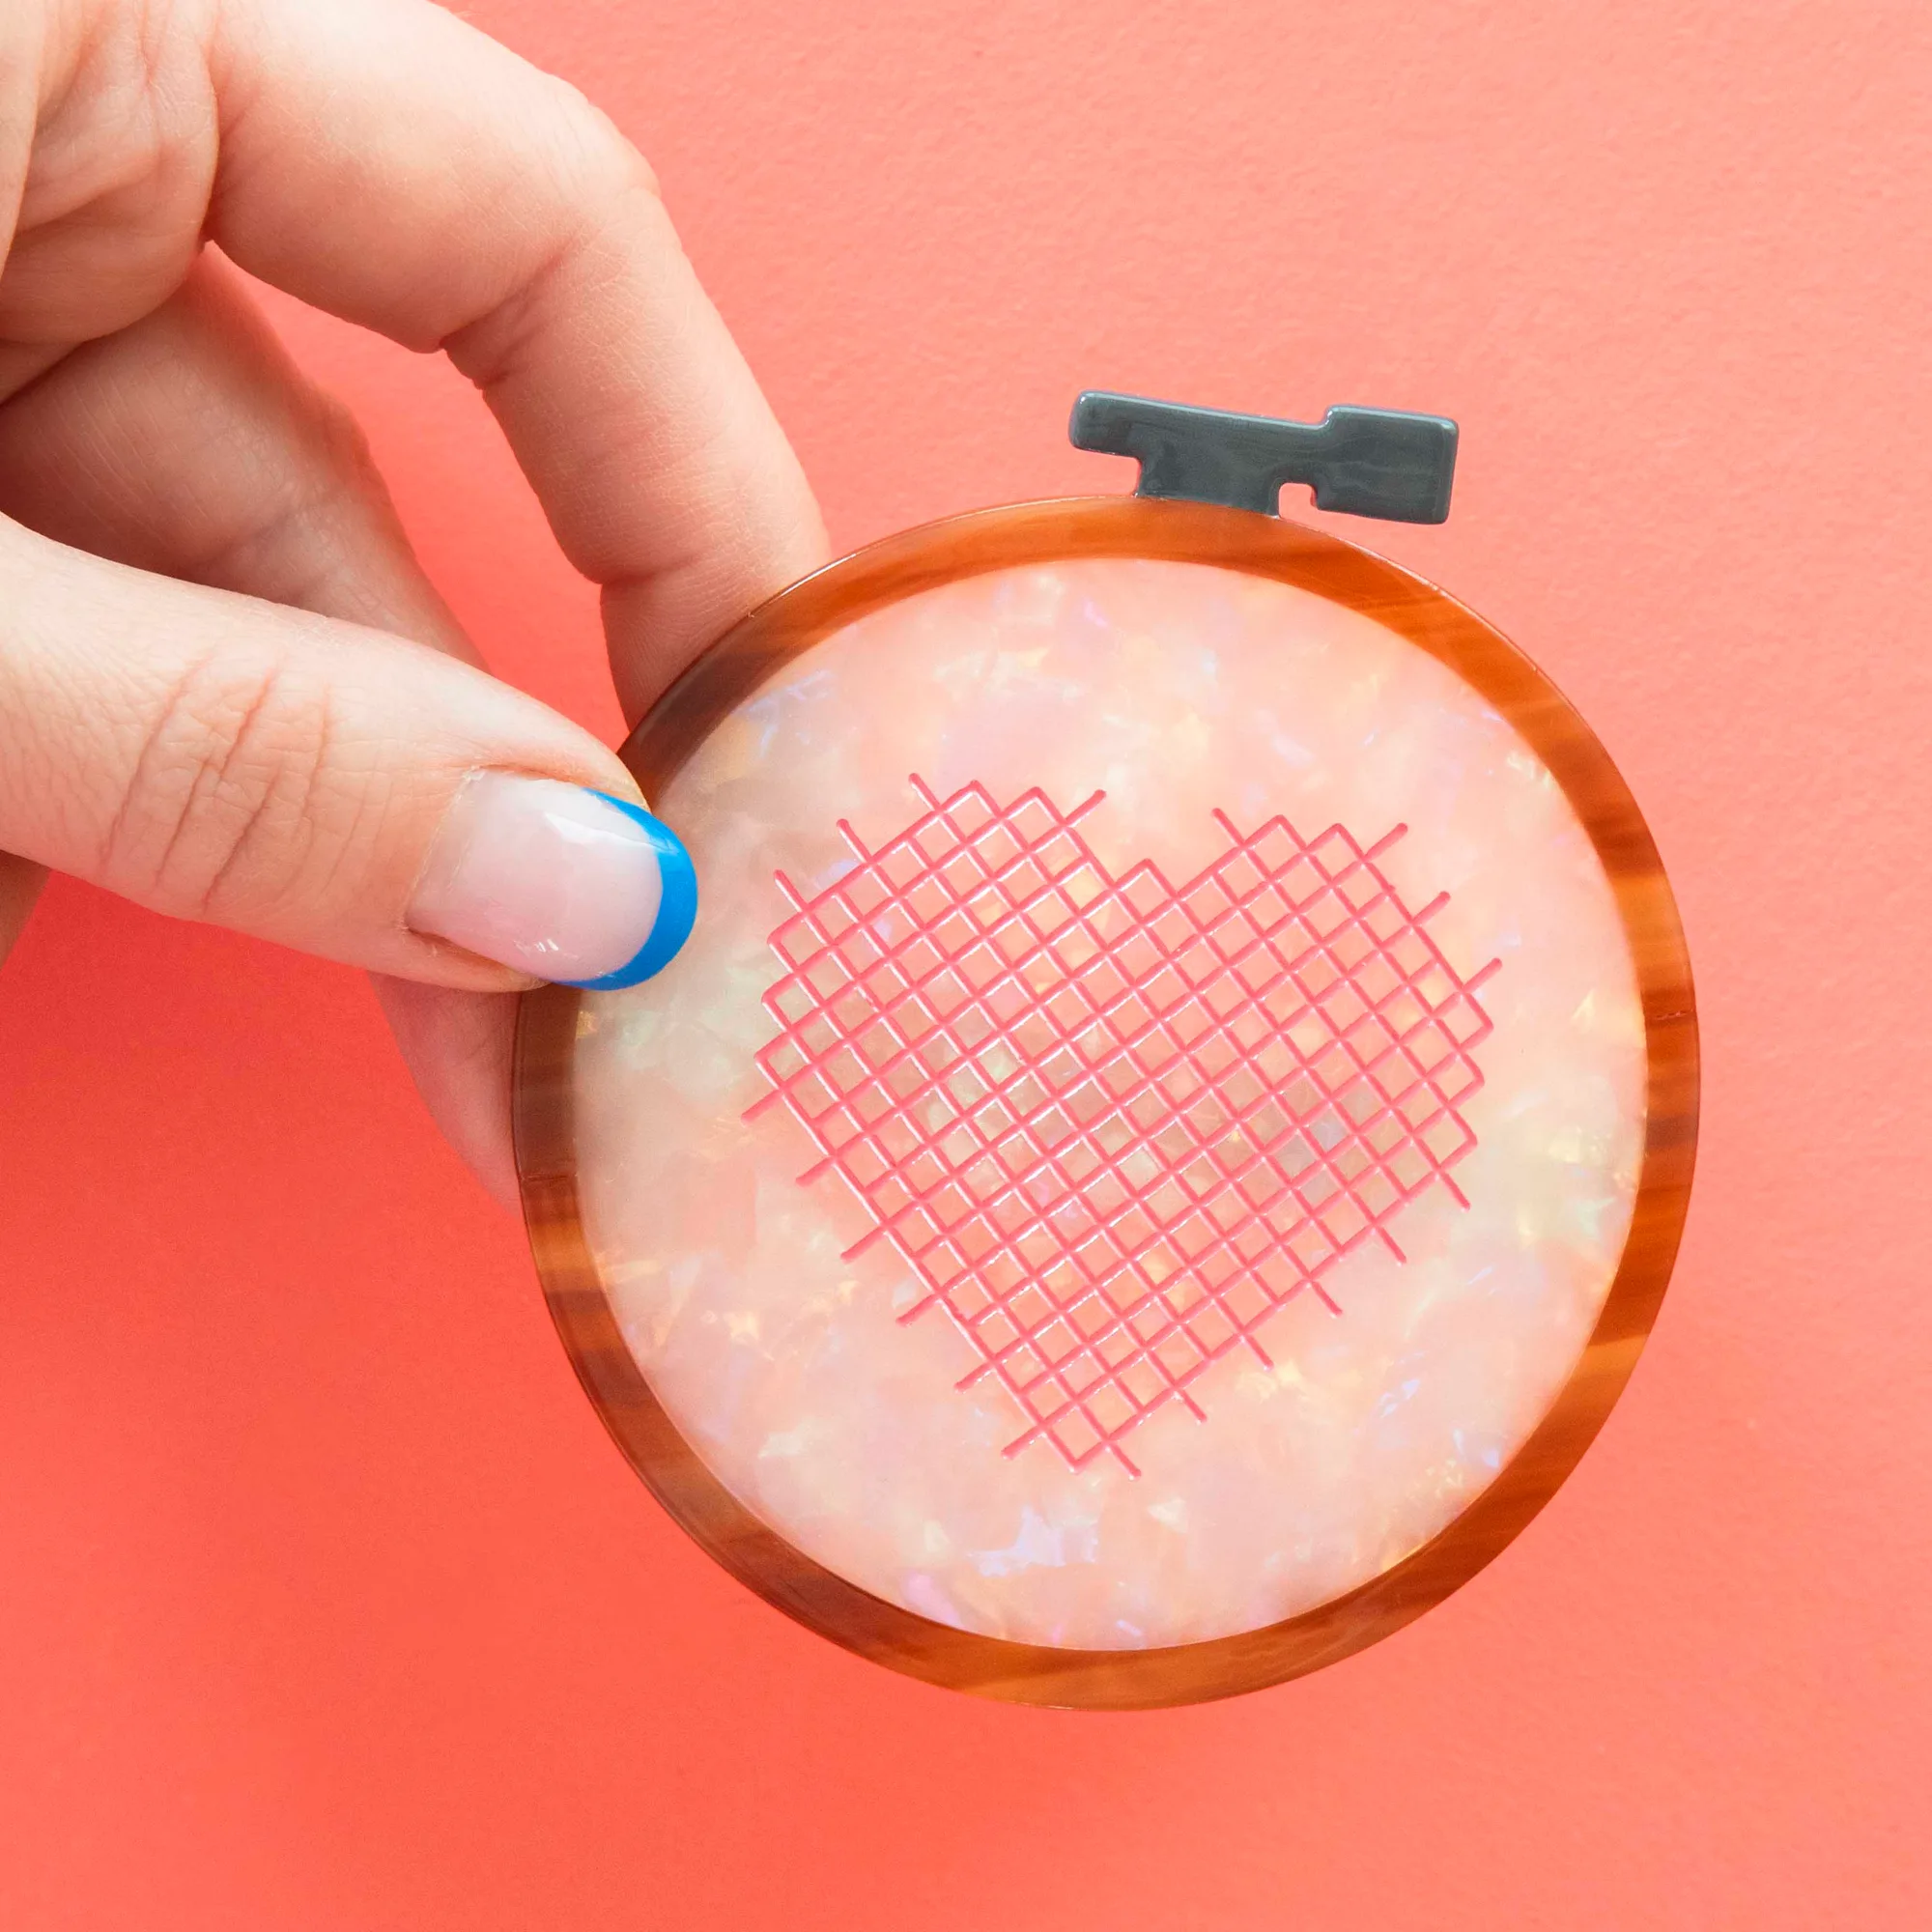
- Cross Stitch Embroidery Hoop French Barrette: Features a gently curved round embroidery hoop shape with a pearly white background and an engraved, hand-painted pink heart cross stitch design, fastening with a classic French barrette clasp. The French barrette clasp works differently from a claw clip: it holds a flat section of hair rather than a gathered twist. If your hair is too slippery for a claw clip, this is a useful alternative for side-swept styles.
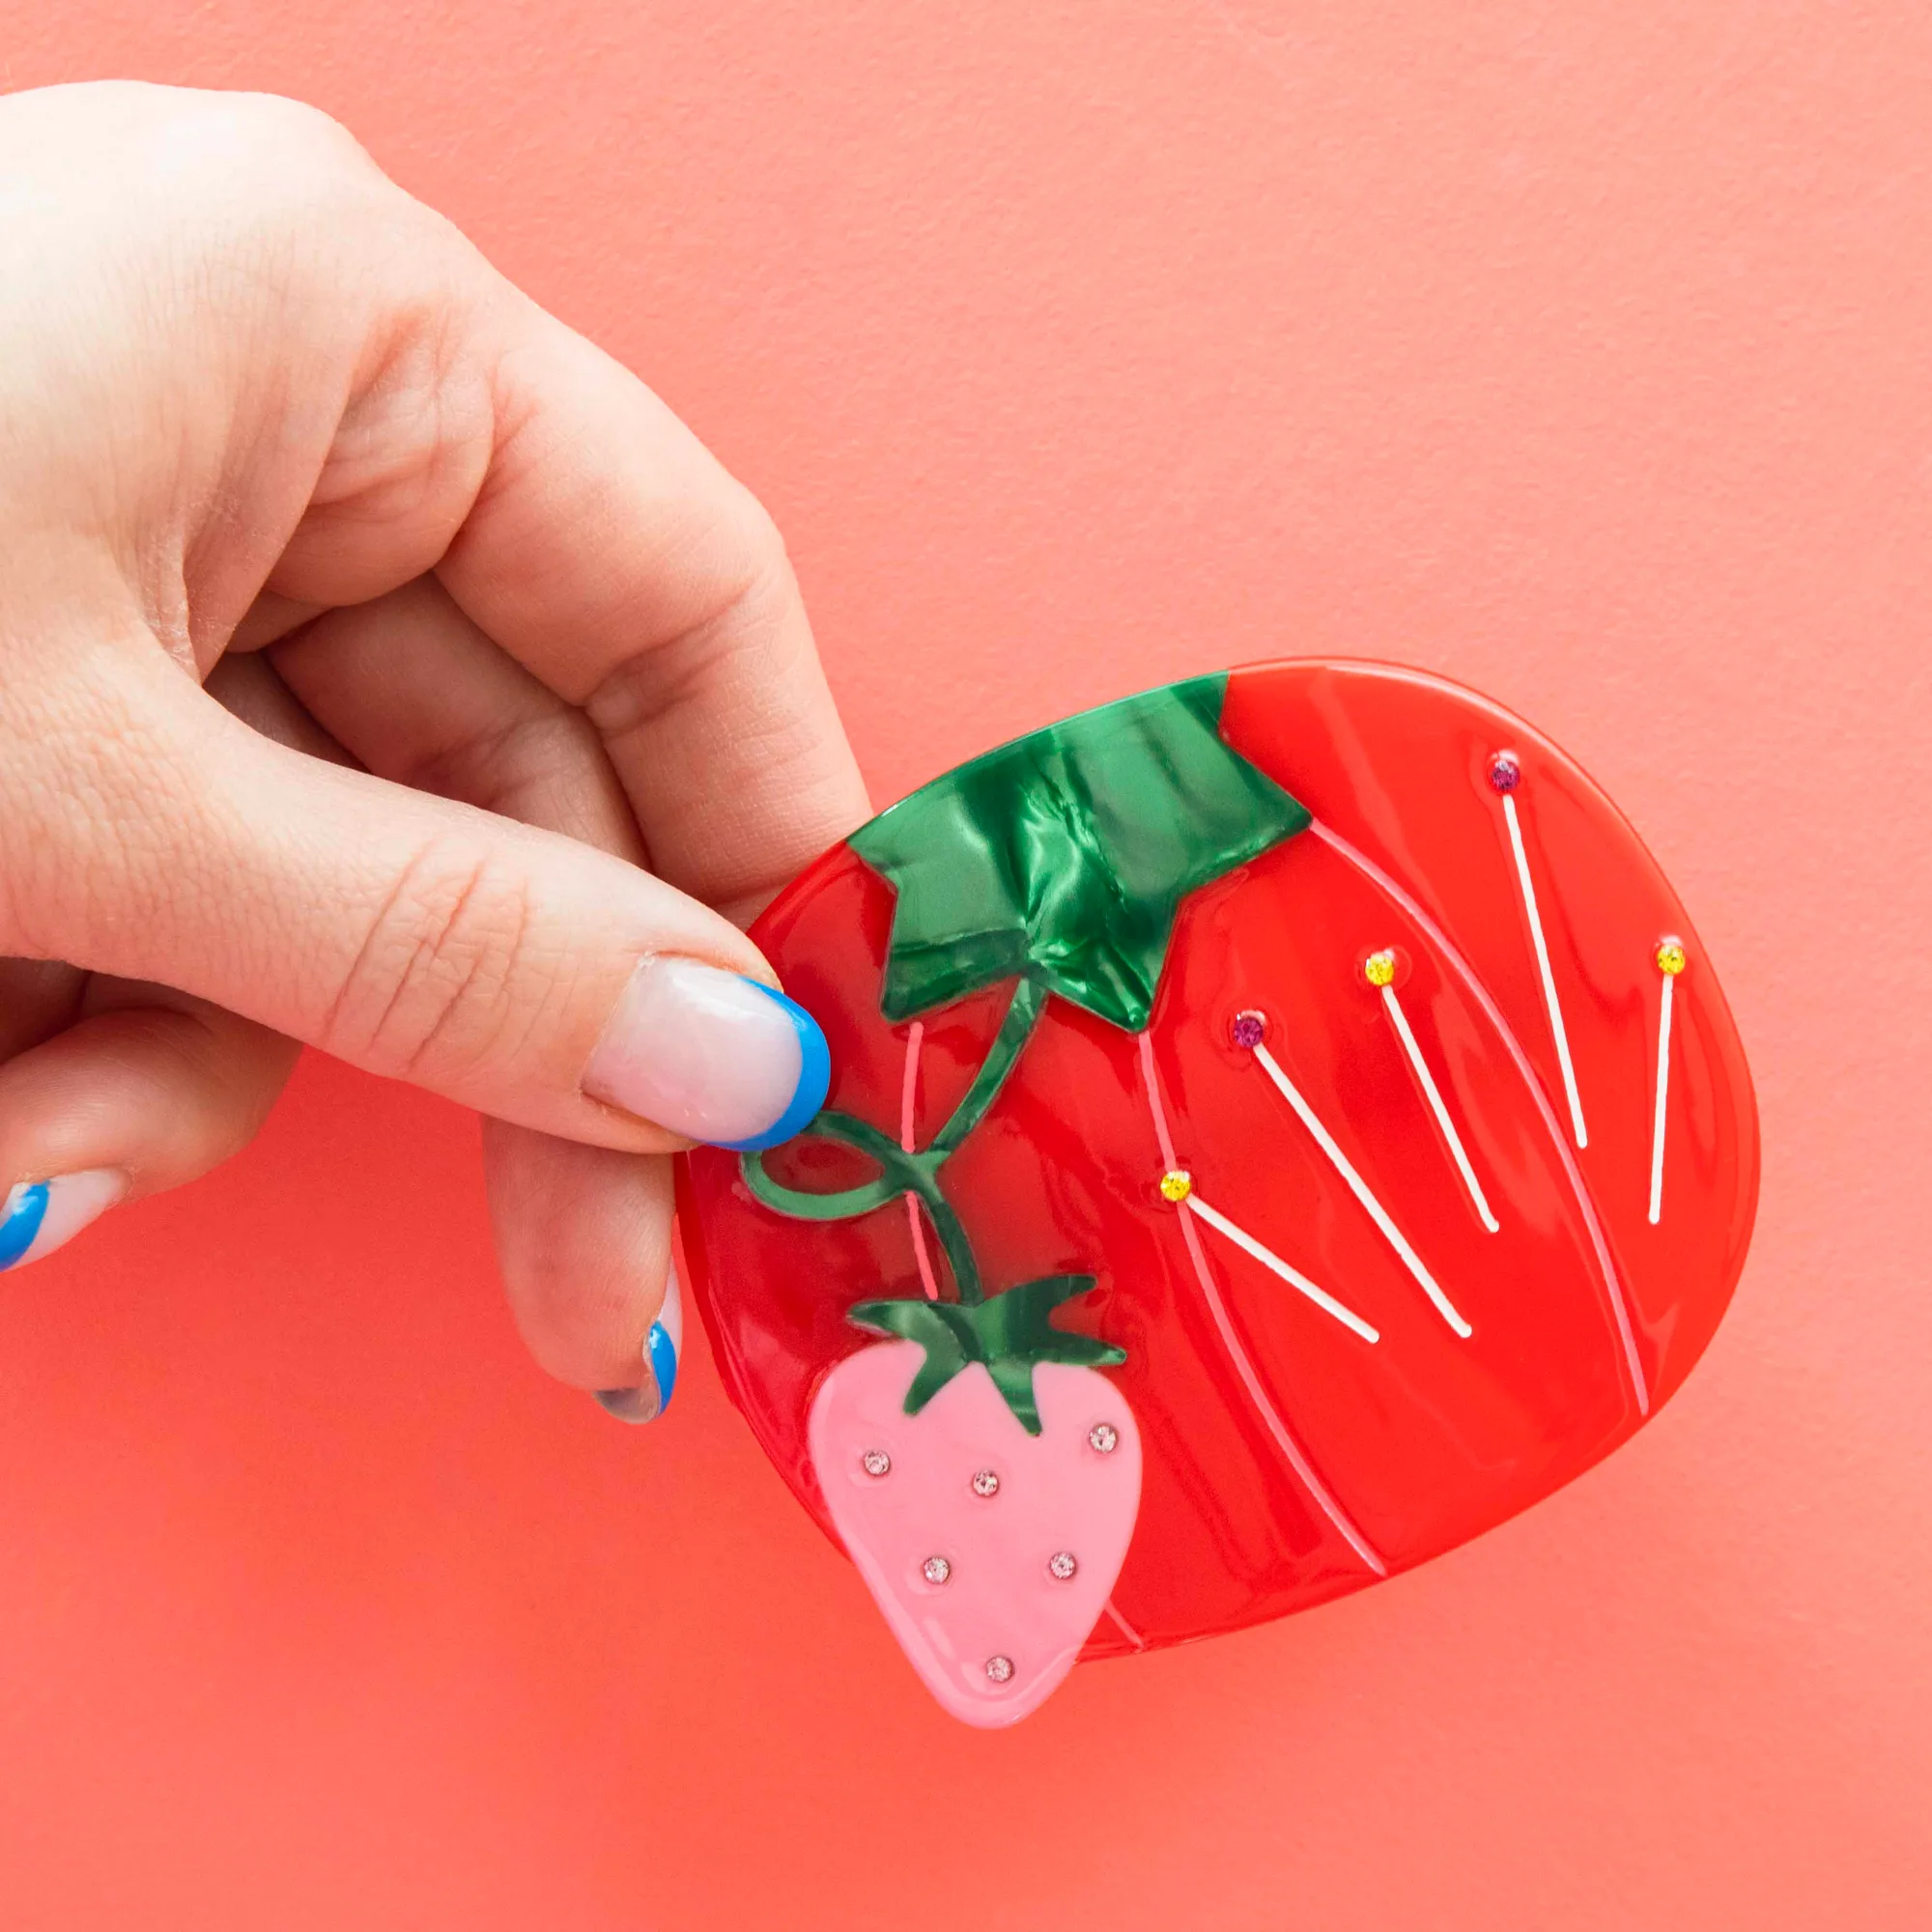
- Sewing Tomato Pincushion French Barrette: Sports a gently curved tomato design with a vibrant red base, pearly green leaves, a cute pink strawberry, engraved accents, and glimmering rhinestones, made from plant-based cellulose acetate. The rhinestones and layered tomato design add shine and dimension, so this clip reads best against solid colors. It is a stronger statement piece for days when you want the accessory to carry the outfit.
A yarn skein claw clip works best when you treat it like a small styling tool, not an afterthought. Prep with texture, twist loosely, clamp flat, and test the grip before you leave. Do that, and the clip holds comfortably while the yarn detail does the talking.