Quick Answer
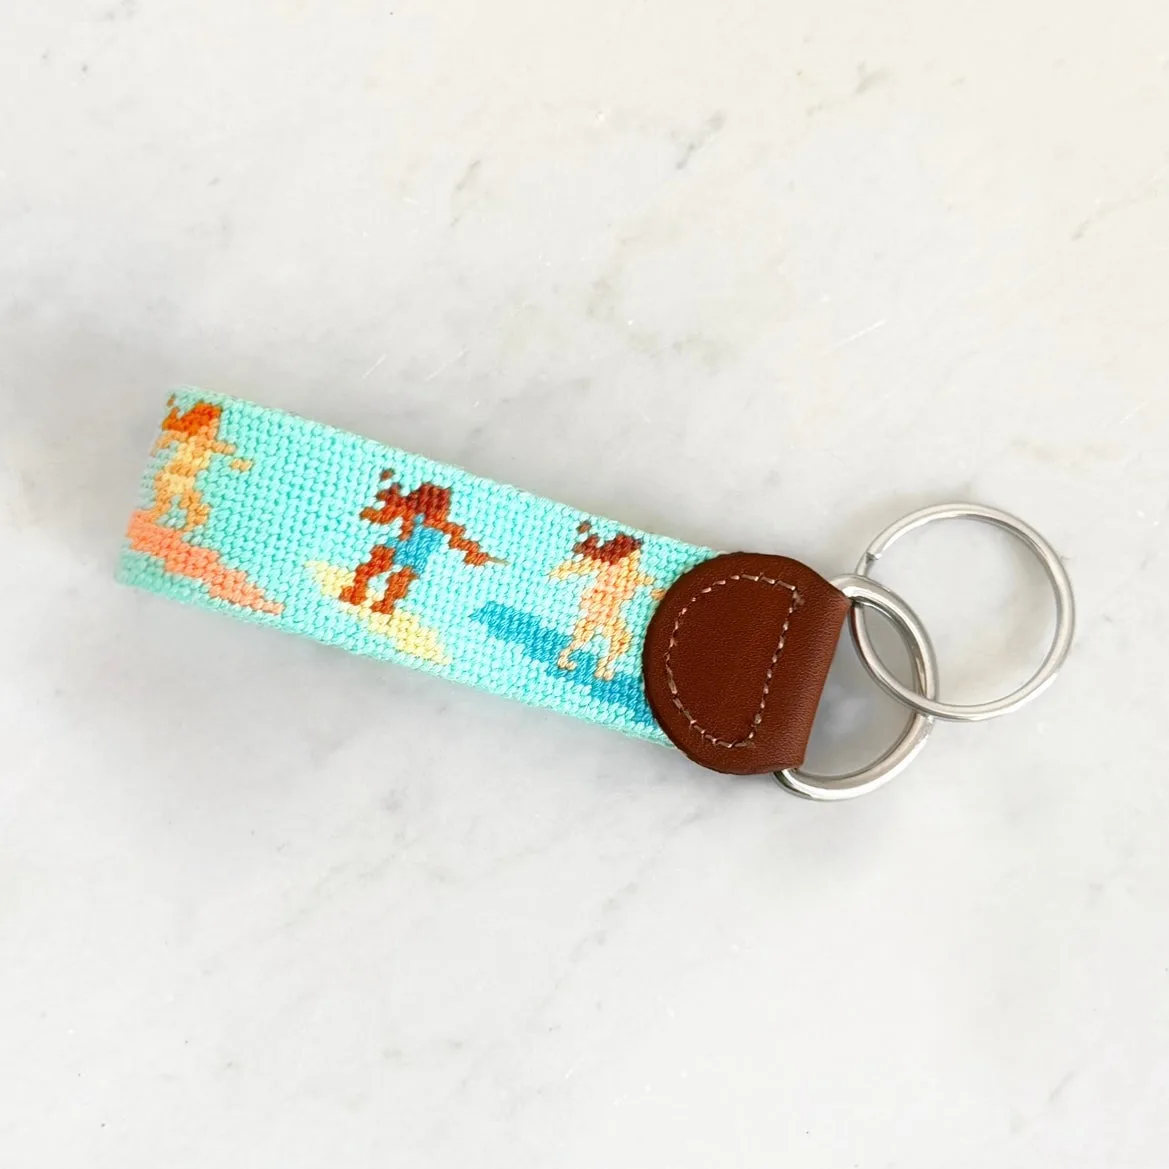
You can turn any finished needlepoint canvas into a key fob by trimming, reinforcing, and assembling it with a pre-made hardware kit. The Surfer Key Fob kit includes everything you need for a polished result.
Why Use a Key Fob Kit?
A dedicated key fob kit saves you the guesswork of sourcing hardware and instructions separately. The Surfer Key Fob kit, for example, includes a hand-painted canvas, silk and wool fibers, a tapestry needle, a stitch brochure, a thread ring, and a reusable project baggy. You only need to stitch the design and follow the finishing steps.
If you prefer a different design, you can substitute any finished needlepoint canvas that fits the fob dimensions (typically 8 x 1.5 inches). Just ensure your stitching is even and the edges are clean.
Common Mistakes to Avoid
Skipping the blocking step can cause the finished fob to warp or pucker. Always block your needlepoint before cutting or assembling.
Cutting too close to the stitching risks fraying. Leave at least a 1/4-inch seam allowance around the design.
Using the wrong adhesive or not reinforcing the back can lead to the canvas separating from the hardware over time. A strong fabric glue or double-sided tape designed for needlepoint works best.
Step-by-Step: Finish Your Needlepoint Key Fob
- Block Your Finished Canvas: Dampen the canvas and pin it to a blocking board, stretching it to its original dimensions. Let it dry completely before moving on. This ensures the design stays flat and the edges align. Skipping blocking can cause the fob to warp after assembly.
- Trim the Canvas to Size: Using sharp scissors, cut the canvas about 1/4 inch outside the stitched design. For the Surfer Key Fob, the finished canvas should be roughly 8 x 1.5 inches. Cut carefully to avoid snipping any threads. Leave a consistent seam allowance to prevent fraying.
- Reinforce the Back: Apply a thin layer of fabric glue or double-sided adhesive tape to the back of the canvas. Press it onto a piece of felt or stiff interfacing cut to the same size. This adds durability and prevents the canvas from stretching. Use a glue that dries clear and flexible.
- Insert Into the Key Fob Hardware: Slide the reinforced canvas into the metal or leather key fob holder. If using a kit like the Surfer Key Fob, the hardware typically has a slot or clamp. Press firmly to secure the canvas in place. Check that the design is centered before finalizing the fit.
- Add a Charm or Personal Touch (Optional): Attach a small charm or bead to the key ring or a jump ring on the fob. This step is optional but adds personality. Ensure any added weight doesn't strain the canvas or hardware. Keep charms lightweight to avoid pulling on the stitching.
Recommended Product
-
Surfer Key Fob: The Surfer Key Fob kit includes a hand-painted, stitch-painted needlepoint canvas on 18 mesh, measuring 8 x 1.5 inches. The pre-painted canvas eliminates guesswork, and the compact size is ideal for a key fob project that stitches up quickly.
Surfer Key Fob