Quick answer
Install the Kreg 12' Self-Adhesive Measuring Tape on your workbench or saw fence for quick, repeatable measurements without reaching for a separate tape measure.
Why the Kreg self-adhesive tape works for accurate cuts
A self-adhesive measuring tape eliminates the need to hold a tape measure in place while marking. Once applied, you can read measurements directly on the surface, which reduces errors from misalignment or tape movement. The Kreg tape is only 1/2" wide, so it fits narrow fences and bench edges without overlapping or peeling.
The highly scuff-resistant metallic surface means it holds up to shop use—tools, clamps, and debris won't quickly wear away the markings. You can also choose left-to-right or right-to-left reading, which is helpful if your dominant eye or setup makes one direction easier to read.
Limitations to consider before installing
The tape is self-adhesive, so it bonds permanently once applied. If you misalign it, removing it cleanly is difficult. Measure twice and align carefully before pressing down. Also, the tape is designed for smooth, flat surfaces. On rough or uneven wood, the adhesive may not grip fully, leading to bubbles or lifting over time.
Because the tape is metallic, it can reflect light and cause glare in bright shop conditions. Position your lighting to avoid reading errors from glare. Finally, the tape is 12 feet long—enough for most workbenches and miter saw fences, but not for longer cutting tables. For those, you may need multiple strips or a different solution.
Comparing the Kreg tape to other measuring methods
A standard retractable tape measure requires you to hook, extend, read, and then mark—each step introduces potential error. A self-adhesive tape stays in place, so you can mark directly at the measurement line. For repetitive cuts, like cutting multiple boards to the same length, a fence-mounted tape lets you set stops without remeasuring each time.
However, a self-adhesive tape is fixed. You cannot adjust the zero point after installation. If your saw blade kerf or fence offset changes, you'll need to compensate mentally or add a separate stop block. For most hobbyist woodworkers, the convenience outweighs this limitation.
How to install and use the self-adhesive measuring tape for accurate cuts
- Clean and dry the surface: Wipe down the area where you'll place the tape with a degreaser or isopropyl alcohol. Remove all dust, oil, and debris. The adhesive needs a clean surface to bond properly. A dirty surface is the most common cause of tape peeling. Even a thin layer of sawdust can reduce adhesion.
- Mark the starting point: Decide where the zero end of the tape should be. For a saw fence, align the zero with the blade's cutting edge when the fence is at its closest position. For a workbench, align it with your reference edge. If you set the zero incorrectly, every cut will be off by the same amount. Double-check with a standard tape measure before pressing down.
- Peel and align the first few inches: Peel back a few inches of the backing paper and position the tape at your marked starting point. Keep the tape straight and parallel to the edge. Press down only the exposed section. Do not peel the entire backing at once. If you misalign, you cannot reposition the whole strip. Work in small sections.
- Smooth the tape as you go: Slowly peel more backing while pressing the tape down with a clean cloth or a plastic scraper. Push out air bubbles toward the unpeeled edge. Bubbles create raised areas that can catch sawdust and cause reading errors. Work from the center outward to minimize them.
- Trim the tape to length: Once the tape is fully applied, use sharp scissors to cut the end cleanly. If you need to stop short of a corner, trim the tape at an angle to avoid a sharp point that could lift. A straight cut across the tape is fine, but a slight angle reduces the chance of the corner catching on tools or clamps.
- Verify the alignment with a standard tape measure: After installation, measure a known distance (e.g., 12 inches) from the zero point using a separate tape measure. Compare the reading on the self-adhesive tape. If the readings differ by more than 1/32 inch, the tape may have stretched during application. Remove and reinstall with a new strip.
- Use the tape for repetitive cuts: To cut multiple pieces to the same length, set a stop block at the desired measurement on the tape. Place your workpiece against the stop block and make the cut. For even greater accuracy, use a digital caliper to set the stop block, then read the final position on the tape as a cross-check.
Product facts
-
12' Self-Adhesive Measuring Tape: 1/2" (13mm) wide self-adhesive tape with left-to-right and right-to-left reading options The narrow width fits tight spaces like saw fences, and the dual-reading option lets you set up the tape to match your natural reading direction, reducing measurement mistakes.
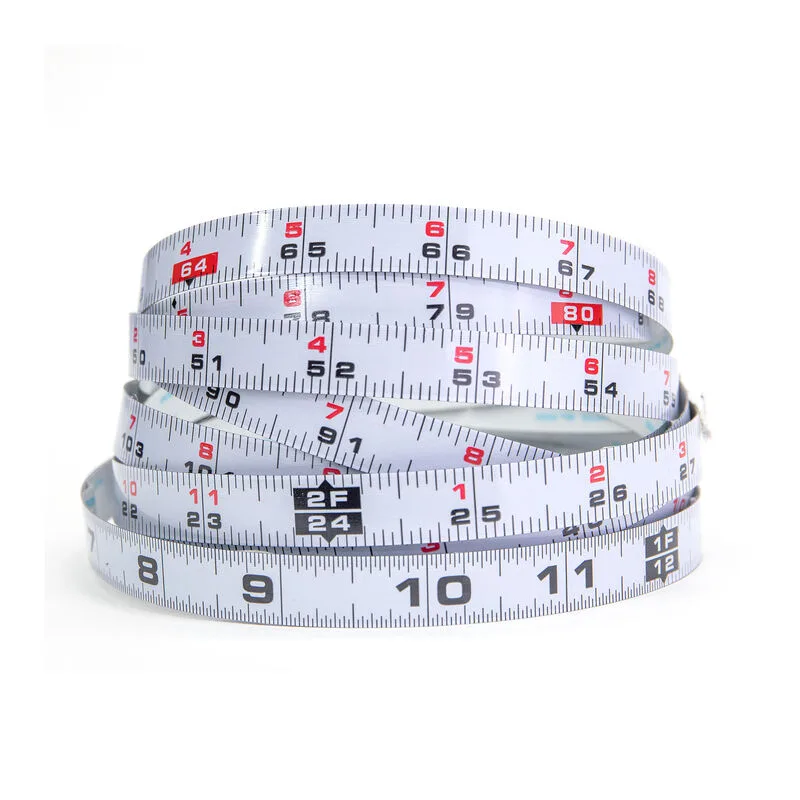
12' Self-Adhesive Measuring Tape
-
12' Self-Adhesive Measuring Tape: Highly scuff-resistant metallic surface that can be easily trimmed with scissors The tape withstands shop wear without fading, and you can cut it to length for custom applications, such as partial fence coverage or shorter bench edges.