Quick Answer
Use a 2-inch angle brush for trim by loading it lightly, holding it like a pencil, and guiding the angled bristles along edges with steady, even strokes. This brush size gives you control for cutting in and painting trim without brush marks.
Why a 2-inch angle brush works for trim
Trim—baseboards, door frames, window casings—requires precision. A 2-inch angle brush is narrow enough to follow tight edges but wide enough to cover flat surfaces efficiently. The angled bristles let you see the contact point clearly, which helps you stay on the line.
The brush's ultra-soft polyester filaments with finely tapered ends are designed to deliver sharp, clean lines with virtually no brush marks. That means less sanding and touching up after the paint dries.
Trade-off: a 2-inch brush is slower than a larger brush for broad areas, but for trim and cutting in, the control is worth the extra time. If you're painting a whole room, pair it with a roller for the walls and use the brush only for edges and trim.
Common mistakes to avoid
Overloading the brush is the most common error—too much paint causes drips and thick, uneven coats. Dip only about a third of the bristle length into the paint and tap off the excess.
Another mistake is painting with a dry brush or using too much pressure, which can create streaks and brush marks. Let the brush glide with minimal pressure, and reload often rather than pushing a nearly empty brush.
Also, don't ignore the angle: use the long side of the bristles against the trim edge for better control. Turning the brush the wrong way makes it harder to keep a straight line.
Step-by-Step: Using a 2-Inch Angle Brush for Trim
- Prepare the brush: Before painting, lightly dip the bristles into paint—only about a third of the length. Tap the brush against the side of the can to remove excess. This prevents drips and thick coats. Checkpoint: The brush should feel damp, not dripping.
- Hold the brush correctly: Grip the handle like a pencil, near the ferrule, for better control. Keep your wrist steady and use your arm to guide the brush along the trim edge. Avoid a tight fist grip—it causes fatigue and shaky lines.
- Cut in along edges: Use the long side of the angled bristles to trace along the trim where it meets the wall. Pull the brush in smooth, continuous strokes, letting the bristles follow the edge naturally. Don't press hard—let the bristles do the work.
- Paint the trim surface: After cutting in, use the brush to paint the flat face of the trim with long, even strokes. Work in sections, overlapping slightly to avoid missed spots. Keep a wet edge to avoid lap marks.
- Clean and store the brush: Rinse the brush thoroughly with soap and water (for latex paint) until the water runs clear. Reshape the bristles and let it dry flat or hang it. This extends the brush's life. Never leave a brush soaking in water—it can ruin the handle and bristles.
Product Facts
-
2" Angle Paint Brush: The 2” angle brush is made of ultra-soft polyester filaments with finely tapered ends to deliver sharp, clean lines with virtually no brush marks. The soft, tapered bristles help you achieve a smooth finish on trim without the need for excessive brushing or sanding.
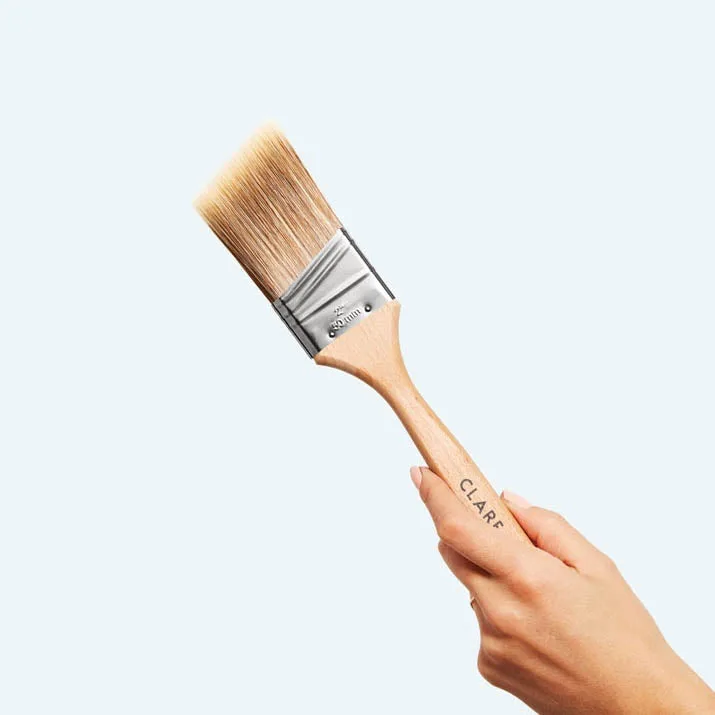
2" Angle Paint Brush