Quick Answer
A film changing bag lets you load film into a developing tank anywhere, no darkroom needed. The key is to practice the motions before sealing the bag and to keep your workspace clean and dry.
Why You Need a Changing Bag for Home Developing
A changing bag is the most portable solution for loading film into a developing tank. It blocks all light so you can handle film safely even in a bright room. Without one, you'd need a completely dark room or a dedicated darkroom, which isn't practical for most home setups.
The Paterson Changing Bag is a popular choice because it's compact and folds small enough to fit in a camera bag. Its 27.5 x 27.5-inch interior gives you enough room to work with 35mm and 120 film reels without feeling cramped.
Common Mistakes to Avoid
The biggest mistake is rushing. If you forget to close the bag's zipper fully, light leaks in and ruins the film. Another frequent error is loading the reel incorrectly inside the bag, which causes film to stick or overlap. Take your time and double-check each step before you start.
Also, avoid working with sweaty or damp hands. Moisture can make film stick to the reel or the bag's interior, leading to scratches or uneven development.
Step-by-Step Guide: Loading a Developing Tank in a Changing Bag
- 1. Prepare Your Workspace: Place the changing bag on a clean, flat surface. Inside the bag, put your developing tank (with reels removed), film canisters, scissors, and a bottle opener or can opener. Keep the bag's zipper open wide. Make sure your hands are clean and dry before you start.
- 2. Insert Your Arms and Seal the Bag: Put your arms through the elastic cuffs, then zip the bag closed completely. The cuffs should be snug but not tight. Check that the zipper is fully sealed along the entire opening. A common mistake is leaving a small gap in the zipper. Run your fingers along the zipper track to confirm it's closed.
- 3. Open the Film Canister (Inside the Bag): Use the bottle opener to pry the cap off the film canister. For 35mm film, pull the film spool out. For 120 film, carefully peel the tape seal and unroll the backing paper. Work slowly to avoid static electricity or kinking the film. If the film feels stuck, don't yank it. Gently wiggle the spool to free it.
- 4. Load the Film onto the Reel: Guide the film onto the developing reel. For Paterson reels, ratchet the film onto the spiral by twisting the reel halves back and forth. The film should slide in smoothly without force. If it catches, back up and try again. Never force the film. If it stops, you may have loaded it at the wrong angle or the reel is damp.
- 5. Place the Loaded Reel into the Tank: Once the film is fully on the reel, drop the reel into the developing tank. Put the lid on and tighten it securely. Make sure the light trap (the funnel-shaped top) is properly seated. Double-check that the lid is tight. A loose lid can let light in during the next steps.
- 6. Remove the Bag and Proceed to Develop: Unzip the bag and remove your arms. You now have a sealed tank with film inside. You can turn on the lights and proceed with the chemical development steps as normal. If you hear any rattling or the lid feels loose, stop and redo the process inside the bag.
Product Facts
-
Paterson Changing Bag (27.5 x 27.5"): The Paterson Changing Bag is small enough to fit in a camera bag and is considered one of the most essential and simplest pieces of equipment a photographer can carry. Its portability means you can develop film at home, on the road, or in a hotel room without needing a darkroom.
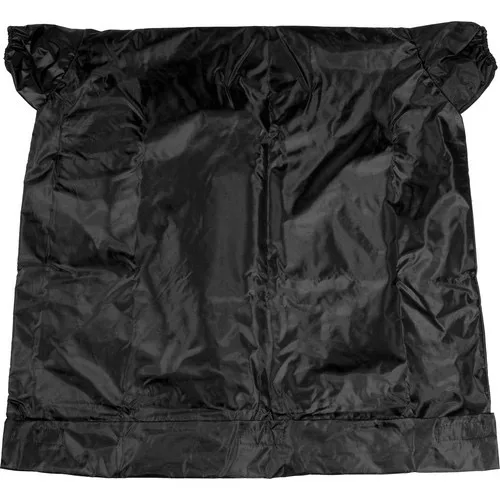
Paterson Changing Bag (27.5 x 27.5")