Quick Answer
Use a layer cake bundle by planning a layout, cutting squares as needed, sewing rows, and pressing seams to create a quilt top. This method saves cutting time and works for many patterns.
Why Start with a Layer Cake Bundle?
Layer cake bundles are precut stacks of 10-inch fabric squares, usually 42 pieces. They eliminate the need to cut yardage, so you can jump straight into arranging and sewing. This makes them ideal for quilters who want to finish a project quickly or try a new pattern without committing to large fabric cuts.
The main trade-off is that you are limited to the fabrics in the bundle. If you need more variety or specific colors, you may need to supplement with coordinating solids or prints. Also, because the squares are all the same size, some patterns require you to cut them down, which creates waste if you are not careful.
Choosing the Right Pattern
Not all quilt patterns work well with precut 10-inch squares. Simple grid layouts, disappearing nine-patch, and rail fence designs are great matches. More complex patterns with many different piece sizes may require additional cutting or extra fabric.
For your first layer cake project, pick a pattern that uses the squares whole or cut into halves or quarters. This keeps the process straightforward and reduces the chance of miscutting.
Step-by-Step Guide: Using a Layer Cake Bundle
- 1. Plan Your Layout: Open the bundle and arrange the squares on a design wall or large table. Play with placement until you are happy with the color and pattern distribution. Take a photo for reference. Common mistake: Skipping this step leads to unbalanced color placement. Always preview before sewing.
- 2. Cut Squares if Needed: If your pattern requires smaller pieces, cut the 10-inch squares into halves (5x10 inches), quarters (5x5 inches), or other shapes. Use a rotary cutter and ruler for accuracy. Checkpoint: Measure twice before cutting. Cutting all squares at once can waste fabric if you change your mind later.
- 3. Sew Squares into Rows: Sew the squares or pieces together using a 1/4-inch seam allowance. Chain piece to save time. Press seams open or to one side as your pattern directs. Common mistake: Not pressing seams consistently can cause the quilt top to pucker. Press after every row.
- 4. Join the Rows: Match seam intersections carefully and pin before sewing. Sew rows together one at a time, pressing after each addition. Checkpoint: If seams do not nest, press them open instead of forcing them flat.
- 5. Finish the Quilt Top: Once all rows are joined, square up the edges by trimming any uneven fabric. Your quilt top is now ready for batting, backing, and quilting. Common mistake: Trimming too aggressively can remove points or reduce the quilt size. Trim only the minimum needed.
Product Spotlight
-
Fruity Delights Layer Cake Bundle: The Fruity Delights Layer Cake Bundle includes 6 high-quality cotton squares with playful fruit patterns like pineapples, watermelons, oranges, and kiwis. This bundle gives you a ready-to-use mix of bright, cheerful prints that coordinate well, so you can start sewing immediately without color matching or cutting yardage.
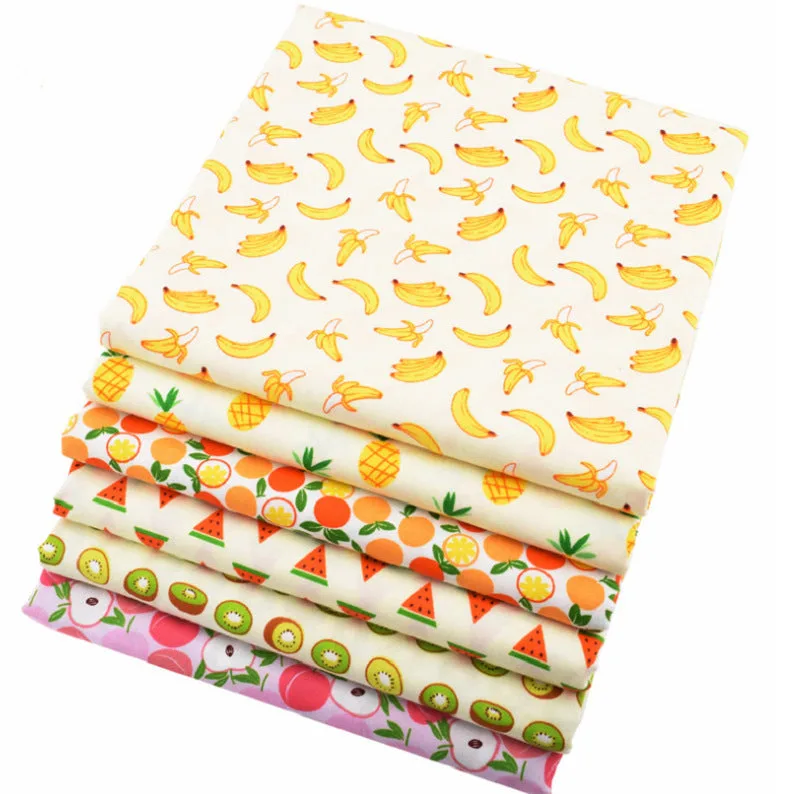
Fruity Delights Layer Cake Bundle