Quick answer
Use Dream Fitter to attach doll eyes cleanly with its pedestal, fixture, and sponge, then refine position and angle with the Dream Fitter Stick's two ends.
Why use a dedicated tool instead of fingers or putty alone
Handling doll eyes with bare fingers can transfer oils or smudge the surface, and it's hard to nudge a tiny eye into the perfect socket without disturbing the adhesive. Dream Fitter's included pedestal, fixture, and sponge let you press the eye into place without touching it, while the Dream Fitter Stick gives you a second stage of fine control after the initial set.
Step-by-step guide
- Prepare the eye socket and Dream Fitter: Place the Dream Fitter pedestal on a flat surface. Fit the sponge onto the fixture, then press the doll eye into the sponge so it rests securely. Apply your chosen adhesive (putty or glue) to the eye or socket as usual. Make sure the eye is centered on the sponge before you insert it into the socket, or the initial placement will be off.
- Insert the eye into the socket: Hold the fixture and gently guide the eye into the doll's eye socket. Press evenly so the adhesive makes full contact. Remove the fixture and sponge by pulling straight out—the eye should stay in place. If the eye moves when you remove the fixture, the adhesive hasn't set enough. Wait a few seconds before trying again.
- Adjust position with the Dream Fitter Stick: Use the thinner end of the Dream Fitter Stick to push the eye left, right, up, or down until it sits symmetrically in the socket. Work slowly to avoid dislodging the adhesive. Pushing too hard can shift the eye too far or break the adhesive bond. Make small, gentle nudges.
- Adjust angle with the Dream Fitter Stick: Use the thicker end of the stick to twirl the eye gently, rotating it to the desired gaze direction (e.g., looking straight ahead or slightly to the side). If the eye resists rotation, the adhesive may have dried too much. Adjust angle within the first minute after insertion for best results.
- Let the adhesive cure fully: Leave the doll undisturbed for the adhesive manufacturer's recommended curing time before handling or repositioning the head. Rushing this step can cause the eye to shift later. Check the adhesive package for exact cure times.
Product facts
-
Dream Fitter Stick: The Dream Fitter Stick has a thinner end for pushing eyes to adjust position and a thicker end for twirling to adjust angle. You get two precision adjustments from one tool, so you don't need to switch between different implements during placement.
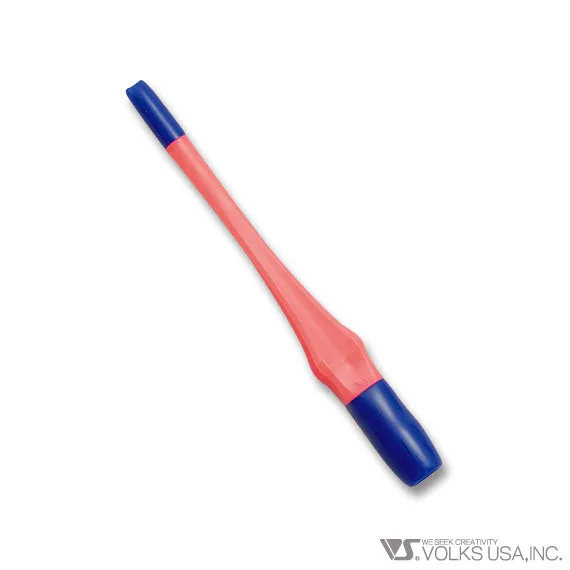
Dream Fitter Stick
-
Dream Fitter: Dream Fitter includes a pedestal, fixture, and sponge that let you attach eyes without soiling your hands. It keeps the process clean and stable, especially useful when working with sticky putty or glue that would otherwise get on your fingers.
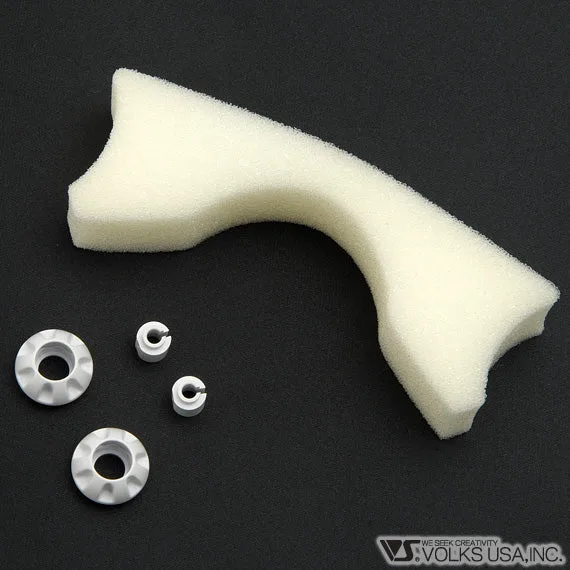
Dream Fitter