Quick Answer
Use extension tubes to turn any lens into a macro lens by mounting them between your camera body and lens, then adjust your focus distance and aperture to get sharp close-up shots.
Why Extension Tubes Work
Extension tubes are hollow metal rings that fit between your camera body and lens. Unlike teleconverters, they contain no glass elements, so they don't degrade image quality. Instead, they increase the distance between the lens and the sensor, which reduces the minimum focusing distance and magnifies your subject.
This makes them a budget-friendly alternative to a dedicated macro lens, especially if you already own a sharp prime or zoom lens. The trade-off is that you lose the ability to focus at infinity, and you'll need to move closer to your subject to get the framing you want.
Choosing the Right Extension Tube Set
Extension tubes come in sets with different lengths, typically 12mm, 20mm, and 36mm. The longer the tube, the greater the magnification. A set of three gives you flexibility to combine them for different levels of close-up work.
Make sure the tubes are compatible with your camera mount (like Canon EF). Some tubes maintain electronic communication between the camera and lens, allowing autofocus and aperture control, while others are manual only. For most users, a set with electronic contacts is worth the small extra cost.
Step-by-Step Guide to Using Extension Tubes
- Mount the Extension Tube: Attach the extension tube to your camera body first, then mount your lens onto the tube. Make sure the alignment dots line up and you hear a click. Common mistake: mounting the tube backwards or not fully locking it, which can cause light leaks or a loose connection. Check that the tube is securely locked before shooting.
- Set Your Camera to Aperture Priority or Manual: Use Aperture Priority (Av) or Manual (M) mode so you control the aperture. A smaller aperture (like f/8 to f/16) increases depth of field, which is critical for macro shots where focus is shallow. Common mistake: shooting wide open and getting only a sliver of the subject in focus. Start with f/8 and adjust based on your subject and lighting.
- Focus by Moving the Camera: With extension tubes, the focus ring has a very limited range. Instead of turning the focus ring, move the camera closer or farther from your subject until it appears sharp. Use a tripod or brace yourself to avoid camera shake. Common mistake: trying to focus by zooming or turning the ring excessively, which can cause you to miss the focus point. Practice moving in and out to find the focus sweet spot.
- Increase Light or Raise ISO: Extension tubes reduce the amount of light reaching the sensor, so you may need to increase your ISO or add a flash. A small LED light or a ring flash can help. Common mistake: using a slow shutter speed without support, leading to blurry images. If your shutter speed drops below 1/100s, raise ISO or add light.
- Review and Adjust Magnification: Take a test shot and check the magnification. If the subject is too large or too small, swap to a different tube length or combine tubes. Common mistake: using the longest tube for all subjects, which can make framing difficult. Experiment with tube combinations to get the composition you want.
Recommended Product
-
Kood Extension Tube Set DG Canon - Set of 3: The Kood Extension Tube Set DG Canon includes three hollow metal rings that fit between your camera body and lens, enabling your lens to focus closer than its normal minimum focusing distance. This inexpensive set lets you try macro photography without investing in a dedicated macro lens, and the varying lengths give you control over magnification.
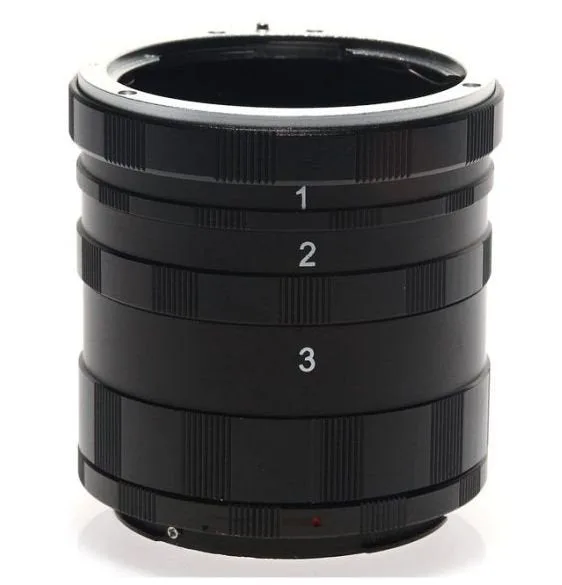
Kood Extension Tube Set DG Canon - Set of 3