Quick answer
Installing metal snap buttons and jeans buttons requires proper tool alignment and firm pressure to create a secure closure that won't pop open or loosen over time.
Why Choose Metal Over Plastic Buttons
Metal snap buttons and jeans buttons are more durable than plastic alternatives, making them ideal for high-stress areas like waistbands, jacket fronts, and bag flaps. They resist cracking in cold weather and hold up to repeated washing and wear. The trade-off is that they require a dedicated setting tool or a sturdy hammer for installation, whereas plastic snaps can sometimes be pressed by hand.
When to Use Snap Buttons vs. Jeans Buttons
Use snap buttons for closures that need to be opened and closed frequently, such as on bags, hats, and children's clothing. Jeans buttons are best for permanent fastening points like the waistband of denim or the front of a heavy coat. Mixing them in the same project is fine, but remember that jeans buttons require a larger hole and a stronger backing than snap buttons.
Step-by-Step Installation Guide
- Mark and Punch the Fabric: Use a fabric marker to indicate the exact button position. For snap buttons, punch a small hole through all layers using an awl or the tool's pointed tip. For jeans buttons, cut a slit slightly smaller than the button's shank. A common mistake is making the hole too large, which causes the button to wobble or pull out.
- Assemble the Button Parts: Separate the snap button into its cap, socket, stud, and post (or the jeans button into its face and tack). Insert the post through the fabric from the wrong side, then press the cap onto it from the right side. Double-check that the socket and stud are paired correctly; mismatched halves won't snap together.
- Set the Button with a Tool or Hammer: Place the assembled button on a hard, flat surface. Use the setting tool provided in the kit (or a hammer with a punch) to strike the center firmly. Apply one solid hit rather than several light taps. Hitting too lightly or at an angle can deform the button or leave it loose. A single firm strike works best.
- Test and Reinforce: Snap the closure open and closed a few times to check that it holds securely. If it feels loose, remove the button (by prying it apart with pliers) and install a new one. For jeans buttons, ensure the tack is fully flush against the fabric. If the button spins on the fabric, the post is not fully compressed. Re-strike it or replace the button to avoid future failure.
What You Need
-
Metal Snap Buttons & Jeans Buttons - 100 buttons!: This set includes both jeans buttons and metal button snap fasteners, all sturdy, durable, and rust proof. You get two types of closures in one kit, so you can switch between snap and jeans buttons without buying separate supplies.
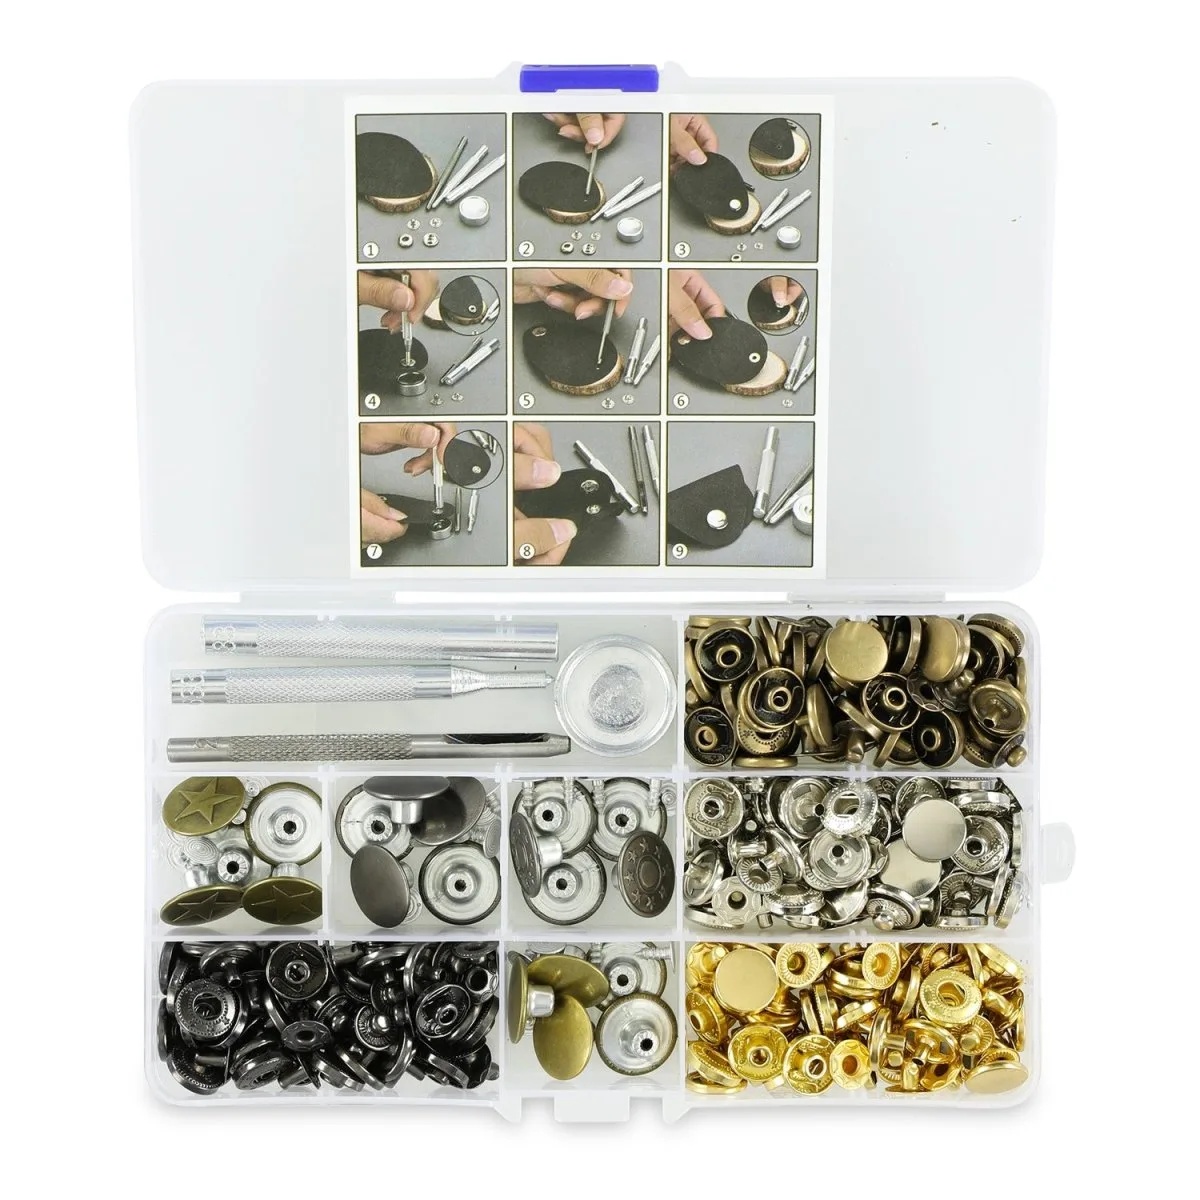
Metal Snap Buttons & Jeans Buttons - 100 buttons!