Quick Answer
The Lauren High Waist Bikini Bottom uses contrast panel sculpting and a supportive high-waist cut to flatter your natural curves. Follow these steps to choose the right size, put it on correctly, and care for it so it stays sleek all season.
Why the High-Waist Cut Works for Sculpting
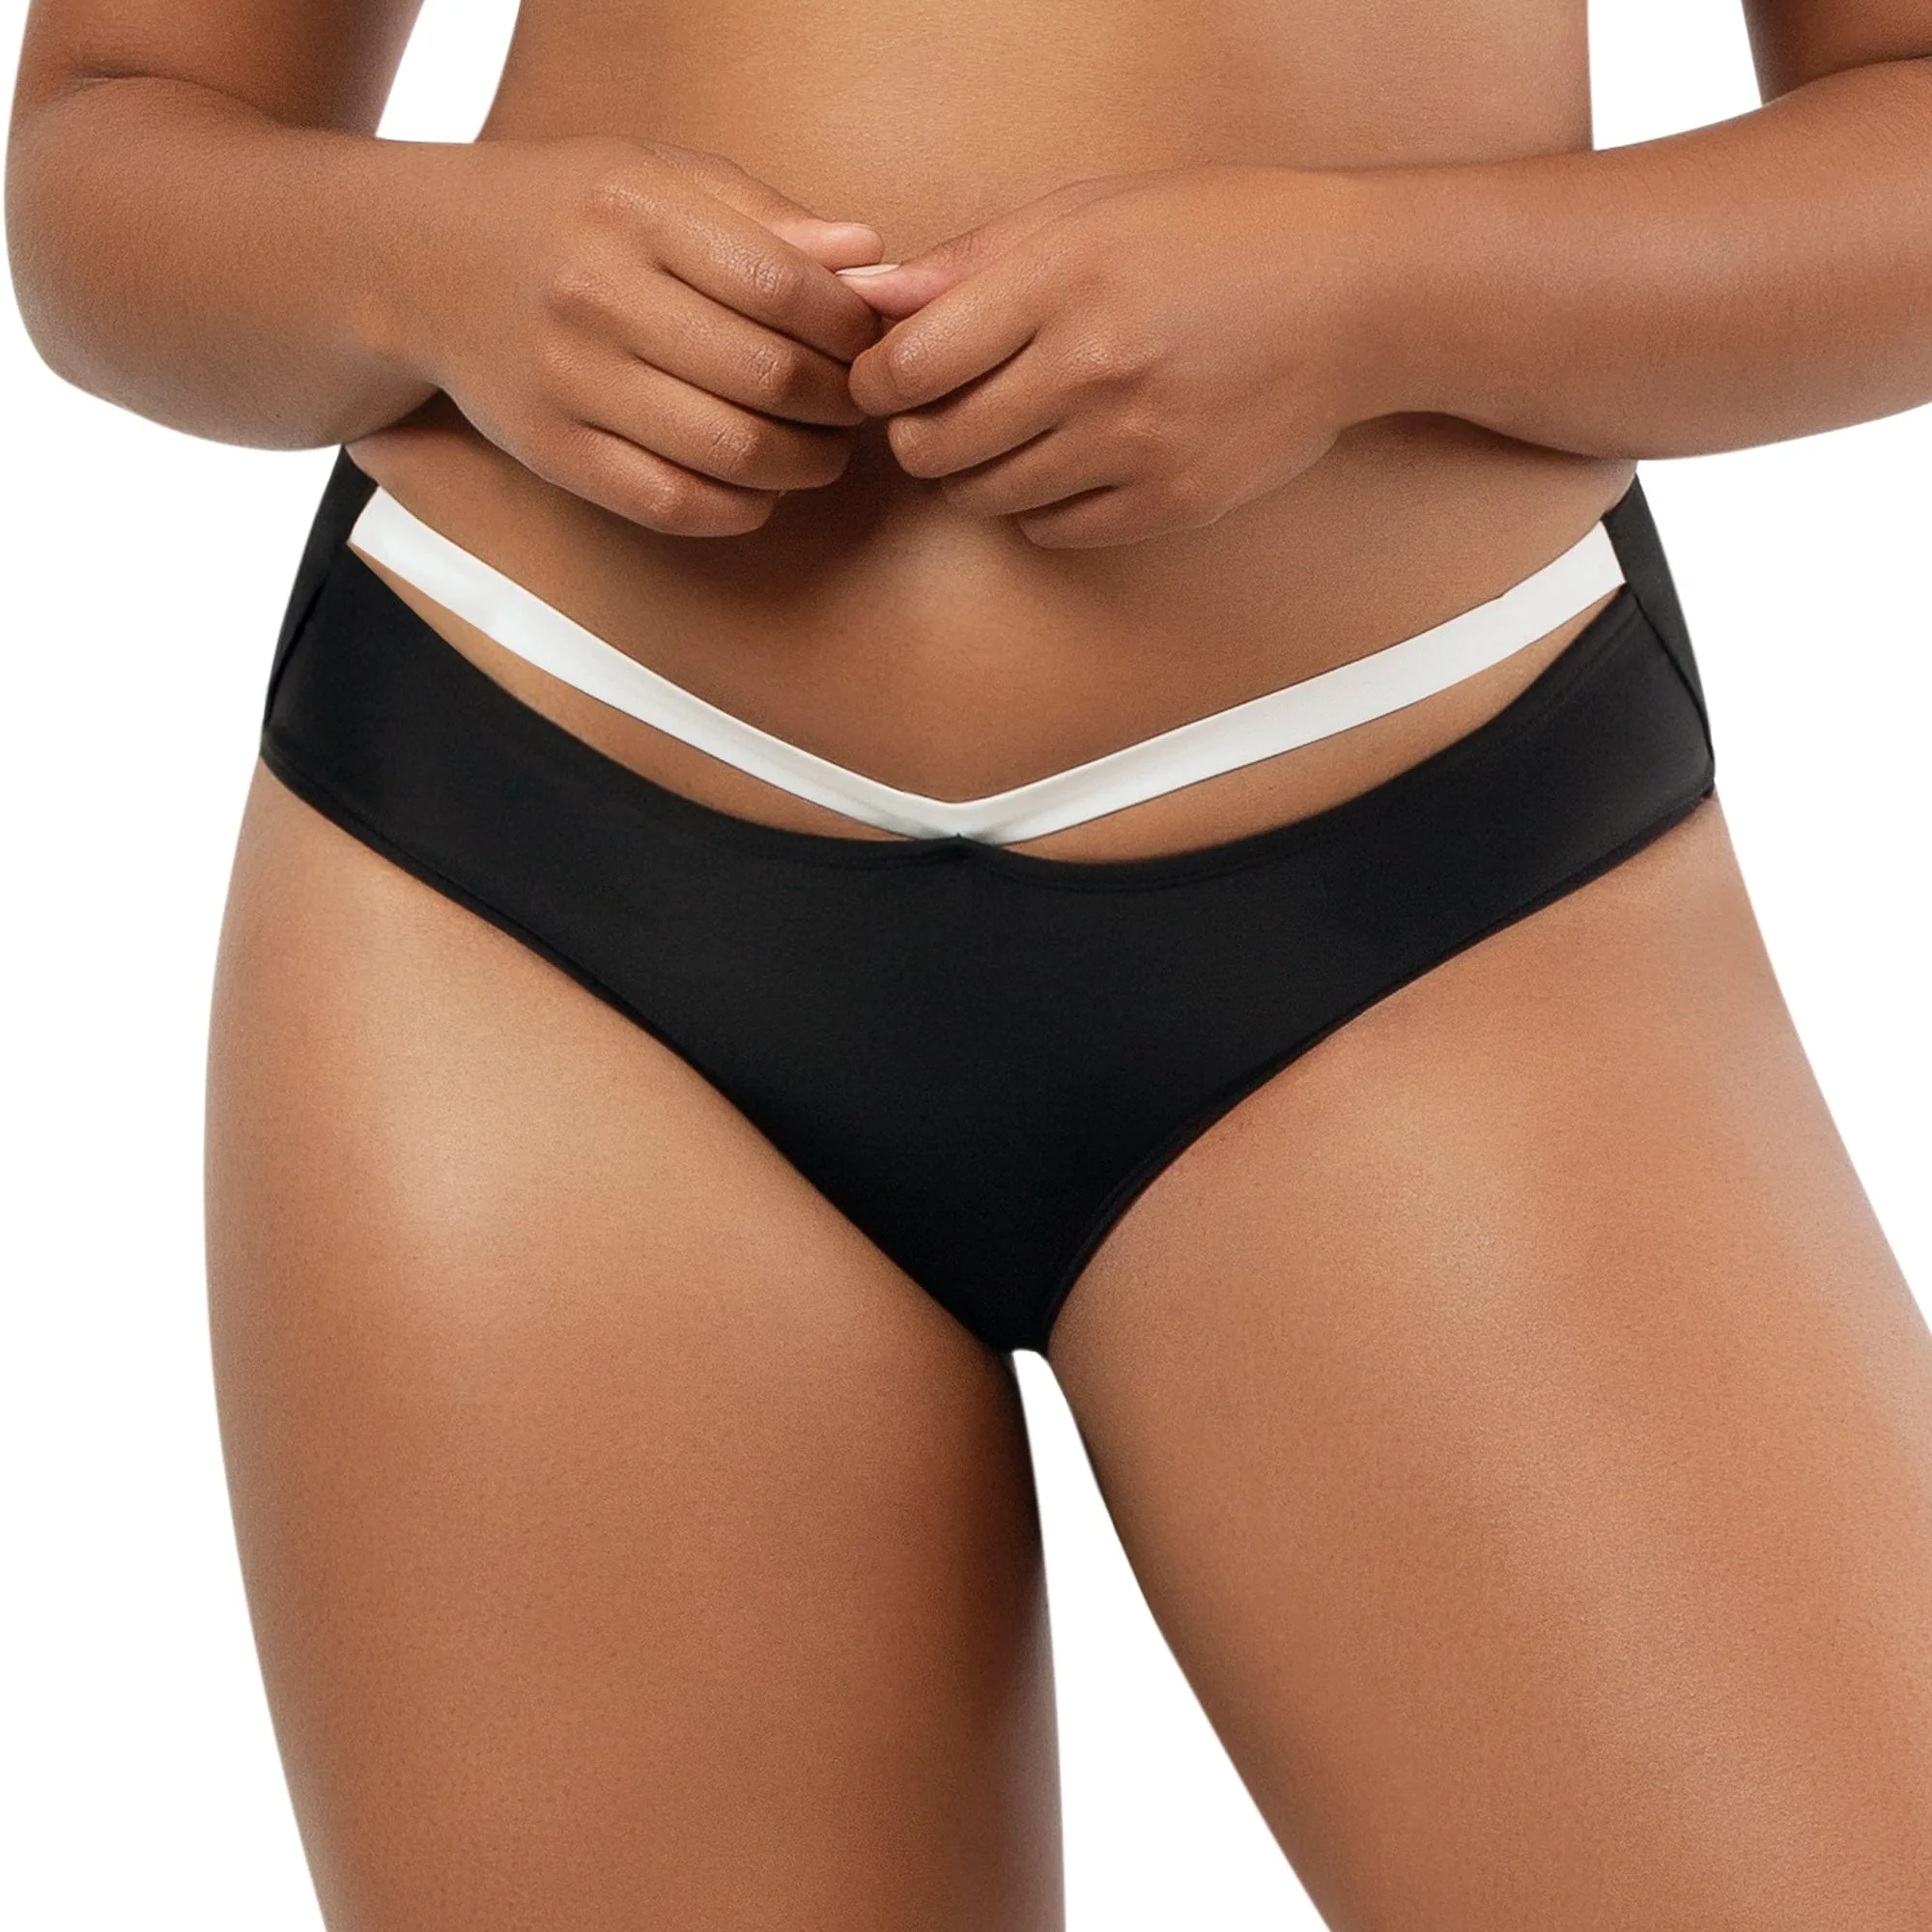
A high-waist bikini bottom naturally covers the midsection and sits at or above the natural waist, which helps create a smooth, continuous line. The Lauren design adds contrast color panels that run vertically along the sides. This visual trick draws the eye up and down rather than side to side, making the silhouette appear longer and leaner.
The sculpting effect comes from the combination of the cut and the fabric. The waistband is wide enough to stay in place without digging in, and the rear coverage is full so nothing shifts during movement. If you are used to low-rise bottoms, the higher rise may feel different at first, but it provides more security and a more polished look.
Sizing Considerations for the Lauren Bottom
The Lauren High Waist Bikini Bottom is available in multiple sizes, but because it is designed to sculpt, the fit is meant to be snug—not tight. If you are between sizes, consider going up one size for a more comfortable fit, especially if you prefer less compression around the waist.
Check the size chart on the product page and measure your natural waist and the widest part of your hips. The waistband should sit flat against your skin without rolling or leaving deep marks. If you see any gaping at the waist or hips, the bottom is too large and will not provide the intended sculpting effect.
How to Get the Perfect Sculpting Fit: Step by Step
- Step 1: Choose Your Size Based on Waist and Hip Measurements: Measure your natural waist (the narrowest part) and your hip circumference (the widest part). Compare both to the size chart. If your waist and hip measurements fall into different sizes, choose the larger size. The Lauren bottom is meant to sculpt, not squeeze, so a size that fits the larger measurement will still provide shaping without discomfort. A common mistake is choosing a size based only on hip measurement. The waistband needs to sit flat, so always check both numbers.
- Step 2: Put It On with a Gentle Roll, Not a Pull: Step into the bottom and pull it up to your hips. Instead of yanking the waistband straight up, roll it up from the hem like you would with a pair of high-waist jeans. This prevents the contrast panels from twisting and keeps the seams aligned. Once the waistband is at your natural waist, smooth the fabric over your hips and rear with both hands. Pulling the waistband straight up can cause the side panels to bunch or shift, which ruins the slimming line.
- Step 3: Adjust the Rear Coverage for a No-Wedgie Fit: Stand up straight and do a gentle squat or bend forward. The back seam should stay in place without riding up. If it does, reach back and pull the fabric down slightly so it sits at the crease where your buttocks meet your thighs. The full-coverage cut is designed to stay put, but a quick adjustment after movement ensures it stays comfortable all day. If the back rides up after a squat, the bottom is too small or the rise is too short for your torso length.
- Step 4: Check the Waistband for Rolling or Gapping: Look in a mirror from the side. The waistband should be parallel to the floor and sit flat against your skin. If it rolls outward at the top, the size is too small. If you can slide two fingers easily between the waistband and your skin, the size is too large. A proper fit allows one finger to slide under the waistband with slight resistance. A rolling waistband is the most common sign of a too-small size. Do not ignore it—it will only get worse when the fabric gets wet.
- Step 5: Care for the Fabric to Preserve the Sculpting Shape: Hand wash the Lauren bottom in cold water with a mild detergent. Avoid wringing or twisting the fabric—press the water out gently with a towel. Lay flat to dry out of direct sunlight. The contrast panels and elastic waistband will maintain their shape longer if they are not exposed to high heat or harsh spin cycles. Machine drying can break down the elastic in the waistband and cause the contrast panels to pucker. Always air dry.
Product Facts
-
Lauren High Waist Bikini Bottom - Contrast Panel Sculpting - Black w White: Clean lines meet contrast color panels to create a visually slimming effect, enhancing your silhouette with effortless glamour. The contrast panels are not just decorative—they actively reshape how the eye perceives your waist and hips, making the sculpting effect work without uncomfortable compression.
Lauren High Waist Bikini Bottom - Contrast Panel Sculpting - Black w White