Quick answer
Condition leather only when it feels dry or stiff, looks dull, or has been exposed to water, heat, or heavy use—typically every 3 to 6 months for daily items and once or twice a year for occasional-use pieces. Use a dedicated leather conditioner, apply a thin coat with a soft cloth, let it absorb, and buff off the excess. Conditioning too often can clog leather's pores and attract dirt, so less is more.
Leather is skin, and like skin it loses moisture over time. Sun, dry air, rain, and everyday handling strip away the natural oils that keep leather supple and strong. Conditioning replaces those oils, which is why a belt that feels like cardboard after a summer in the truck can often be brought back with one patient session.
But conditioning is not a weekly chore, and more product is not better. The goal is to keep leather flexible and protected without turning it greasy or darkening it unevenly. This guide walks through when leather actually needs conditioning, how to do it step by step, and how to avoid the mistakes that ruin good belts, bags, and boots.
Why leather conditioning matters
Leather is made of collagen fibers that stay flexible when they hold a certain amount of moisture and oil. When those oils dry out, the fibers rub against each other and crack. That is why neglected leather fails at stress points first: the fold of a belt, the handle of a bag, the flex point of a boot. Conditioning restores the oils and creates a thin barrier that slows future moisture loss.
Conditioning also protects against water damage. Dry leather soaks up water fast, and when it dries it can stiffen and stain. A conditioned surface sheds water more readily and recovers its shape better after a soaking. It will not make leather waterproof, but it buys you time to wipe it dry before damage sets in.
- Conditioning is preventive maintenance, not a repair for deep cracks.
- Leather that is already cracking cannot be restored by conditioner alone.
When to condition leather
The simplest test is touch. Press a thumb into the leather. If it feels dry, stiff, or shows fine surface lines that do not spring back, it is ready for conditioner. If it feels slightly tacky or looks shiny and dark, it has enough oil and should be left alone. For items used daily—a wallet, a belt, a work bag—check every few months. For seasonal pieces like a vest or a flask that lives in a drawer, once or twice a year is usually enough.
Climate and exposure matter more than the calendar. Leather in arid climates dries out faster. Leather that gets rained on, worn against sweaty skin, or left in a hot car needs more frequent attention. After any significant soaking or heat exposure, let the item dry naturally away from direct heat, then assess whether it needs conditioning.
- Do not condition wet leather. Let it dry completely first.
- New leather usually does not need conditioning for the first several months.
Choosing a leather conditioner
There is no single best conditioner for every leather. Creams and balms made with natural oils and waxes are a good general choice for smooth, finished leather because they absorb slowly and let you control the amount. Lotions and lighter liquids penetrate faster but can be easy to overapply. Avoid products with petroleum distillates, silicones, or heavy solvents, which can strip finishes and leave a greasy residue.
Test any new product on a hidden area first, especially on dyed or lighter-colored leather. Some conditioners darken leather temporarily, and a few will darken it permanently. That is not a defect—it is the nature of oiling leather—but you want to know before you treat the whole belt. If the leather has a delicate finish, such as the needlepoint on a belt, keep conditioner off the textile and treat only the leather trim.
- Match the product to the leather type: smooth finished leather, suede, and exotic skins each need different care.
- When in doubt, choose a neutral cream over a colored polish.
How to condition leather: step by step
- 1. Clean the leather first: Wipe the surface with a soft, damp cloth and let it dry completely. For heavier grime, use a dedicated leather cleaner and follow its directions. Conditioner applied over dirt and grit pushes that grit into the leather. Checkpoint: the leather should be dry to the touch before you open the conditioner.
- 2. Test on a hidden spot: Apply a small amount of conditioner to an inconspicuous area, such as the back of a belt or the inside of a bag strap. Wait 24 hours to see how the leather reacts and whether the color shifts. Mistake to avoid: skipping the test and darkening the whole piece unevenly.
- 3. Apply a thin, even coat: Put a small dab of conditioner on a soft cloth—not directly on the leather—and work it in with light circular motions. Start with less than you think you need. The leather should look slightly damp, not wet. Checkpoint: if the surface looks greasy, you have used too much. Wipe the excess and wait.
- 4. Let it absorb: Give the conditioner 15 to 30 minutes to soak in. If the leather still looks dry after that, apply a second thin coat. If it looks shiny, stop—the leather has taken all it can. Mistake to avoid: layering coat after coat in one session. More is not better.
- 5. Buff off the excess: Use a clean, dry cloth to buff the surface in brisk strokes. This removes leftover product, evens out the finish, and brings back a soft sheen without grease. Checkpoint: the leather should feel supple, not slick or sticky.
- 6. Let it rest and reassess: Set the item aside for a few hours, ideally overnight, before using it. Then check the feel again. If it is still stiff, repeat the process in a week rather than immediately. Next step: note the date so you can space out future conditioning sessions.
Leather goods worth conditioning well
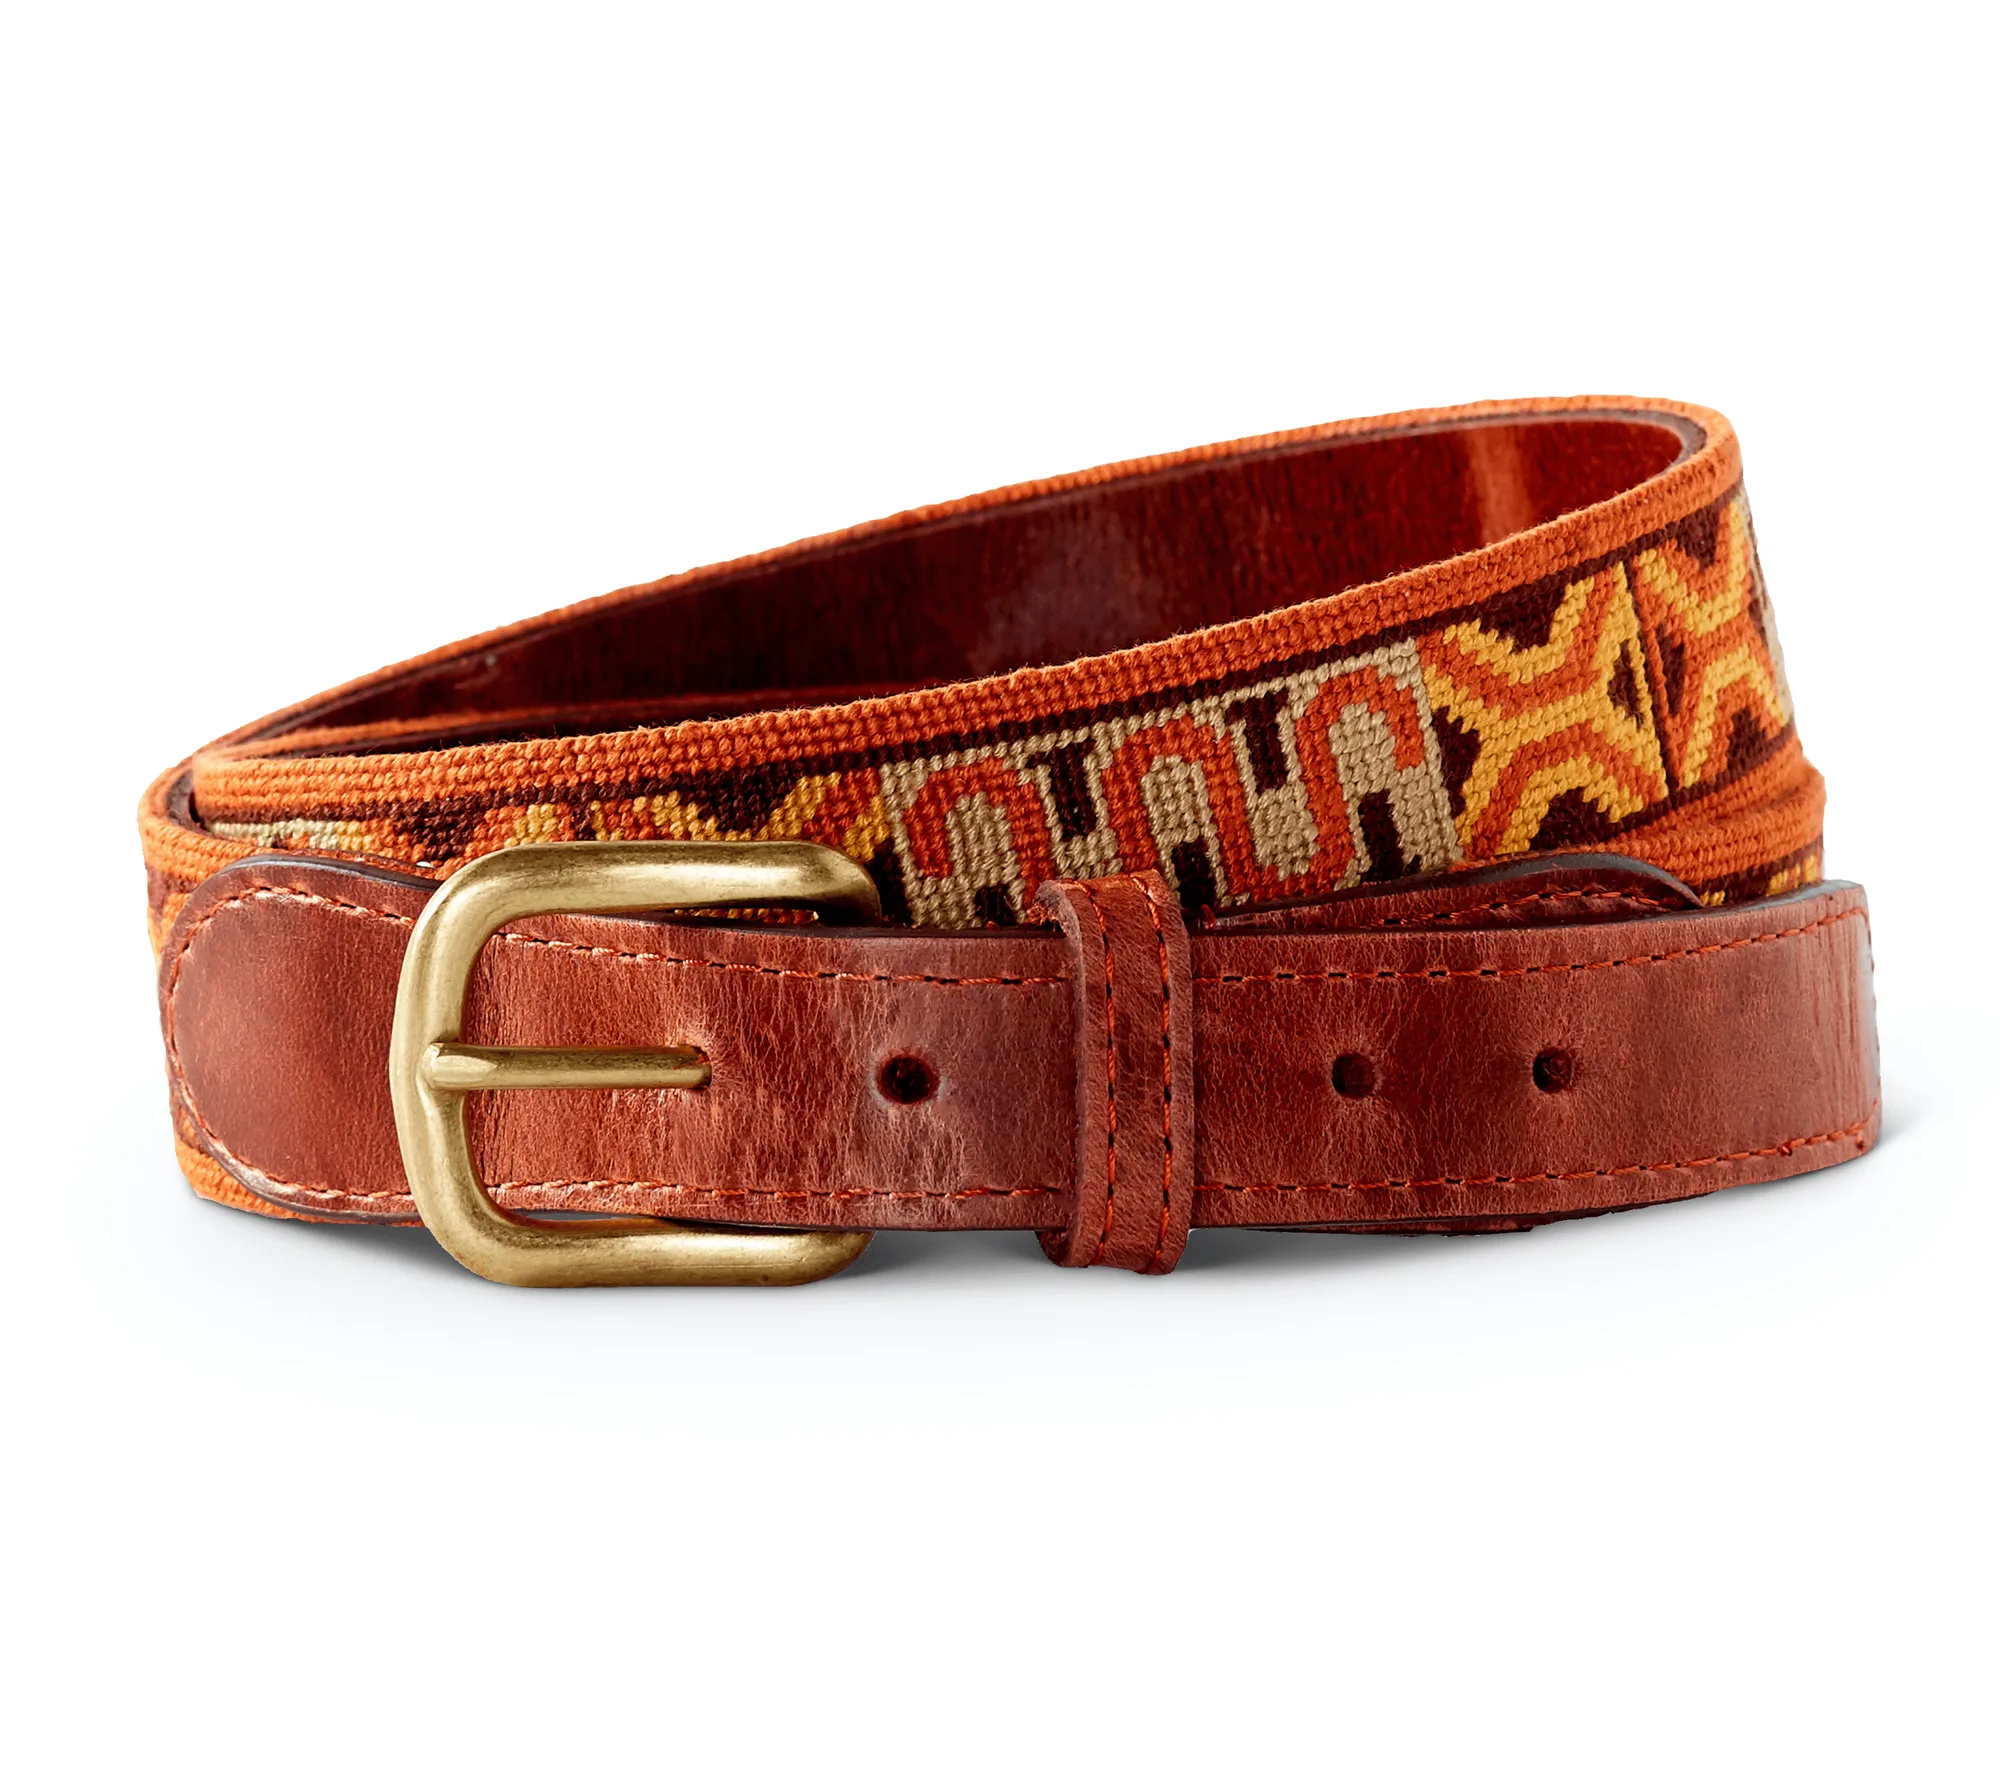
- King Ranch Tiffany Rug Border Belt (Muted Colors): Inspired by the 1915 Main House at King Ranch and its Tiffany-designed interiors, this belt reflects the enduring craftsmanship of the Ranch's iconic wool rugs. Hand-stitched in pure cotton thread, with rich brown leather and a solid brass buckle. The leather body benefits from occasional conditioning, but the cotton stitching and brass buckle should be kept dry and free of excess product. Apply conditioner sparingly to the leather only, and buff the brass with a dry cloth.
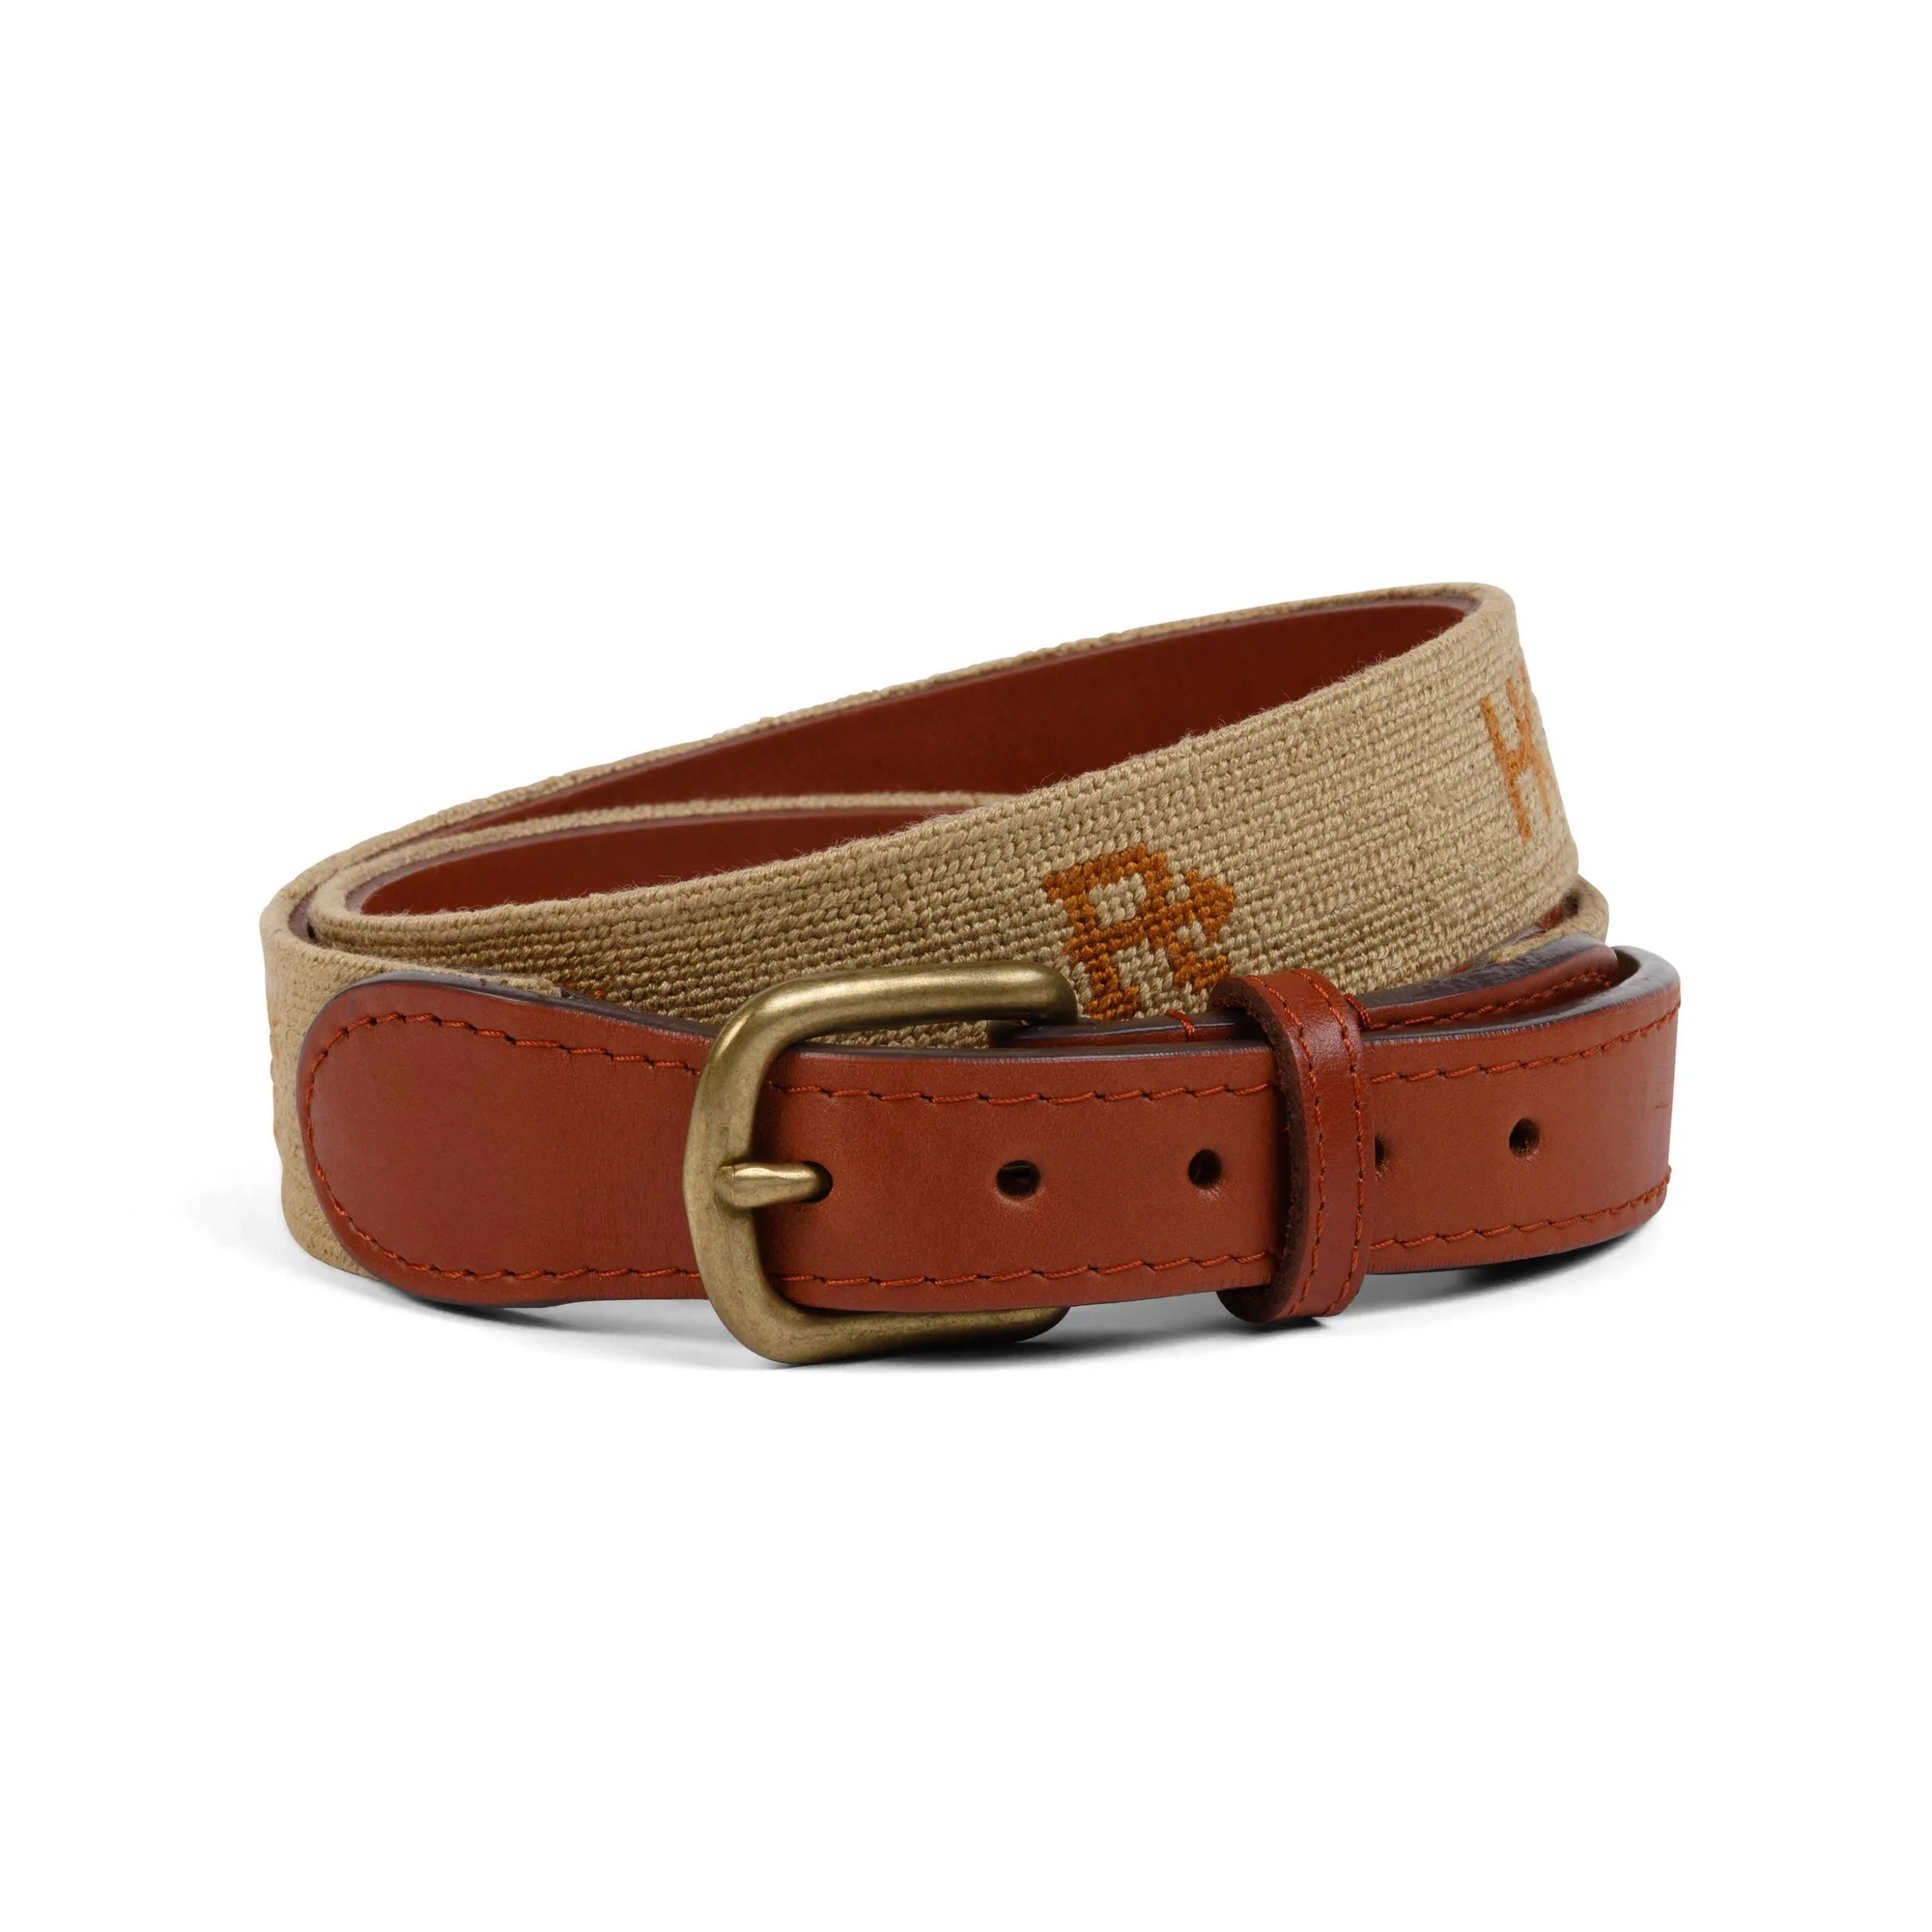
- Needlepoint King Ranch Brands Belt: This belt pays tribute to the legacy of the King Ranch family, featuring custom embroidery of Henrietta King's HK initials and Richard King's original K with arrow. Hand-stitched in cotton needlepoint, it's trimmed with brown leather and finished with a brass buckle. Needlepoint is textile, not leather, so conditioner should never touch the embroidered panel. Treat only the brown leather trim and the back of the belt, using a cloth small enough to stay on the leather.
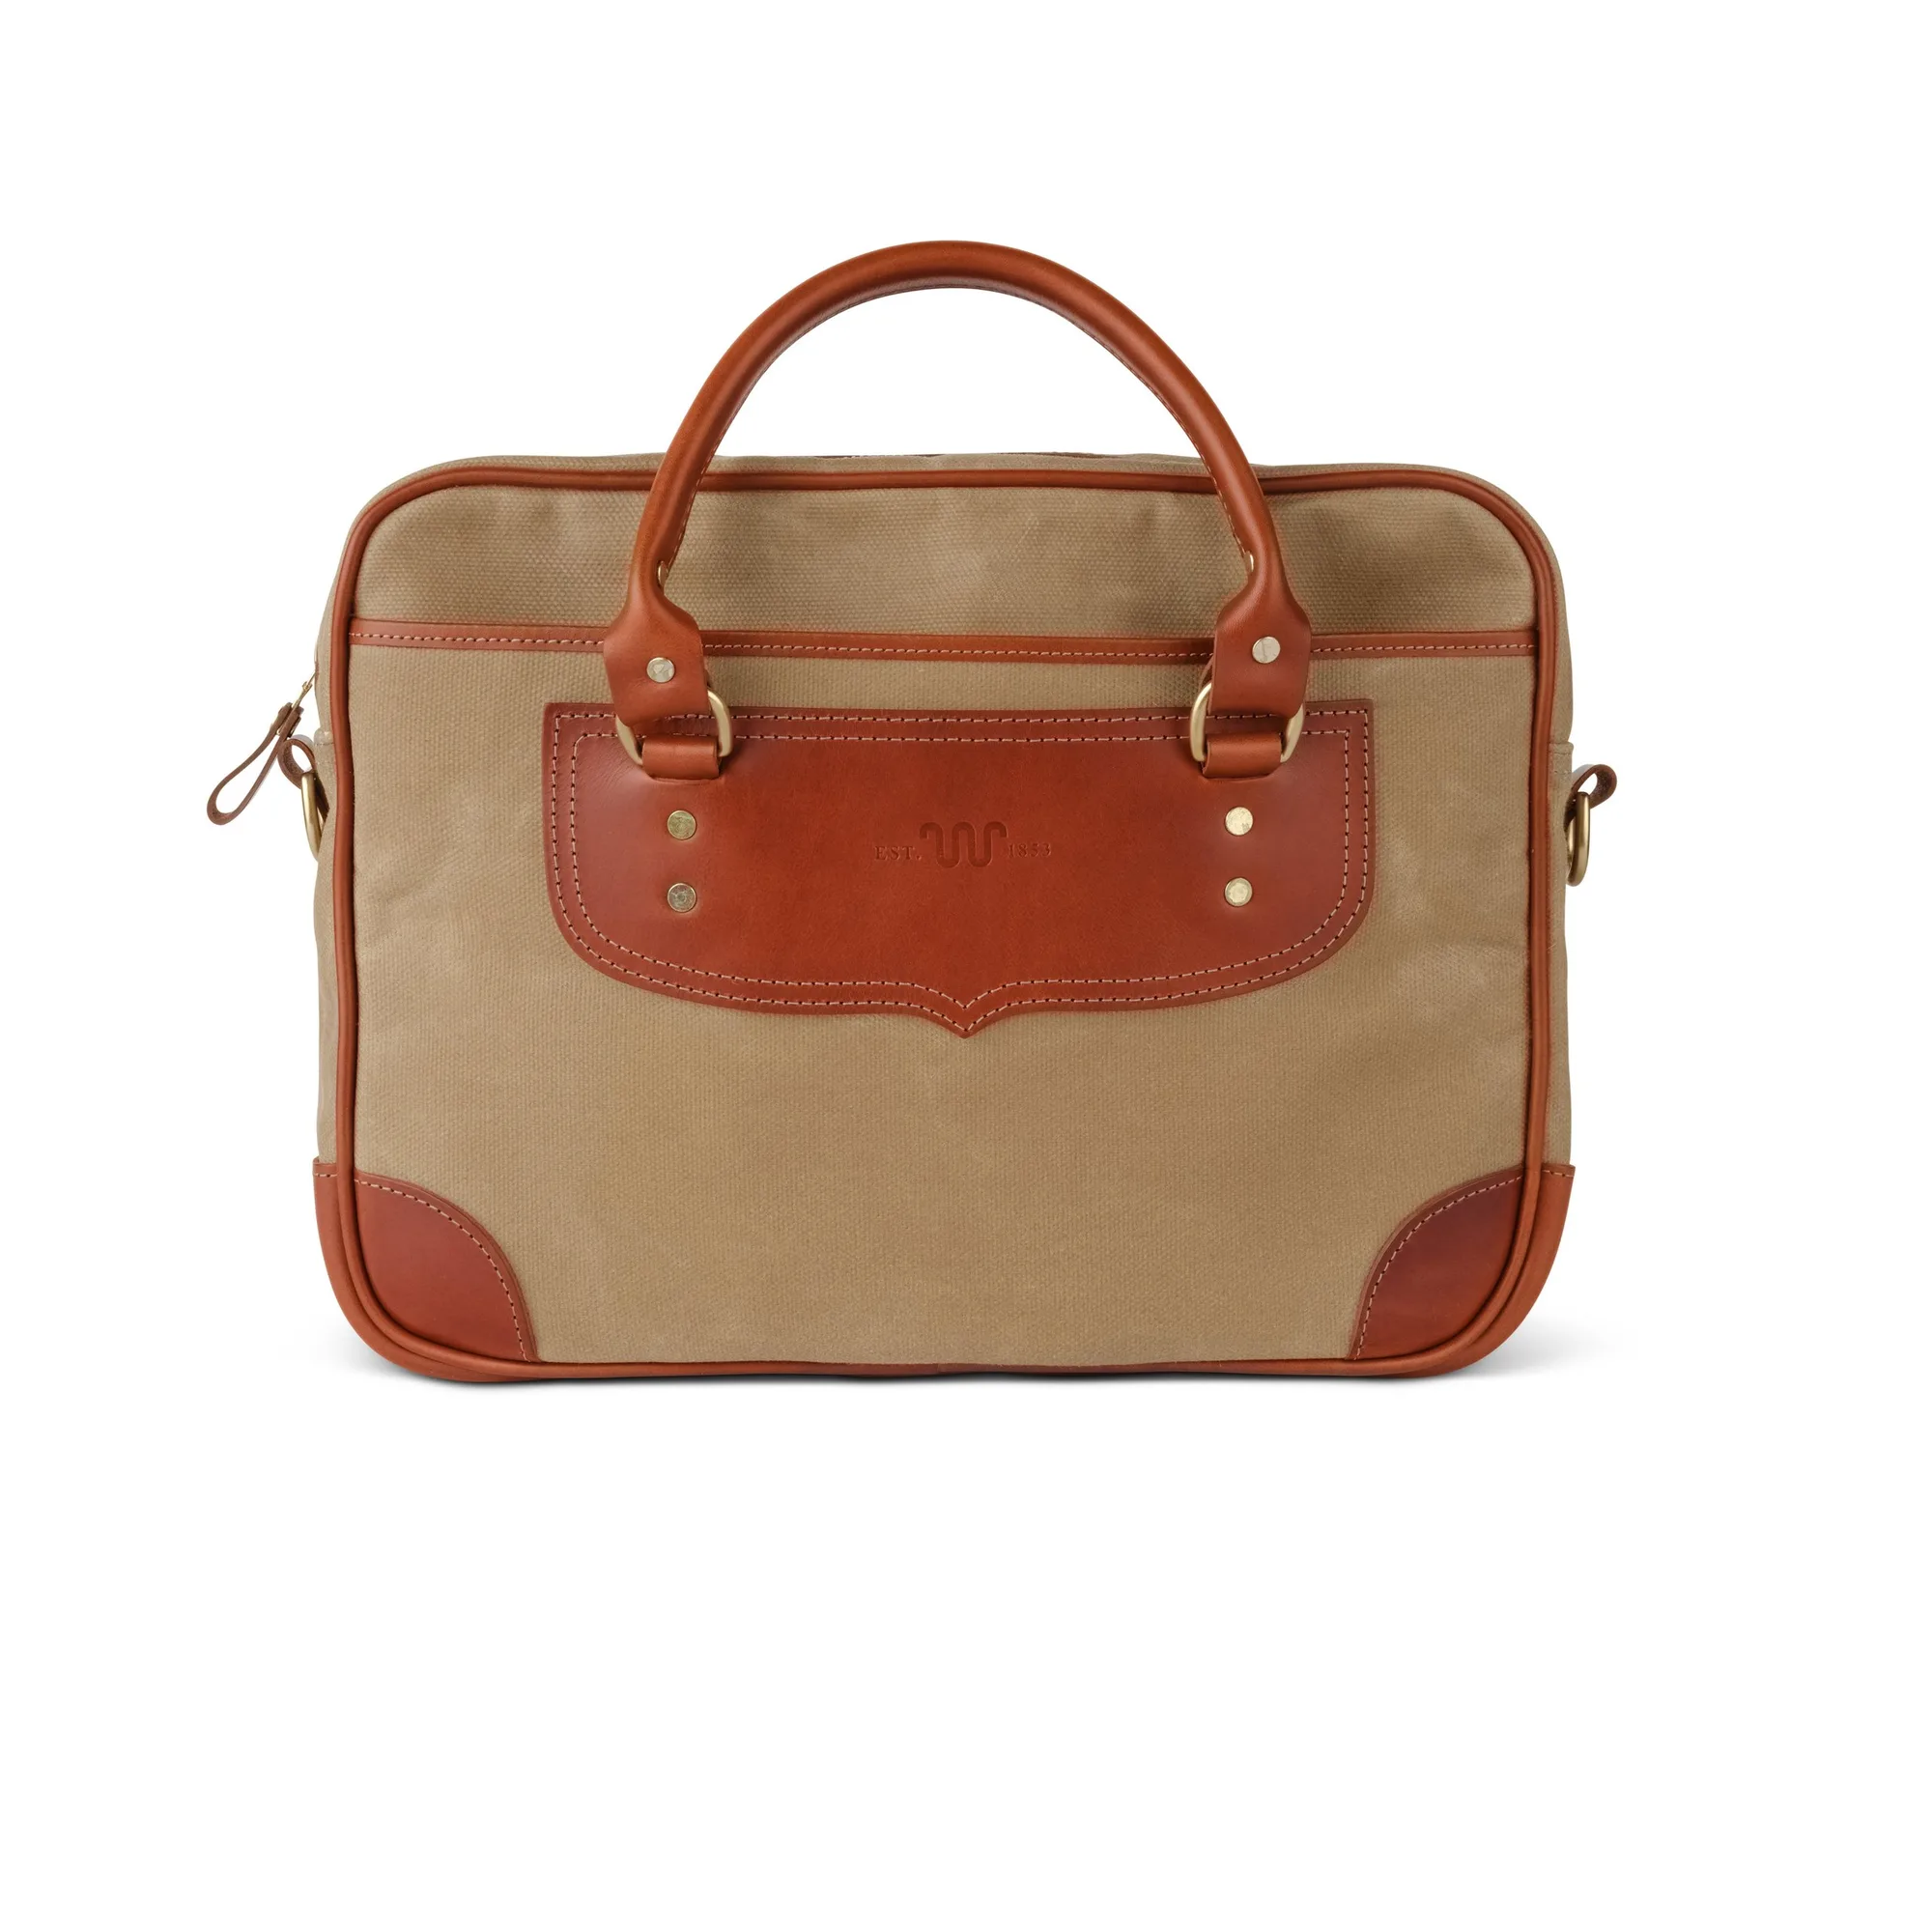
- King Ranch Waxed Canvas Briefcase: Made for the miles between ranch and town, this briefcase blends field-tested durability with a refined, professional silhouette. Crafted from 24 oz heavyweight waxed canvas and finished with solid brass hardware, it's built to handle daily commutes, client meetings, and travel days with equal ease. A padded sleeve protects your laptop, while thoughtful exterior and interior pockets keep essentials organized. Waxed canvas is not leather and should not be conditioned with leather products. If the canvas needs refreshing, use a wax re-proofing product made for waxed canvas; save the leather conditioner for any leather trim.
Leather conditioning is less about a schedule and more about paying attention. Check your belts, bags, and boots a few times a year, condition only when they feel dry, and apply thin coats rather than heavy ones. Done that way, a well-made leather piece can stay supple and handsome for decades.