Quick answer
The Lemon Beginner Needlepoint Kit includes a precision-printed 4" x 4" canvas, a curated thread palette with Pepperpot silks and a metallic accent, and two Bohin stainless needles — everything you need to stitch a cheerful lemon design as your first project.
Why this kit works for first-time stitchers
The Lemon Beginner Needlepoint Kit is designed with a 16-count mono canvas that gives you a manageable stitch count — not too tiny for beginners, not too loose for a crisp finish. The threads are pre-selected and bundled, so you don't have to guess which colors or materials to buy separately.
A common worry for new stitchers is running out of thread or choosing the wrong needle. This kit removes both concerns: the thread palette is generous enough for the 4" x 4" design, and the included Bohin needles are the correct size for the canvas count. You can focus on learning the stitch rather than hunting for supplies.
Trade-off: pre-printed vs. hand-painted canvas
The Lemon kit uses a precision-printed canvas, which keeps the cost lower than a hand-painted canvas. The printed design is clear and easy to follow, making it ideal for a first project. However, printed ink may fade slightly over time if exposed to direct sunlight, so store your unfinished canvas in a cool, dry place. For most beginners, this trade-off is well worth the savings.
How to start your Lemon Beginner Needlepoint Kit
- Prepare your canvas and tools: Unfold the canvas and lay it flat. Cut a length of thread about 18 inches — longer threads tangle easily. Thread one of the Bohin needles and tie a small knot at the end of the thread. Keep your thread shorter than 20 inches to avoid knots and fraying.
- Find your starting point: Locate the center of the design (often marked by a small dot or the intersection of two arrows on the printed canvas). Start stitching from the center outward — this keeps your design balanced and prevents distortion. Starting in the center also helps you check your tension early; if the canvas puckers, you're pulling too tight.
- Work the tent stitch: The tent stitch is the most common beginner stitch. Bring the needle up from the back at the bottom-left of a canvas intersection, then down at the top-right. Repeat to cover the design area row by row. Work each row in the same direction for a uniform look. If your stitches slant inconsistently, you may be switching direction mid-row. Stick to one diagonal direction per row.
- Change threads cleanly: When you finish a thread or need to switch colors, weave the tail under three or four stitches on the back of the canvas. Snip the excess close to the canvas. Start the new thread the same way — weave the tail under existing stitches before bringing the needle to the front. Avoid tying knots on the back; they create bumps that show on the front and make finishing harder.
- Finish and display your piece: Once all stitches are complete, trim any loose tails. Block the canvas by lightly misting it with water and pinning it to a flat board until dry — this evens out tension. Frame it or turn it into a small pillow or ornament. Blocking is optional for a small 4" x 4" piece, but it gives a professional finish if you plan to frame it.
Product details
-
Lemon Beginner Needlepoint Kit: Precision-printed 4" x 4" design on 16-count mono needlepoint canvas, edge-taped for durability. The edge-taping prevents fraying while you stitch, so you can handle the canvas without worrying about loose threads.
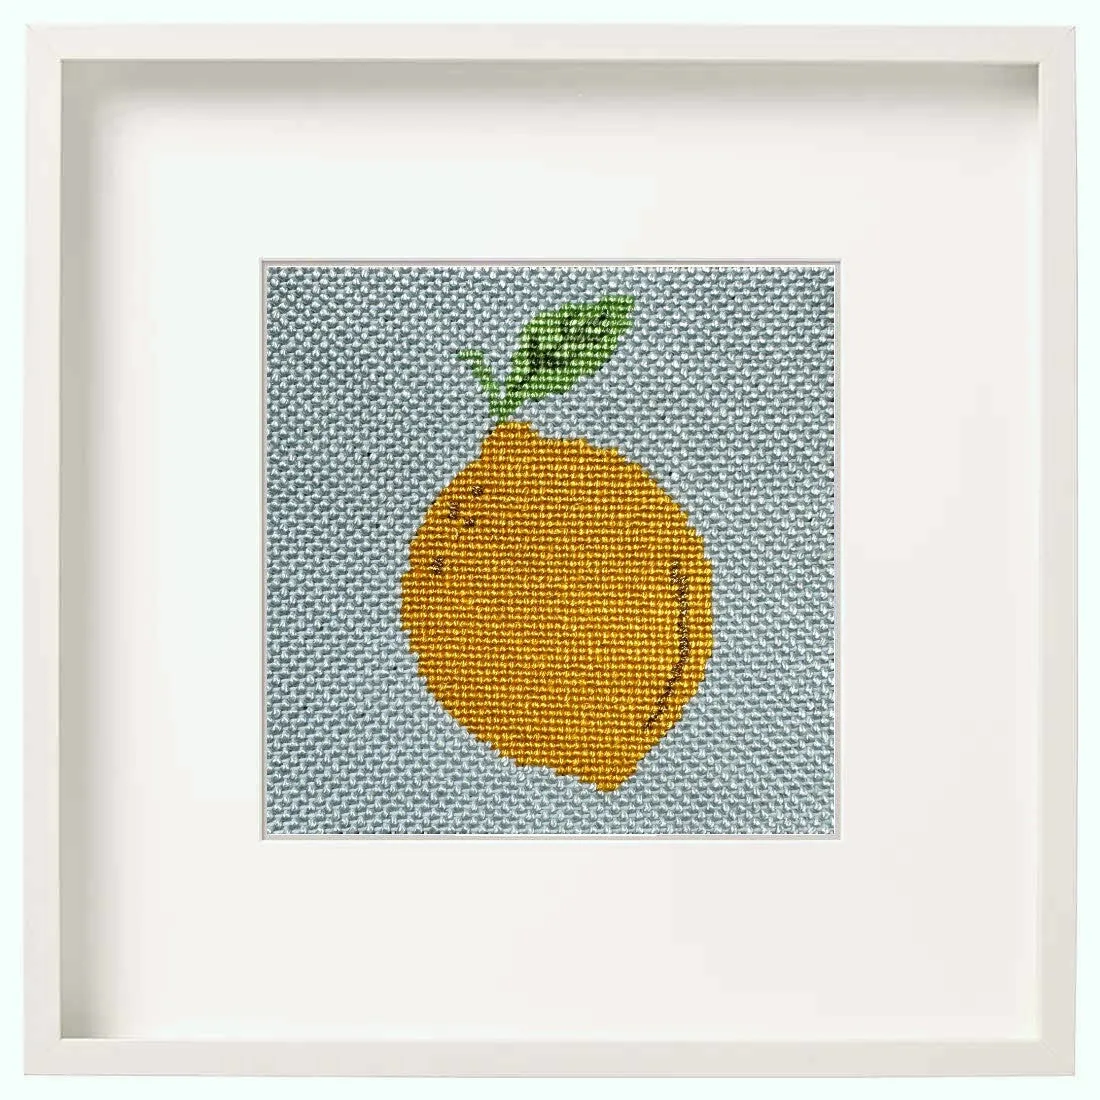
Lemon Beginner Needlepoint Kit
-
Lemon Beginner Needlepoint Kit: Includes a generous selection of premium threads, including Pepperpot silks and a metallic thread for subtle sparkle. The mix of silk and metallic thread gives your lemon a polished look with a touch of shine, without requiring you to buy specialty threads separately.
-
Lemon Beginner Needlepoint Kit: Comes with two high-quality Bohin stainless needles. Bohin needles are known for their smooth finish and sharp points, reducing snags and making each stitch easier to place — a real help when you're learning.