Start with the thread path, not the fabric
Most beginner sewing frustration starts before the needle touches cloth. When thread tangles, loops underneath, or snaps, resist the urge to rethread randomly. Instead, trace the thread from spool to needle in one continuous path. Check that the spool sits squarely, the thread passes through every guide, and the needle is inserted the right way. A missed guide or a spool that wobbles will cause snags that look like tension problems.
If the thread keeps tangling, cut it and start fresh rather than picking at the knot. A clean rethread solves more beginner problems than any adjustment. Keep the thread tail short and hold it gently for the first few stitches so it doesn’t get pulled back into the machine.
Quick fixes for three common beginner problems
- Tangled thread under the fabric: Stop sewing immediately. Raise the needle, remove the fabric, and cut the tangled thread. Rethread the top and check that the bobbin is seated correctly. If the tangle repeats, slow your stitching speed and hold the thread tails for the first few stitches.
- Skipped or uneven stitches: A skipped stitch often means the needle is dull, bent, or inserted backward. Replace the needle and confirm it’s fully seated. If stitches are uneven, check that the fabric isn’t being pulled or stretched as you sew—let the feed dogs move the fabric.
- Wobbly or crooked seams: Slow down and watch the seam guide, not the needle. If your machine has a seam guide, use it. Otherwise, mark a stitching line on the fabric with a washable marker or tape. Practicing on scrap fabric first builds the muscle memory for straight seams.
What the LET’S LEARN SEWING ART kit actually includes
The LET’S LEARN SEWING ART kit is designed for eight specific projects: colorful hair clips, a mini plush bear, a unicorn purse, and more. That project list is your best guide to what the kit supports. If you’re troubleshooting a problem on one of these projects, the fix is usually in the thread path, needle, or fabric handling—not in the kit’s contents.
The supplied product information does not list specific machine settings, stitch lengths, or tension numbers. So if your manual suggests a particular setting, follow that instead of guessing. For kit-specific projects, start with a scrap of the same fabric and test your stitch before sewing the final piece.
Kit facts that shape your troubleshooting
-
LET’S LEARN SEWING ART: Make 8 Adorable Creations: From colorful hair clips to a mini plush bear and even a unicorn purse, every project is as cute as it is rewarding. Knowing the eight projects helps you match your fabric and thread choices to the kit’s intended scope. If you’re tangling on thin fabric for hair clips versus thicker fabric for the plush bear, adjust your handling accordingly—but always test on scrap first.
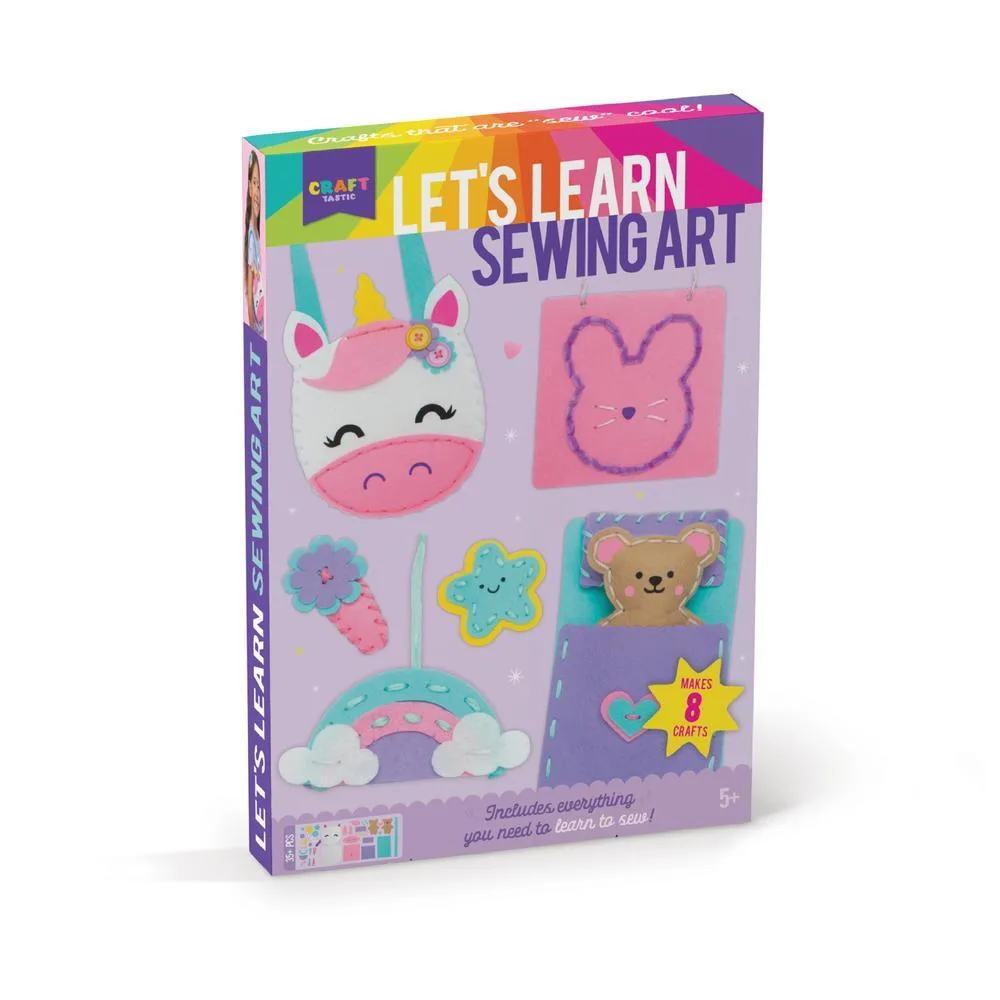
LET’S LEARN SEWING ART
A reset routine when stitches go wrong
When a seam goes bad, don’t keep sewing over it. This five-step reset clears the problem and gets you back to practice.
- Stop and lift: Raise the needle and presser foot, then gently pull the fabric away. Cut any tangled thread rather than pulling it free.
- Rethread completely: Remove the top thread and rethread from scratch, making sure every guide is used. Check the bobbin is seated and the thread tail is correct.
- Test on scrap: Sew a short line on a scrap of the same fabric. If the test is clean, continue. If not, repeat the rethread and check the needle.
- Slow down: Reduce your speed for curves, corners, and thick seams. Speed is the most common cause of wobbly seams for beginners.
- Check the needle: Replace the needle if it’s dull or bent. A fresh needle solves skipped stitches more often than tension adjustments.
Practice tips that prevent repeat mistakes
Set aside ten minutes before each project to sew on scrap fabric. Practice straight lines, gentle curves, and pivoting at corners. This warms up your hands and lets you confirm the thread path is correct before you commit to a project piece.
Keep your work area tidy: loose thread tails, pins, and fabric scraps can catch in the feed dogs and cause tangles. And when you finish for the day, cut the thread close to the spool and remove the bobbin case if your manual recommends it—small habits reduce the chance of surprise tangles next time.