Quick answer
To achieve a clean finish on the Mega-Shiki HG, focus on careful nub removal, seam line elimination, and precise panel lining before applying a topcoat.
Why the Mega-Shiki HG needs extra care
The Mega-Shiki HG features large, flat armor panels that make any imperfections stand out. Taking time on nub removal and seam lines is essential for a smooth, professional look.
Build steps for a clean finish
- Remove nubs flush and sand: Cut each part from the runner with a side cutter, leaving a small nub. Use a hobby knife to shave it flush, then sand with 600-1000 grit sandpaper. Common mistake: cutting too close and gouging the plastic. Always sand in one direction to avoid scratches.
- Eliminate seam lines: Apply plastic cement to the seam, press parts together firmly, and let the glue squeeze out. After drying, sand the area smooth. Common mistake: using too much glue, which can warp the part. Test fit parts before gluing to ensure alignment.
- Panel line before assembly: Use a fine-tipped panel liner pen or thinned enamel paint on the recessed lines. Wipe excess with a cotton swab lightly dampened with lighter fluid. Common mistake: applying too much ink and staining the plastic. Let the liner dry for 10 minutes before wiping.
- Apply decals carefully: Soak the decal in water for 10 seconds, slide it into position, and use a cotton swab to remove air bubbles. Common mistake: moving the decal too much after placement, tearing it. Use a drop of setting solution to soften the decal over curves.
- Topcoat for a uniform finish: Spray a thin coat of matte or gloss topcoat from 20 cm away in a well-ventilated area. Apply 2-3 light coats. Common mistake: spraying too thick, causing drips or a cloudy finish. Let each coat dry for 30 minutes before the next.
Product facts
-
Mega-Shiki HG: High Grade (HG) scale model kit of the Mega-Shiki The HG scale is ideal for practicing clean finish techniques without the complexity of a Master Grade.
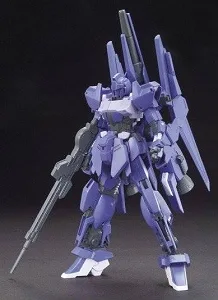
Mega-Shiki HG