Quick answer
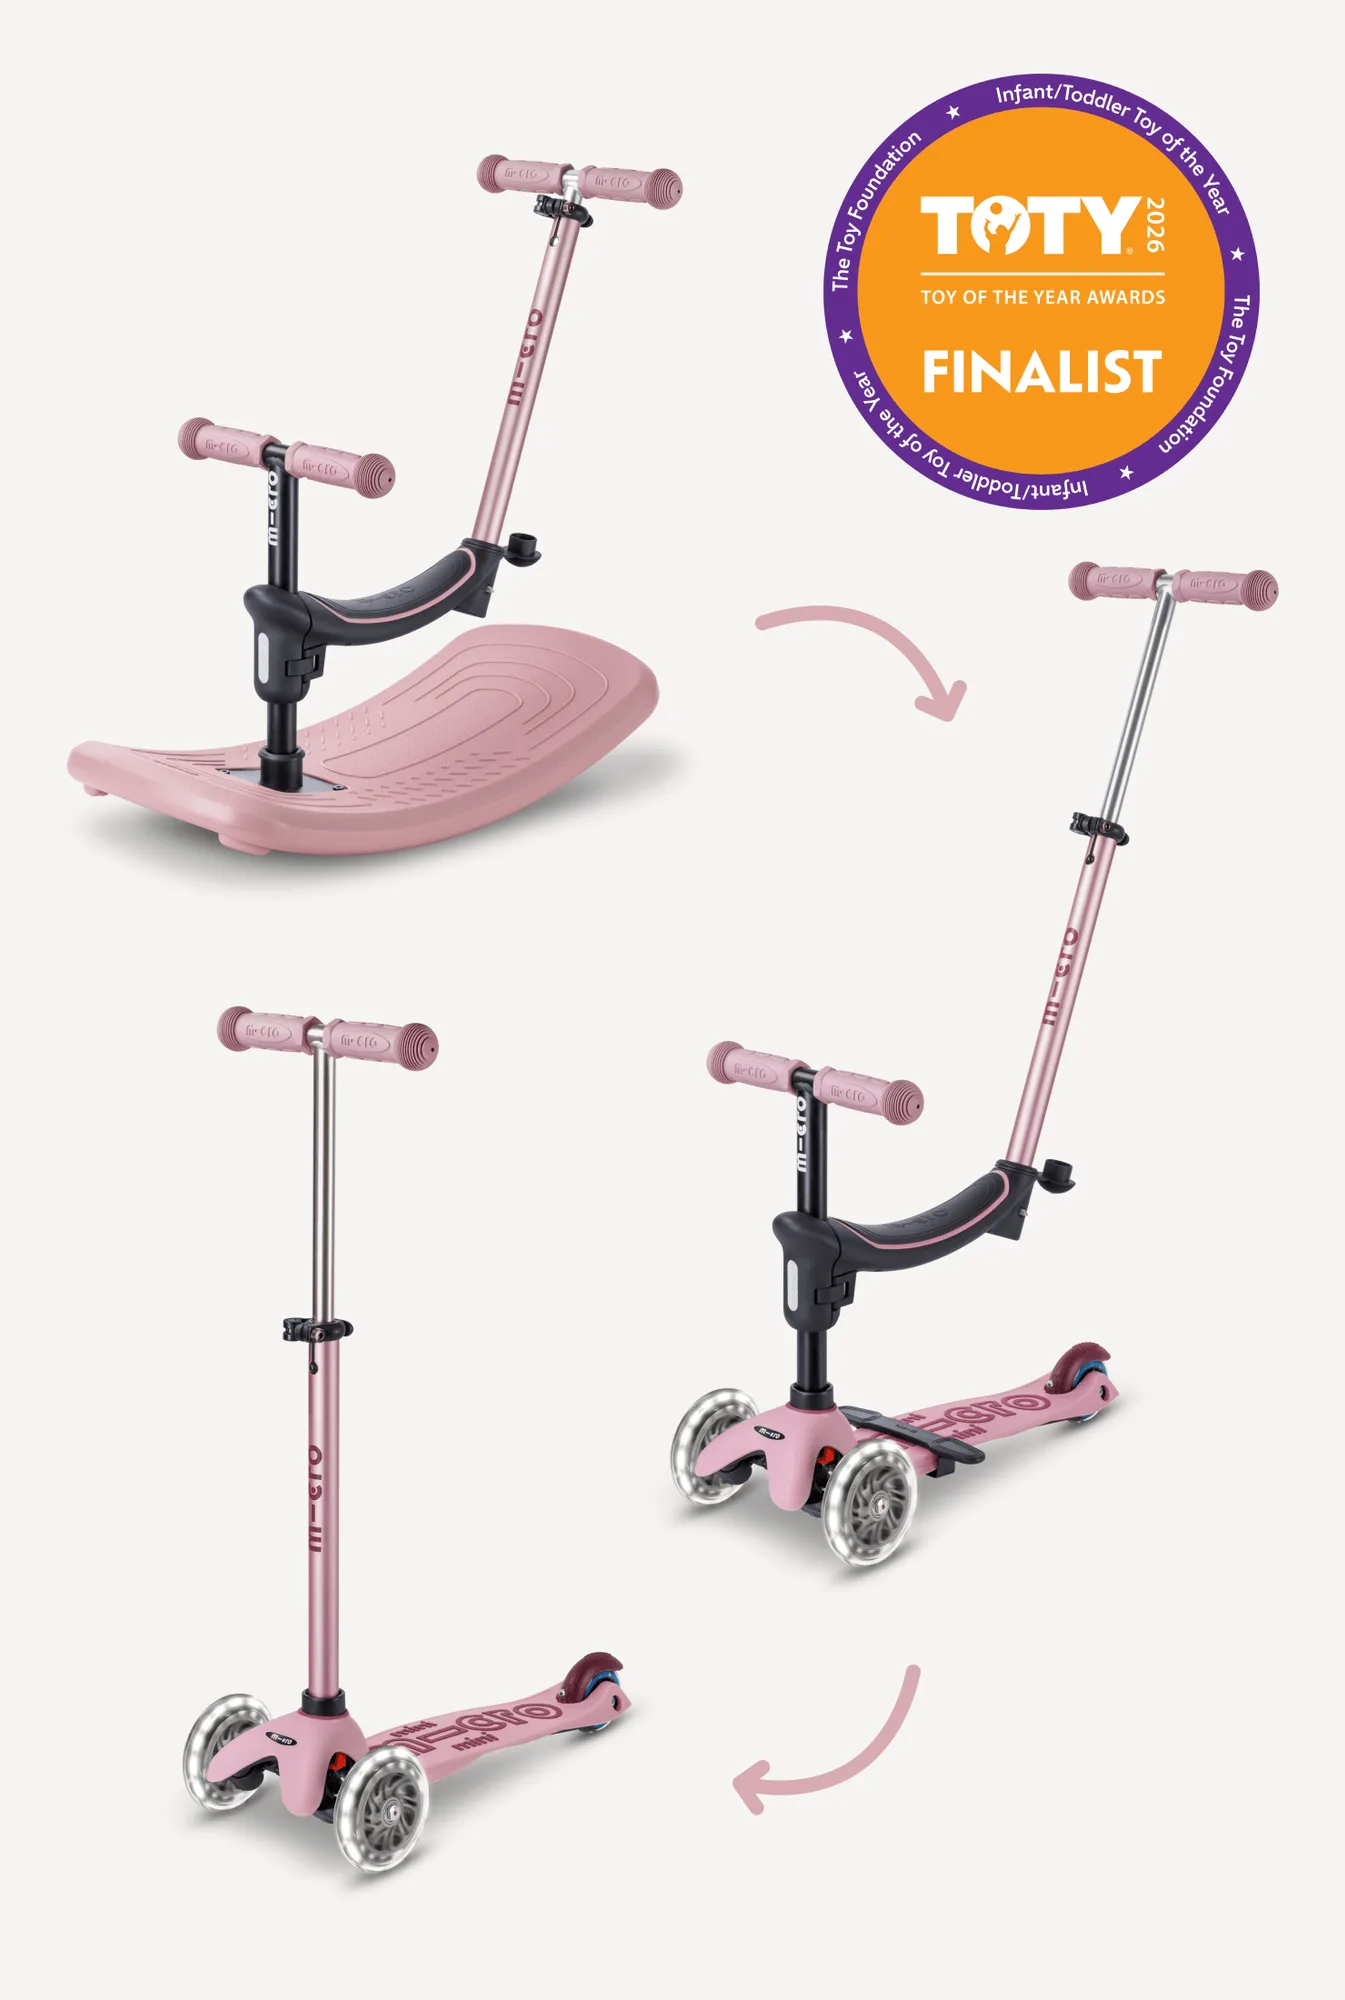
The Micro Mini Rock & Go LED transitions through three stages—rocker, seated scooter, and classic kick scooter. Setup is tool-free and takes about five minutes once you know the latch positions and wheel alignment tricks.
Why three stages matter for your toddler
Each stage of the Micro Mini Rock & Go LED targets a different developmental milestone. The rocker stage (12 months+) introduces gentle movement and balance without the need to steer. The seated scooter stage lets your child practice pushing with their feet while staying low to the ground. The classic Micro Mini LED Scooter stage builds confidence in steering and gliding. Skipping stages can overwhelm a child who isn't ready for full steering or balancing.
What you get in the box
The scooter arrives partially assembled. You'll find the main deck with the LED wheels, the T-bar handlebar, the seat/rocker base, and the seat post. The LED wheels are pre-installed and light up when the wheels spin—no batteries required. Check that all parts are present before starting setup.
Step-by-step setup for the first ride
- 1. Attach the rocker base: Slide the rocker base onto the main deck until it clicks into place. The base has curved runners that allow the scooter to rock side to side. Push down firmly on both ends to ensure it's locked. Common mistake: Not pushing the base all the way until you hear the click. If the base wobbles, it isn't fully seated.
- 2. Insert the seat post for rocker mode: Press the button on the seat post and slide it into the hole on the rocker base. Adjust the height so your child's feet can touch the ground comfortably when seated. The post has three height settings. Checkpoint: Make sure the button pops out completely through the hole. A partially engaged button can release during use.
- 3. Switch to seated scooter mode: Remove the rocker base by pressing the release tab on the underside of the deck. Attach the seat post directly into the deck's center hole. The seat now stays fixed—no rocking motion. Your child sits and pushes with their feet. Common mistake: Forgetting to remove the rocker base before inserting the seat post. The post won't lock properly if the base is still attached.
- 4. Convert to classic kick scooter: Remove the seat post entirely. Insert the T-bar handlebar into the deck's center hole. Adjust the handlebar height so it reaches your child's chest or lower—not chin level. Tighten the collar by hand until snug. Checkpoint: Handlebar too high reduces steering control. Aim for handlebar height just below chest level for best balance.
- 5. Check the LED wheels before the first ride: Spin each wheel by hand to confirm the LEDs light up. The lights activate automatically when the wheels spin above a low speed. If a wheel doesn't light, check for debris or damage around the axle. Common mistake: Assuming the LEDs need batteries or a switch. They are motion-activated and require no power source.
Product facts
-
Micro Mini Rock & Go LED: The Mini Rock & Go LED delivers three rides in one: a rocker, a seated scooter, and the classic Micro Mini LED Scooter. You don't need to buy separate toys for each stage—this single scooter adapts as your child grows, saving money and storage space.
Micro Mini Rock & Go LED