Quick answer
Start with a snap-fit model kit like the Rikka Takarada kit—it's pre-colored and lets you focus on learning basic painting techniques without needing to glue or mask.
Why start with a snap-fit kit
Snap-fit model kits, like those in Good Smile US's lineup, come with pre-colored parts that snap together without glue. This makes them ideal for beginners: you can practice painting on select parts while leaving others unpainted, reducing the risk of ruining the entire build.
If you're nervous about your first paint job, choose a kit with interchangeable parts—like the Rikka Takarada kit, which includes both a cardigan and short-sleeve option. That way, you can paint only the version you prefer and keep the other as a backup.
Essential supplies vs. nice-to-haves
You don't need an airbrush to get good results. Start with these basics: acrylic model paint (water-based, easy cleanup), a few fine brush sizes (0 and 00 for details), a hobby primer (to help paint stick to plastic), and a clear topcoat (matte or gloss) to seal your work.
Skip expensive tools until you're sure you enjoy painting. A cheap sprue cutter and a small file set are all you need for prep. Avoid spray paints intended for general use—they can react with the kit's plastic and cause cracking.
Beginner painting steps
- Step 1: Wash the runners: Wash all plastic parts with warm water and a drop of dish soap to remove mold-release residue. Let them dry completely before any assembly or painting. This ensures paint adheres evenly. Skipping this step is the #1 cause of paint peeling later.
- Step 2: Snip and sand: Use a sprue cutter to remove parts, leaving a tiny nub. Smooth the nub with a fine file or sanding sponge (400-600 grit). Avoid over-sanding—you'll remove panel lines and details. Test fit parts before priming; if they're too tight, sand a little more—don't force them.
- Step 3: Prime the parts: Shake your hobby primer well and spray in light, even coats from about 6-8 inches away. Work in a well-ventilated area. Let each coat dry for 15-20 minutes before the next. Priming gives the paint a toothy surface and makes colors pop. Hold the can too close and you'll get drips or orange peel texture.
- Step 4: Thin your paint: Mix paint with water or thinner on a palette until it's the consistency of skim milk. Apply two to three thin coats, waiting 5-10 minutes between coats. Thin coats dry faster and hide brush strokes. Thick paint clogs panel lines and leaves visible brush marks—always thin.
- Step 5: Paint in sub-assemblies: Keep parts grouped by color or section (e.g., hair, arms, torso) and paint them before final assembly. This gives you easier access to nooks and prevents accidental paint transfer. Never fully assemble the kit before painting—you'll create hard-to-reach gaps.
- Step 6: Seal with a topcoat: Once fully dry (24 hours), apply a clear topcoat in the same way as primer—light passes from 6-8 inches. Matte topcoat reduces shine, gloss preserves vibrancy. Choose based on the look you want. Test the topcoat on a spare part first to confirm it doesn't react with your paint.
Product facts for this guide
-
Rikka Takarada Articulated Plastic Model Kit Figure (Re-release): Rikka Takarada's first articulated plastic model kit includes interchangeable parts for a cardigan or short-sleeve shirt. This gives you a practice-friendly option—paint one outfit while leaving the other as-is, so you can compare effects and learn without pressure.
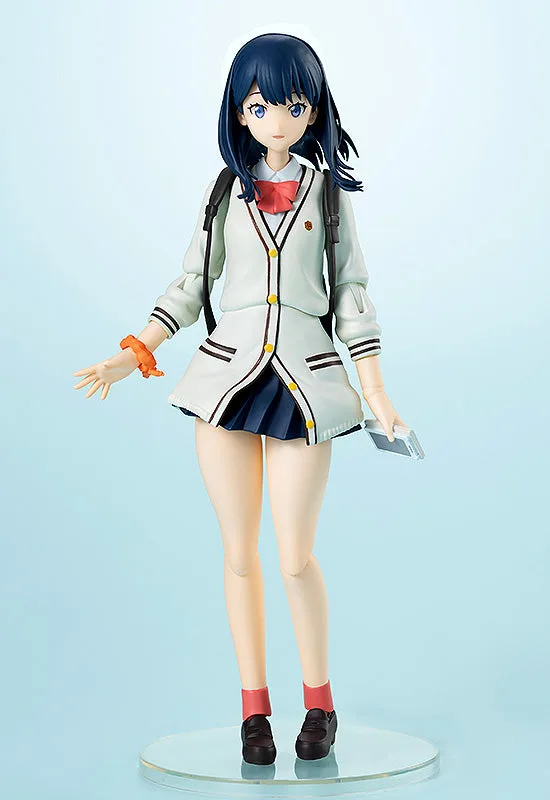
Rikka Takarada Articulated Plastic Model Kit Figure (Re-release)
-
Spice and Wolf: Merchant Meets the Wise Wolf - KADOKAWA PLASTIC MODEL KIT Spice and Wolf: MERCHANT MEETS THE WISE WOLF Holo: Holo's kit from Spice and Wolf uses pre-colored materials and pre-painted parts to recreate the character's design by simple assembly. Pre-painted parts mean you can focus on small accent painting (like her apple or belt) instead of covering large areas, perfect for building brush control.
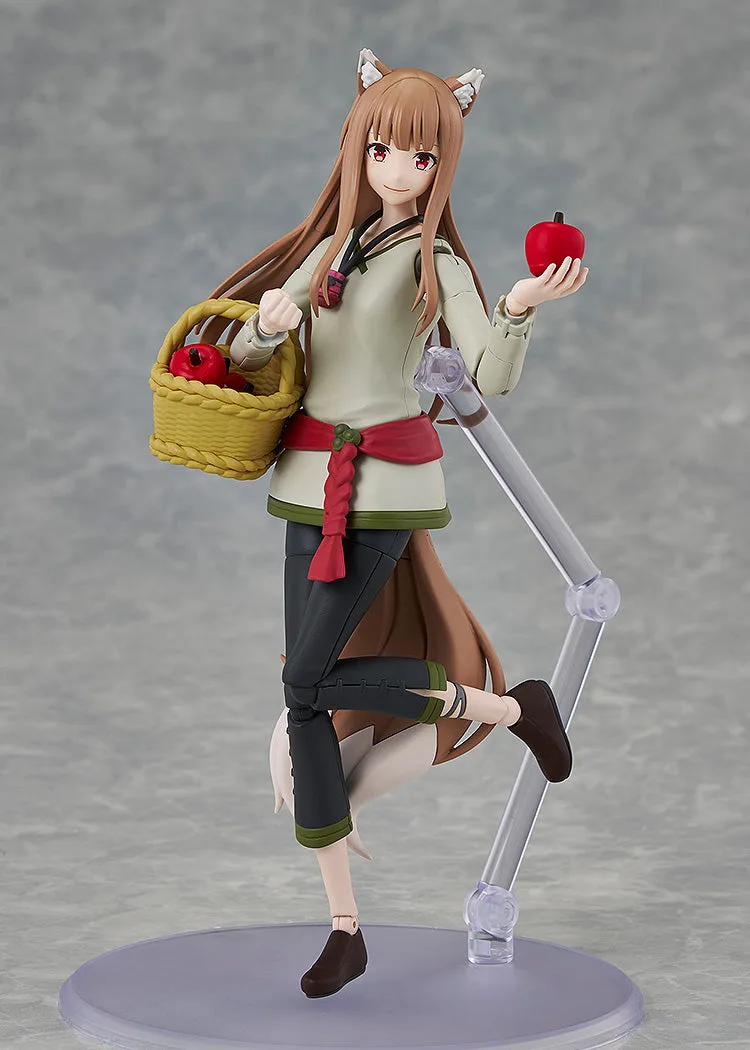
Spice and Wolf: Merchant Meets the Wise Wolf - KADOKAWA PLASTIC MODEL KIT Spice and Wolf: MERCHANT MEETS THE WISE WOLF Holo