Quick Answer
Start with the design dimensions in inches, then match the mesh count to your thread and stitch goals. For most hand-painted canvases, 18 mesh suits finer threads and detailed designs, while 13 mesh works better for larger stitches and quicker coverage. Always check the recommended stretcher bar size when the canvas lists one, and leave at least 2 inches of border for finishing.
Choosing a needlepoint canvas size is less about a single number and more about how the finished piece will be used. A canvas that is too small limits detail; one that is too large can feel overwhelming or waste thread. The right size depends on the design, the mesh count, and how you plan to finish the piece.
This guide breaks down the practical decisions: reading design dimensions, understanding mesh count, matching stretcher bars, and knowing when to size up or down. You will also see real examples from Wheelhaus Needlepoint canvases that show how these numbers work in practice.
Understand Design Dimensions vs. Canvas Size
The design dimensions tell you how large the stitched area will be, not the total canvas size. For example, a canvas with a design of 3.5 inches wide by 4.25 inches high gives you a compact ornament or small tote front. The actual canvas will be larger to allow for borders, stretcher bars, and finishing. When you see a listing like Starfish Christmas Tree Tote - Day 1 with an 18 mesh and a design of 3.5"W x 4.25"H, you know the stitched area is small and detailed.
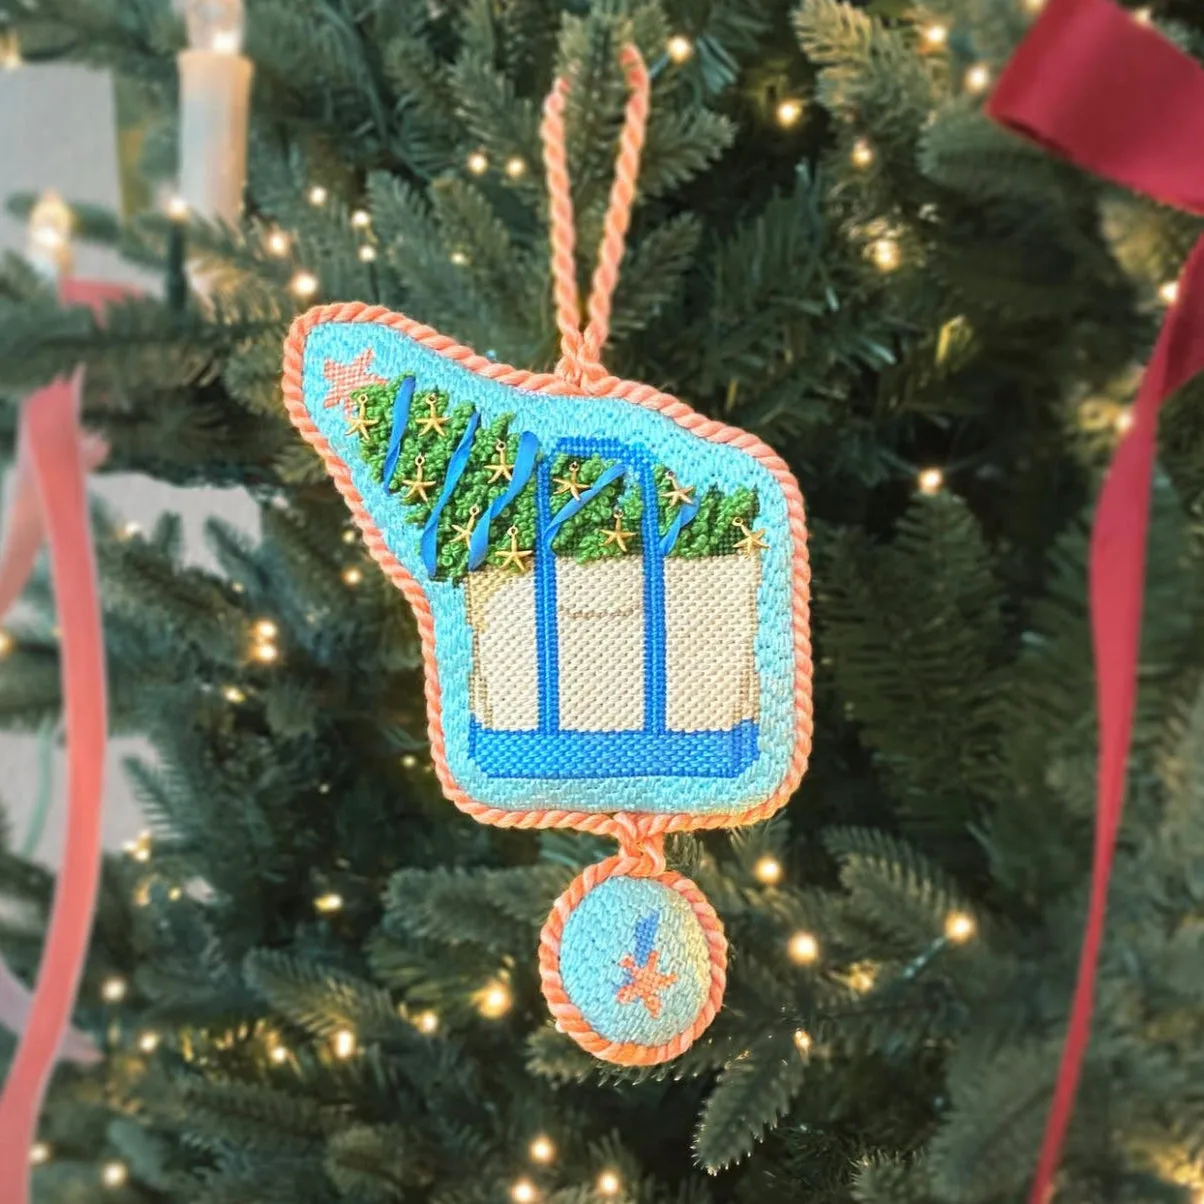
Starfish Christmas Tree Tote - Day 1
Always add at least 2 inches of unstitched canvas on each side for blocking and finishing. If you plan to frame the piece, add more. If you are stitching a tote or pillow, follow the pattern or finishing instructions for the exact allowance. The key is to think of the design dimensions as the finished stitched area and the canvas size as the raw material you cut or mount.
- Measure the intended finished item first, then work backward to the design dimensions.
- Check if the canvas is hand-painted and stitch-painted, as these often have a defined design area.
Mesh Count: The Hidden Size Factor
Mesh count is the number of threads per inch on the canvas. An 18 mesh canvas has 18 threads per inch, which allows for fine details and works well with silk and fine wool threads. A 13 mesh canvas has 13 threads per inch, so stitches are larger and cover the area faster. The mesh count affects how the design translates: a small design on 18 mesh will have more stitches than the same design on 13 mesh.
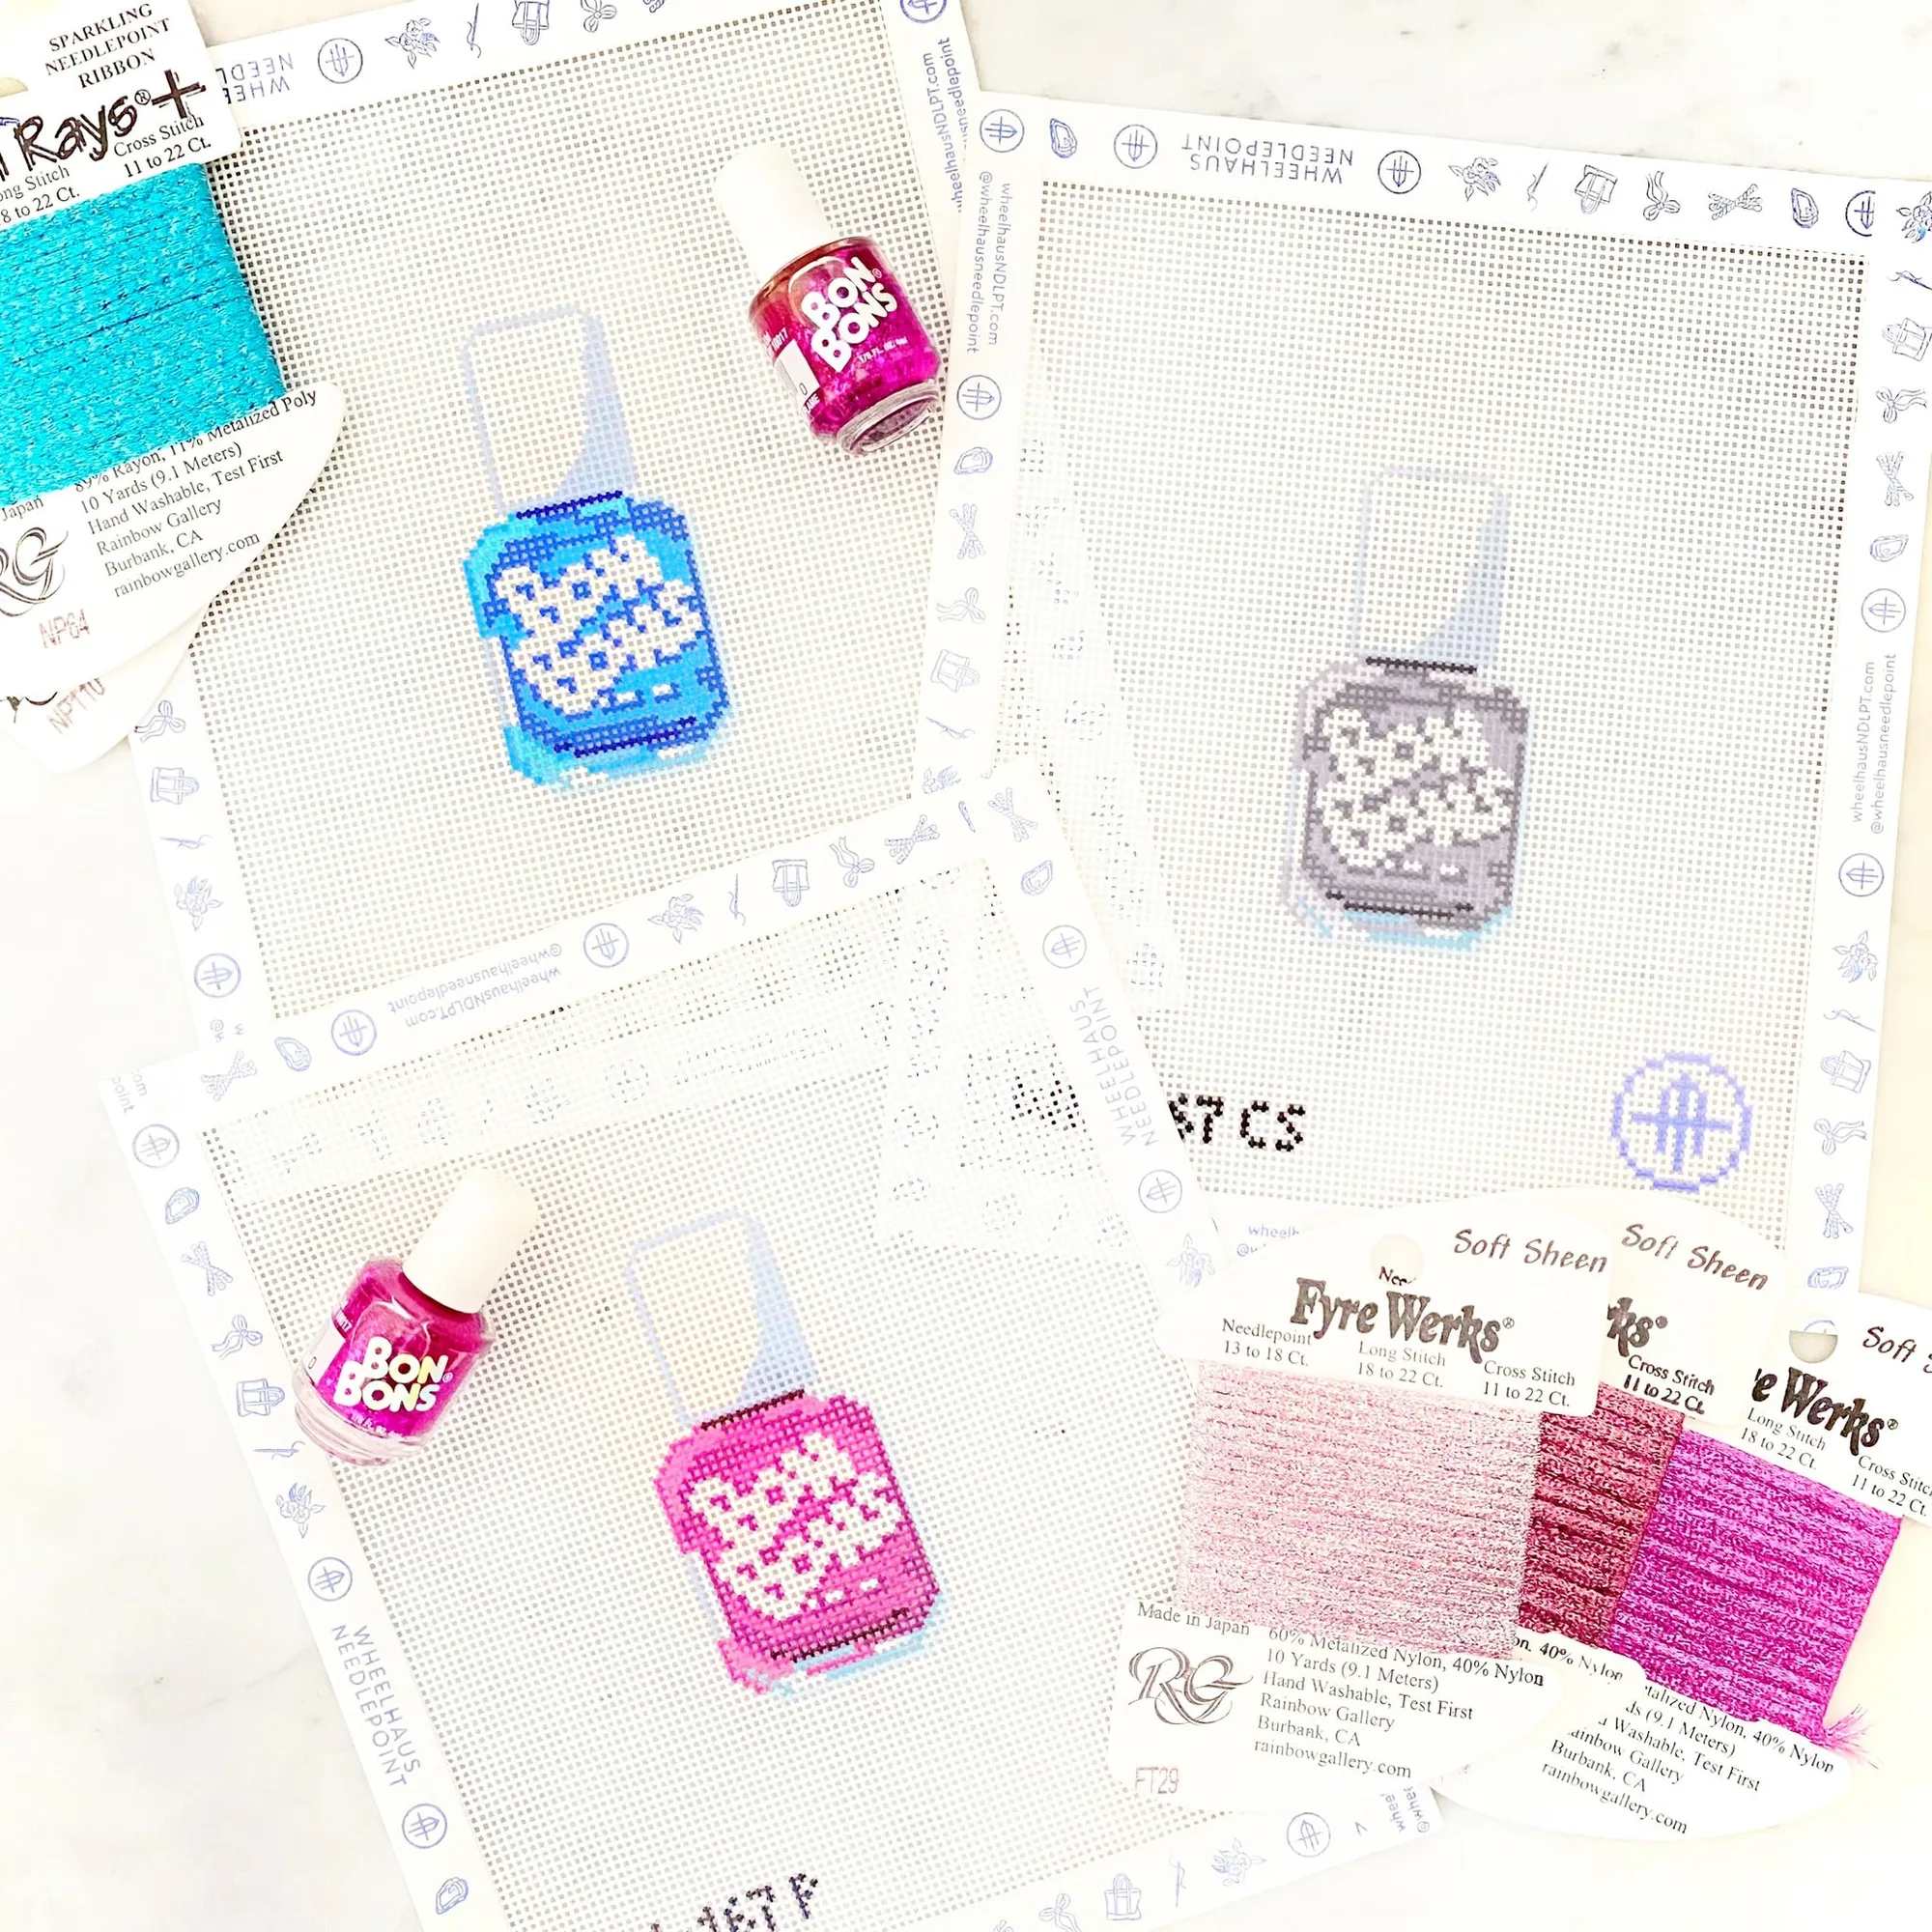
For example, French Bistro Monogram Tile Coaster - Customizable uses 13 mesh with a design of 5.5 W x 5.5 H. That mesh count makes it a good choice for a coaster because the stitches are larger and the project moves quickly. On the other hand, Bon Bons Nail Polish uses 18 mesh with a design of 1.25W x 3H, which is tiny and detailed, better suited for fine thread and a delicate finish.
- 18 mesh: finer detail, more stitches, slower coverage, best for small or intricate designs.
- 13 mesh: larger stitches, faster coverage, better for beginners or larger areas.
- Match mesh to thread weight: finer threads for 18 mesh, heavier threads for 13 mesh.
Stretcher Bar Sizes and Mounting
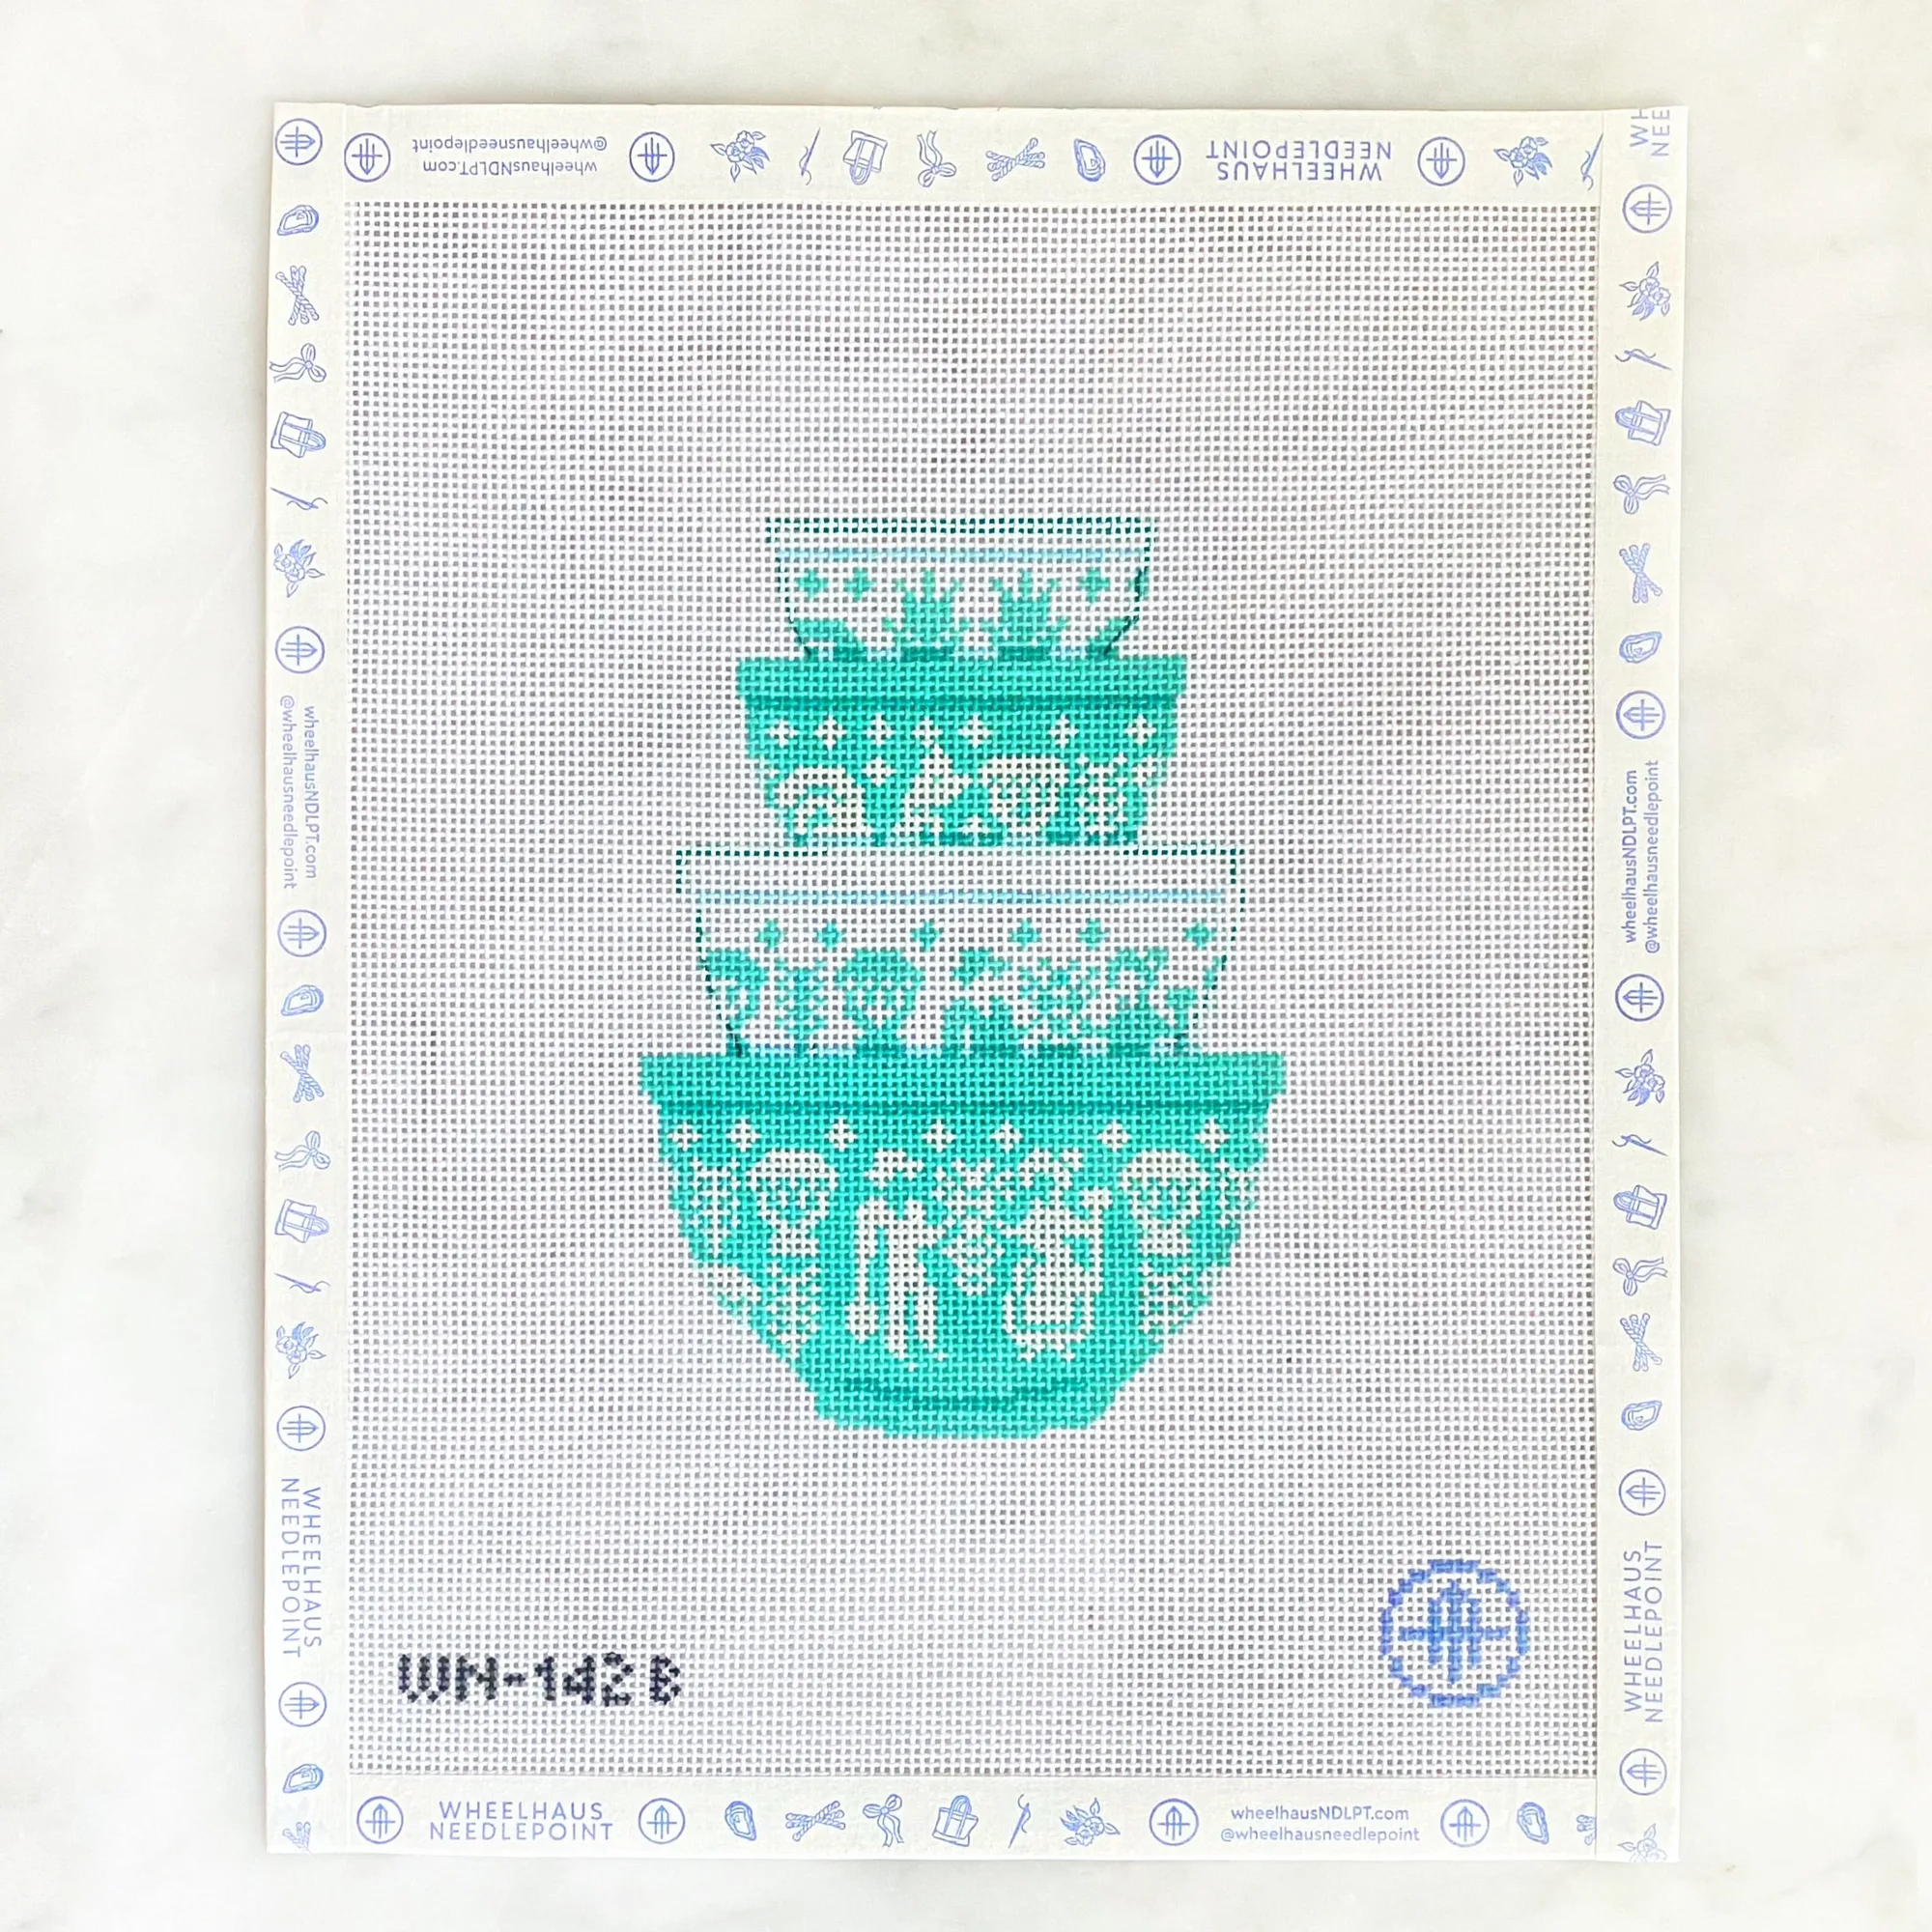
Some canvases list a recommended stretcher bar size. For instance, Vintage Mixing Bowls Butterprint has a design of 4 x 5.5 and recommends an 8 x 9 stretcher bar. That recommendation accounts for the design plus a border for stitching and finishing. Using the recommended size keeps the canvas taut and prevents distortion. If no stretcher bar size is listed, measure the design and add at least 2 inches on each side to determine the bar size.
Stretcher bars come in standard sizes, so you may need to choose the next size up if your calculation falls between sizes. Always prioritize having enough border over a tight fit. A canvas that is too close to the edge of the bars is hard to stitch and may fray.
- If a stretcher bar size is recommended, use it as a starting point.
- Add 2 inches per side to the design dimensions if no recommendation is given.
- Round up to the nearest standard bar size to avoid a cramped stitching area.
Matching Canvas Size to Project Type
Small canvases under 4 inches square are ideal for ornaments, coasters, and small accents. They stitch up quickly and use less thread. Medium canvases from 4 to 8 inches work for pillows, small bags, and framed pieces. Large canvases over 8 inches are best for totes, wall hangings, and statement pieces, but they require more time, thread, and a larger frame or scroll bars.
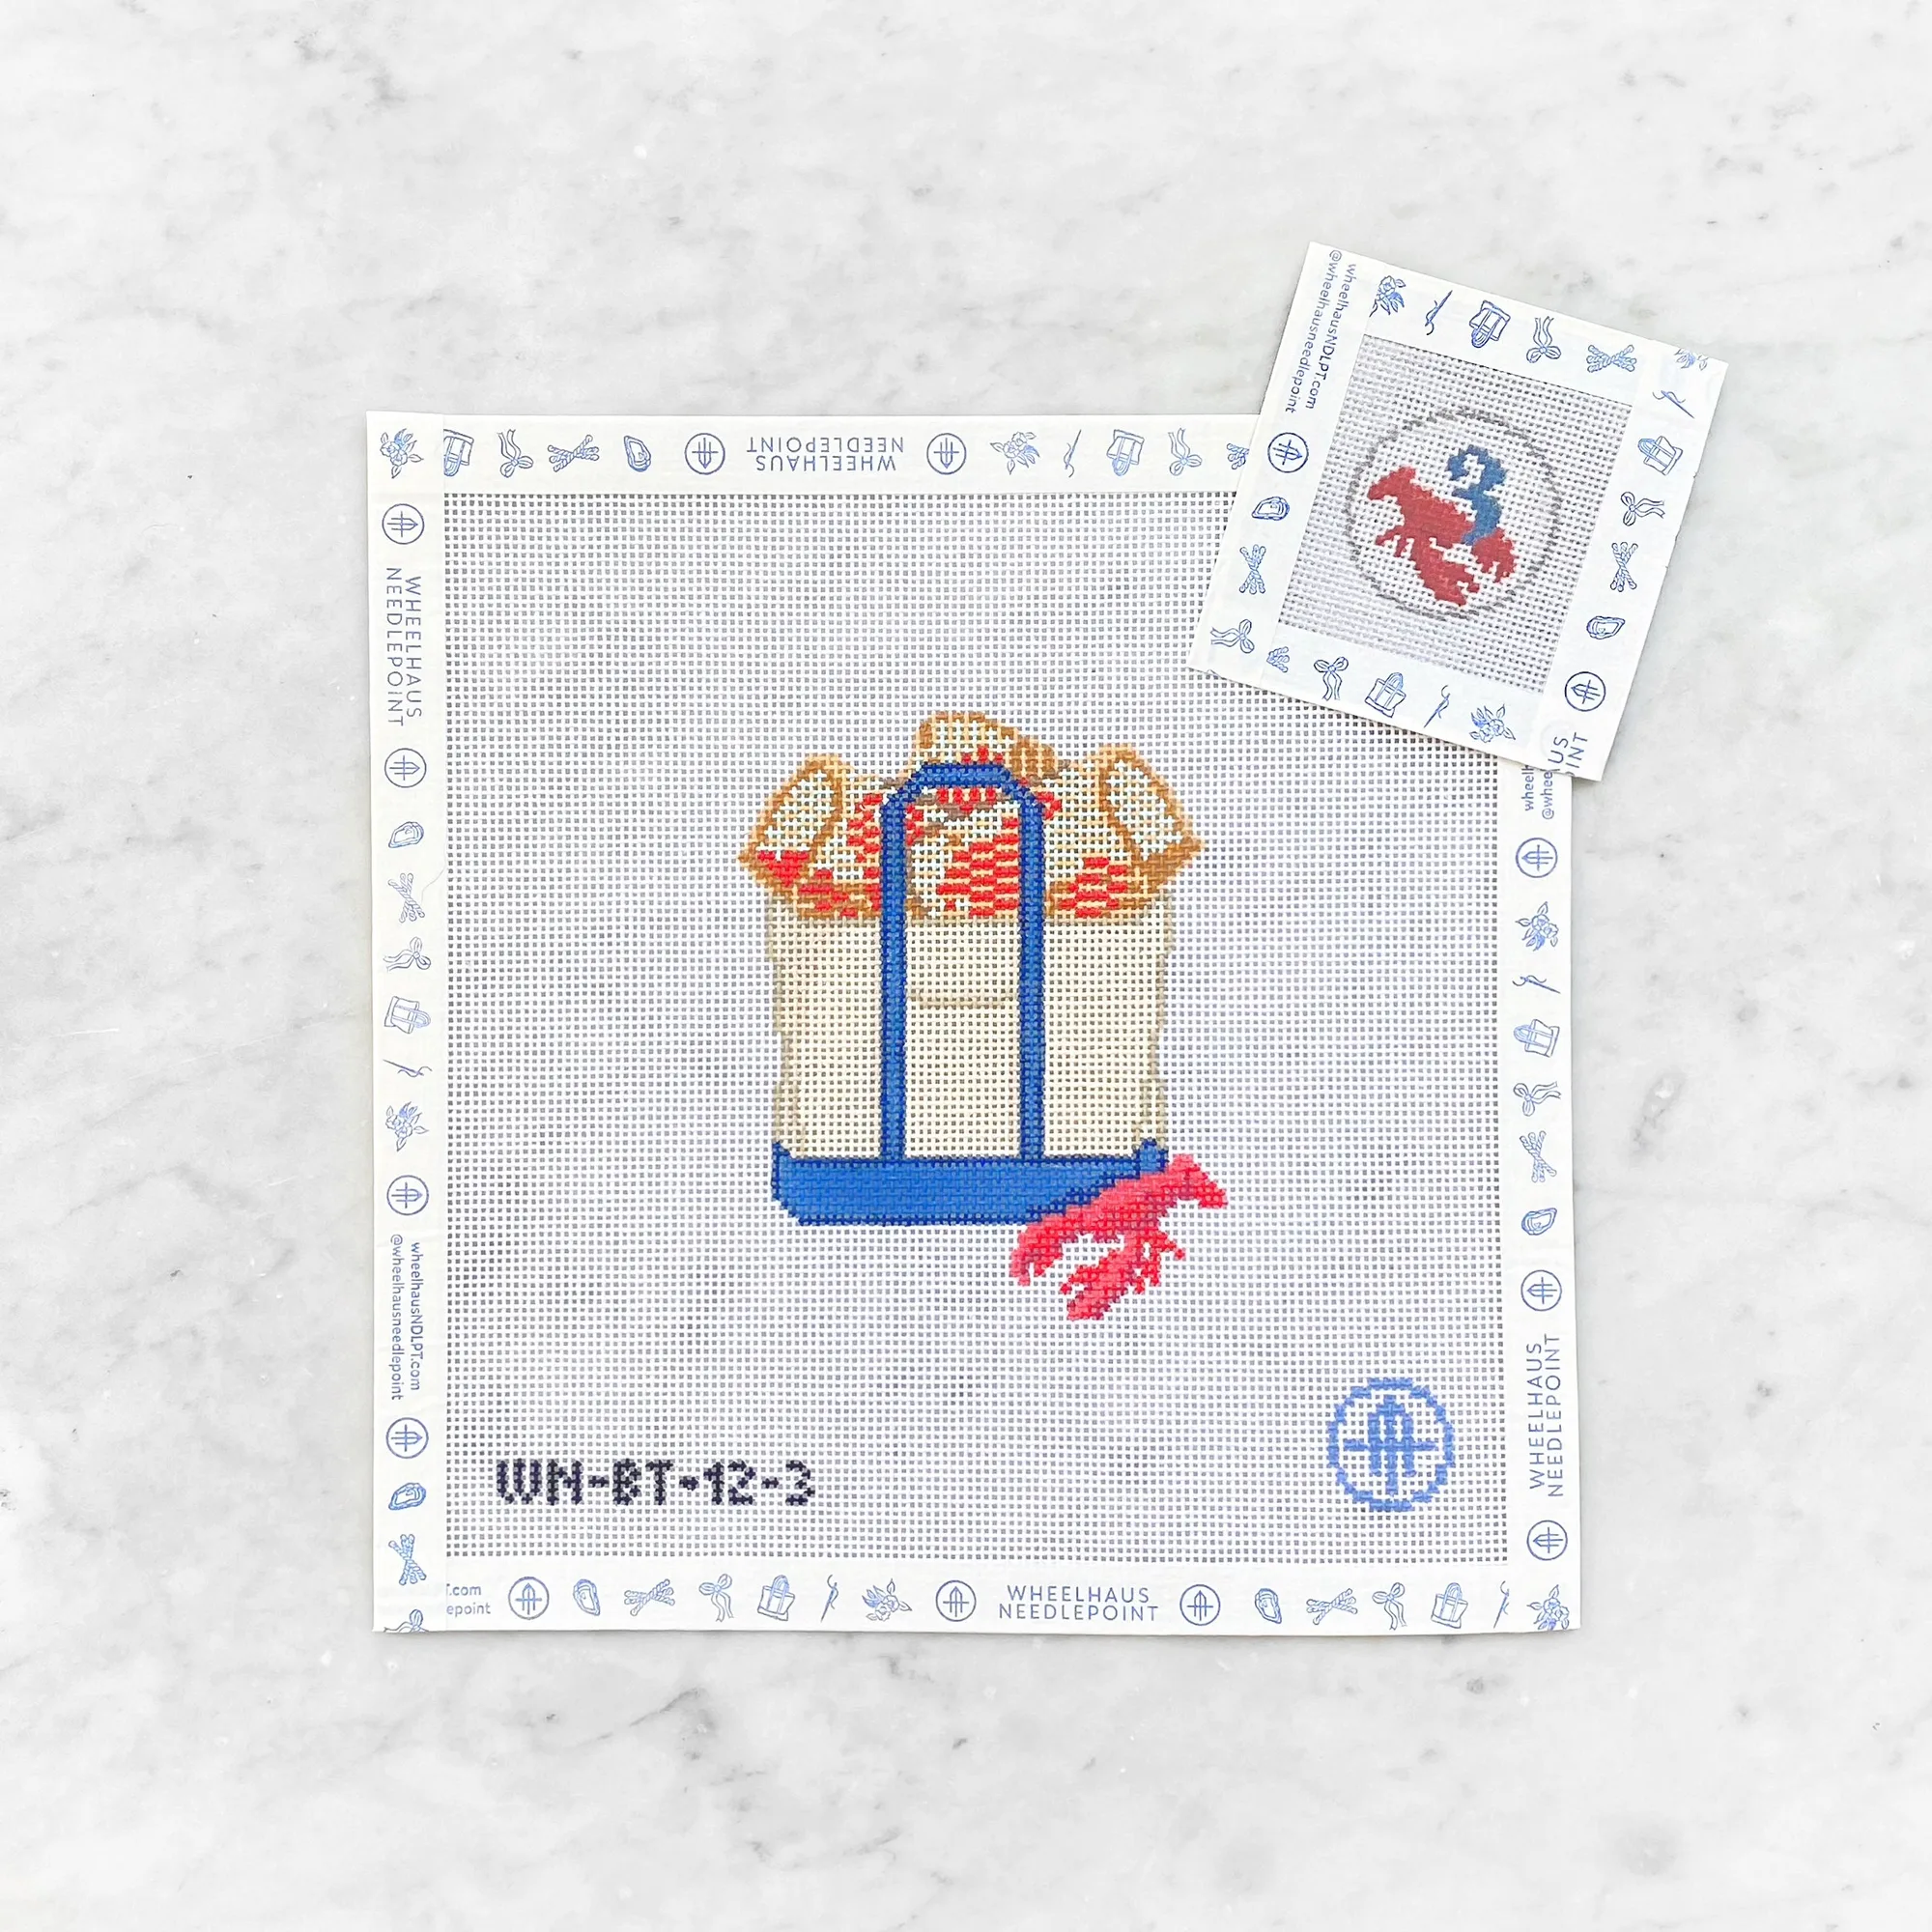
Consider the finished use: a tote front needs a canvas that fits the bag dimensions, while a coaster needs a square that will be functional. Filled Lobster Traps Tote - Day 3 has a design of 3.75"H x 3.5"W on 18 mesh, which is small enough for a tote accent but detailed enough to be recognizable. For a full tote panel, you would need a larger canvas or a design that fills the space.
- Ornaments and coasters: 2–4 inches.
- Pillows and small framed pieces: 4–8 inches.
- Totes and wall hangings: 8 inches and up.
When to Size Up or Down
Size up if you want more detail, plan to use finer threads, or need the piece to fit a specific finished item. Size down if you are a beginner, want a quick project, or prefer larger stitches. The mesh count and design dimensions together determine the stitching experience. A 13 mesh canvas with a 5.5-inch design will stitch faster than an 18 mesh canvas with the same design dimensions.
If you are unsure, start with a medium-sized canvas on 13 mesh. It gives you enough room to learn stitches without committing to a huge project. As you gain confidence, move to 18 mesh for finer work. Remember that the canvas size you choose also affects the amount of thread you need; always buy a little extra.
- Size up for detail and finer threads; size down for speed and simplicity.
- Beginners: start with 13 mesh and a design around 4–6 inches.
- Advanced: 18 mesh and smaller designs for intricate pieces.
Decision Rules for Choosing Canvas Size
- Rule 1: Start with the finished object: Measure the item you plan to make (coaster, pillow, tote panel) and note its dimensions. The stitched design must fit within that area with room for finishing. If the finished object is smaller than 4 inches, choose a small design on 18 mesh for detail.
- Rule 2: Match mesh to thread and detail: Use 18 mesh for fine threads and intricate designs; use 13 mesh for heavier threads and faster coverage. The mesh count affects how the design translates and how long the project takes. If you want a quick project, choose 13 mesh; if you want fine detail, choose 18 mesh.
- Rule 3: Add border for mounting: Always add at least 2 inches of unstitched canvas on each side of the design for blocking and finishing. If a stretcher bar size is recommended, use it. When in doubt, round up to the next standard stretcher bar size.
- Rule 4: Consider your experience level: Beginners should start with 13 mesh and designs around 4–6 inches. Advanced stitchers can handle 18 mesh and smaller or more complex designs. Choose a canvas that matches your comfort with stitch counting and thread tension.
Examples from Wheelhaus Needlepoint
- French Bistro Monogram Tile Coaster - Customizable: 13 mesh, design 5.5 W x 5.5 H, includes a downloadable digital Lettering Chart. The 13 mesh makes it a faster stitch, and the 5.5-inch square is a good size for a coaster. The lettering chart helps you personalize it without guessing.
- Bon Bons Nail Polish: 18 mesh, design 1.25W x 3H. This tiny design on 18 mesh is best for fine threads and a delicate finish, ideal for a small ornament or a quick, detailed project.
- Vintage Mixing Bowls Butterprint: 18 mesh, design 4 x 5.5, recommended stretcher bar size 8 x 9. The recommended stretcher bar size takes the guesswork out of mounting, ensuring you have enough border for stitching and finishing.
- Starfish Christmas Tree Tote - Day 1: 18 mesh, design 3.5"W x 4.25"H. A small, detailed design that works well for a tote accent or a standalone ornament. The 18 mesh gives crisp detail for the starfish and tree.
Is This Canvas Size Right for You?
Best for
- Stitchers who know the finished item they want to make and need to match canvas dimensions.
- Beginners looking for a manageable project with clear size guidelines.
- Advanced stitchers seeking fine detail on 18 mesh.
Not for
- Stitchers who prefer to improvise without measuring the finished object.
- Those who want a one-size-fits-all answer without considering mesh count or thread weight.
Choosing the right needlepoint canvas size comes down to three numbers: design dimensions, mesh count, and border allowance. Start with the finished object, match the mesh to your thread and detail goals, and always leave enough canvas for mounting. With these decision rules, you can pick a canvas that fits your project and your stitching style.