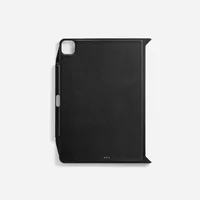
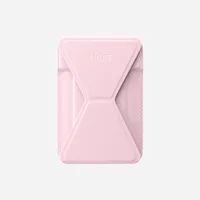
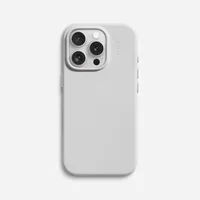
Are you tired of laptop stands that slide around or leave sticky residue on your desk? The Non-adhesive Laptop Stand offers a clean, residue-free solution, but getting it to stay put on every surface can be tricky. Whether you're working on a glass desk, a polished wooden table, or a slightly uneven countertop, this guide will walk you through the setup process to achieve maximum stability.
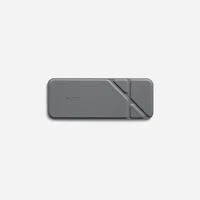
Non-adhesive Laptop Stand
Unlike traditional stands that rely on adhesive pads or clamps, the Non-adhesive Laptop Stand uses a clever friction-based design. This means it works almost anywhere—but only if you set it up correctly. In this article, we'll share pro tips for surface preparation, angle adjustment, and weight distribution to ensure your laptop stays put, no matter where you work.
Why Choose a Non-adhesive Laptop Stand?
Many laptop stands on the market use adhesive strips or suction cups to stay in place. While these can work, they often leave behind sticky residue, damage delicate surfaces, or lose their grip over time. The Non-adhesive Laptop Stand eliminates these problems by using a non-slip base and a foldable design that grips the surface through friction alone.
This design is especially beneficial for people who move between workspaces—whether you're at home, in a coffee shop, or at a client's office. You can quickly set up and dismantle the stand without worrying about leaving marks or carrying extra accessories. Plus, the non-adhesive nature means you can reposition it as often as you like without losing effectiveness.
- No sticky residue on your desk or laptop.
- Works on glass, wood, metal, and plastic surfaces.
- Lightweight and portable for on-the-go productivity.
Step-by-Step Setup for Maximum Stability
To get the most stable setup, start by cleaning the surface where you'll place the stand. Dust, oil, or moisture can reduce friction and cause slipping. Use a dry microfiber cloth to wipe the area thoroughly. If you're on a glass desk, ensure it's completely dry—even a small amount of condensation can affect grip.
Next, unfold the Non-adhesive Laptop Stand completely. Most models have a hinge or locking mechanism that clicks into place. Make sure it's fully extended to create the correct angle for your laptop. Place the stand on your desk and press down firmly on the base for a few seconds to 'seat' the non-slip material against the surface. This helps create a stronger grip.
Now, position your laptop on the stand. For maximum stability, center the laptop's weight over the stand's base. If your laptop is heavier, you may need to adjust the angle slightly to distribute weight more evenly. The Non-adhesive Laptop Stand is designed to support a wide range of laptops, but finding the sweet spot will prevent any wobble.
- Clean the surface with a dry cloth before setup.
- Press down firmly on the base to activate the non-slip grip.
- Center your laptop's weight over the stand's base.
Tips for Specific Surfaces
Glass desks are notorious for being slippery, but the Non-adhesive Laptop Stand handles them well if you follow a few extra steps. Ensure the glass is spotless and dry. If you're still experiencing sliding, try slightly moistening your fingers and wiping the base of the stand—this can increase friction on smooth surfaces. However, avoid getting the stand wet, as it may damage the material.
On wooden or laminate surfaces, the stand usually grips well right away. However, if your desk has a glossy finish, it might be more slippery. In that case, consider placing a thin, non-slip mat underneath the stand (not sold separately) to add extra grip. For uneven surfaces like a slightly warped table, adjust the stand's feet (if adjustable) to level it out, ensuring all contact points touch the surface evenly.
- For glass: clean and dry thoroughly; test grip before placing laptop.
- For glossy wood: use a non-slip mat for added stability.
- For uneven surfaces: adjust feet to level the stand.
Troubleshooting Common Issues
If you notice your stand sliding, the most common cause is an unclean surface. Even invisible oils from your hands can reduce friction. Re-clean the surface and the base of the stand with a dry cloth. Also, check that the stand is fully unfolded—a partially open stand might not have proper contact.
Another issue could be weight imbalance. If your laptop is top-heavy or has a large battery, the stand may tilt forward. Try adjusting the angle to a more reclined position to shift the center of gravity. If you're using an external keyboard, you can also move the laptop slightly forward or backward on the stand to find the balance point.
- Always re-clean surfaces if sliding occurs.
- Ensure the stand is fully unfolded for proper contact.
- Adjust the angle for heavy laptops to prevent tipping.
With these simple steps, your Non-adhesive Laptop Stand will provide a stable, secure base for your laptop on virtually any surface. Remember to keep the surface clean, press down firmly during setup, and adjust the angle to suit your laptop's weight. For a complete ergonomic setup, consider pairing your stand with other accessories like the Snap Battery Pack for all-day power, or the Flip Laptop Phone Mount to keep your phone within easy reach. Explore our collection today and upgrade your workspace!