Quick answer
For realistic Greek hoplite helmets and crests on 28mm figures, start with a metallic bronze base coat, layer on washes for depth, and drybrush highlights. The new Victrix plastic heads allow easy crest swaps, so you can vary unit markings without extra work.
Why plastic heads change your painting approach
Victrix retooled their Greek heads in hard plastic, which means less flash and more detail than metal. The separate crests on many heads let you swap styles between figures—great for distinguishing units or historical periods without repainting. Plastic also holds primer differently; use a quality acrylic primer to prevent paint from chipping during handling.
Choosing your helmet colors
Bronze was the standard for hoplite helmets, but variations like iron-grey or tarnished copper add visual interest. For a quick tabletop standard, bronze works across all city-states. If you want more historical accuracy, reserve iron-grey for later periods or specific regions like Sparta. The plastic heads take paint evenly, so you can experiment with metallic medium mixes for a polished shine.
Step-by-step painting process
- Prime the plastic heads: Spray or brush on a thin coat of acrylic primer. Focus on the recessed areas of the helmet and crest sockets. Let dry completely for 30 minutes. Skipping primer leads to paint rubbing off on plastic—especially around crest attachment points.
- Base coat the helmet: Apply a solid layer of bronze metallic acrylic (e.g., Vallejo Bronze or Citadel Balthasar Gold). Cover the entire helmet, including the underside of the brim. Two thin coats are better than one thick coat. Thick coats obscure detail like the brow ridge and cheek pieces. Keep the paint consistency like milk.
- Wash for shadows: Mix a dark brown or black ink with water (1:10 ratio) and brush it into the recesses. Wipe the excess off the raised areas with a damp cloth. This creates instant depth around the eye holes and crest ridge. Too much wash pools in the eye holes; blot with a dry brush if it runs into the face area.
- Drybrush highlights: Load a flat brush with pure metallic bronze, then wipe most off on a paper towel. Lightly brush the top edges of the helmet, the crest ridge, and the cheek pieces. This simulates wear and shine. Use a worn brush for a more natural effect—new brushes leave streaks.
- Paint the crest separately (if applicable): If the crest is separate, paint it off the head. Use a contrasting color (white, red, or black) for the horsehair. For a realistic look, apply a light drybrush of the same color mixed with white over the top. Painting the crest while attached risks getting paint on the helmet. Always remove and paint separately when possible.
- Attach and final touch-up: Glue the crest into the socket with superglue or plastic cement. Once dry, touch up any visible glue with the helmet base color. Seal the entire head with a matte varnish to protect the paint during gaming. Test-fit the crest before gluing—some heads have slightly different socket depths.
Product facts
-
Greek Hoplite Heads x 56: The pack contains 56 hard plastic heads (28 per frame, 2 frames), with many crests separated so you can swap styles from head to head. This lets you paint multiple crest variations on a single set of heads, saving time and giving your hoplites a more varied look across the unit.
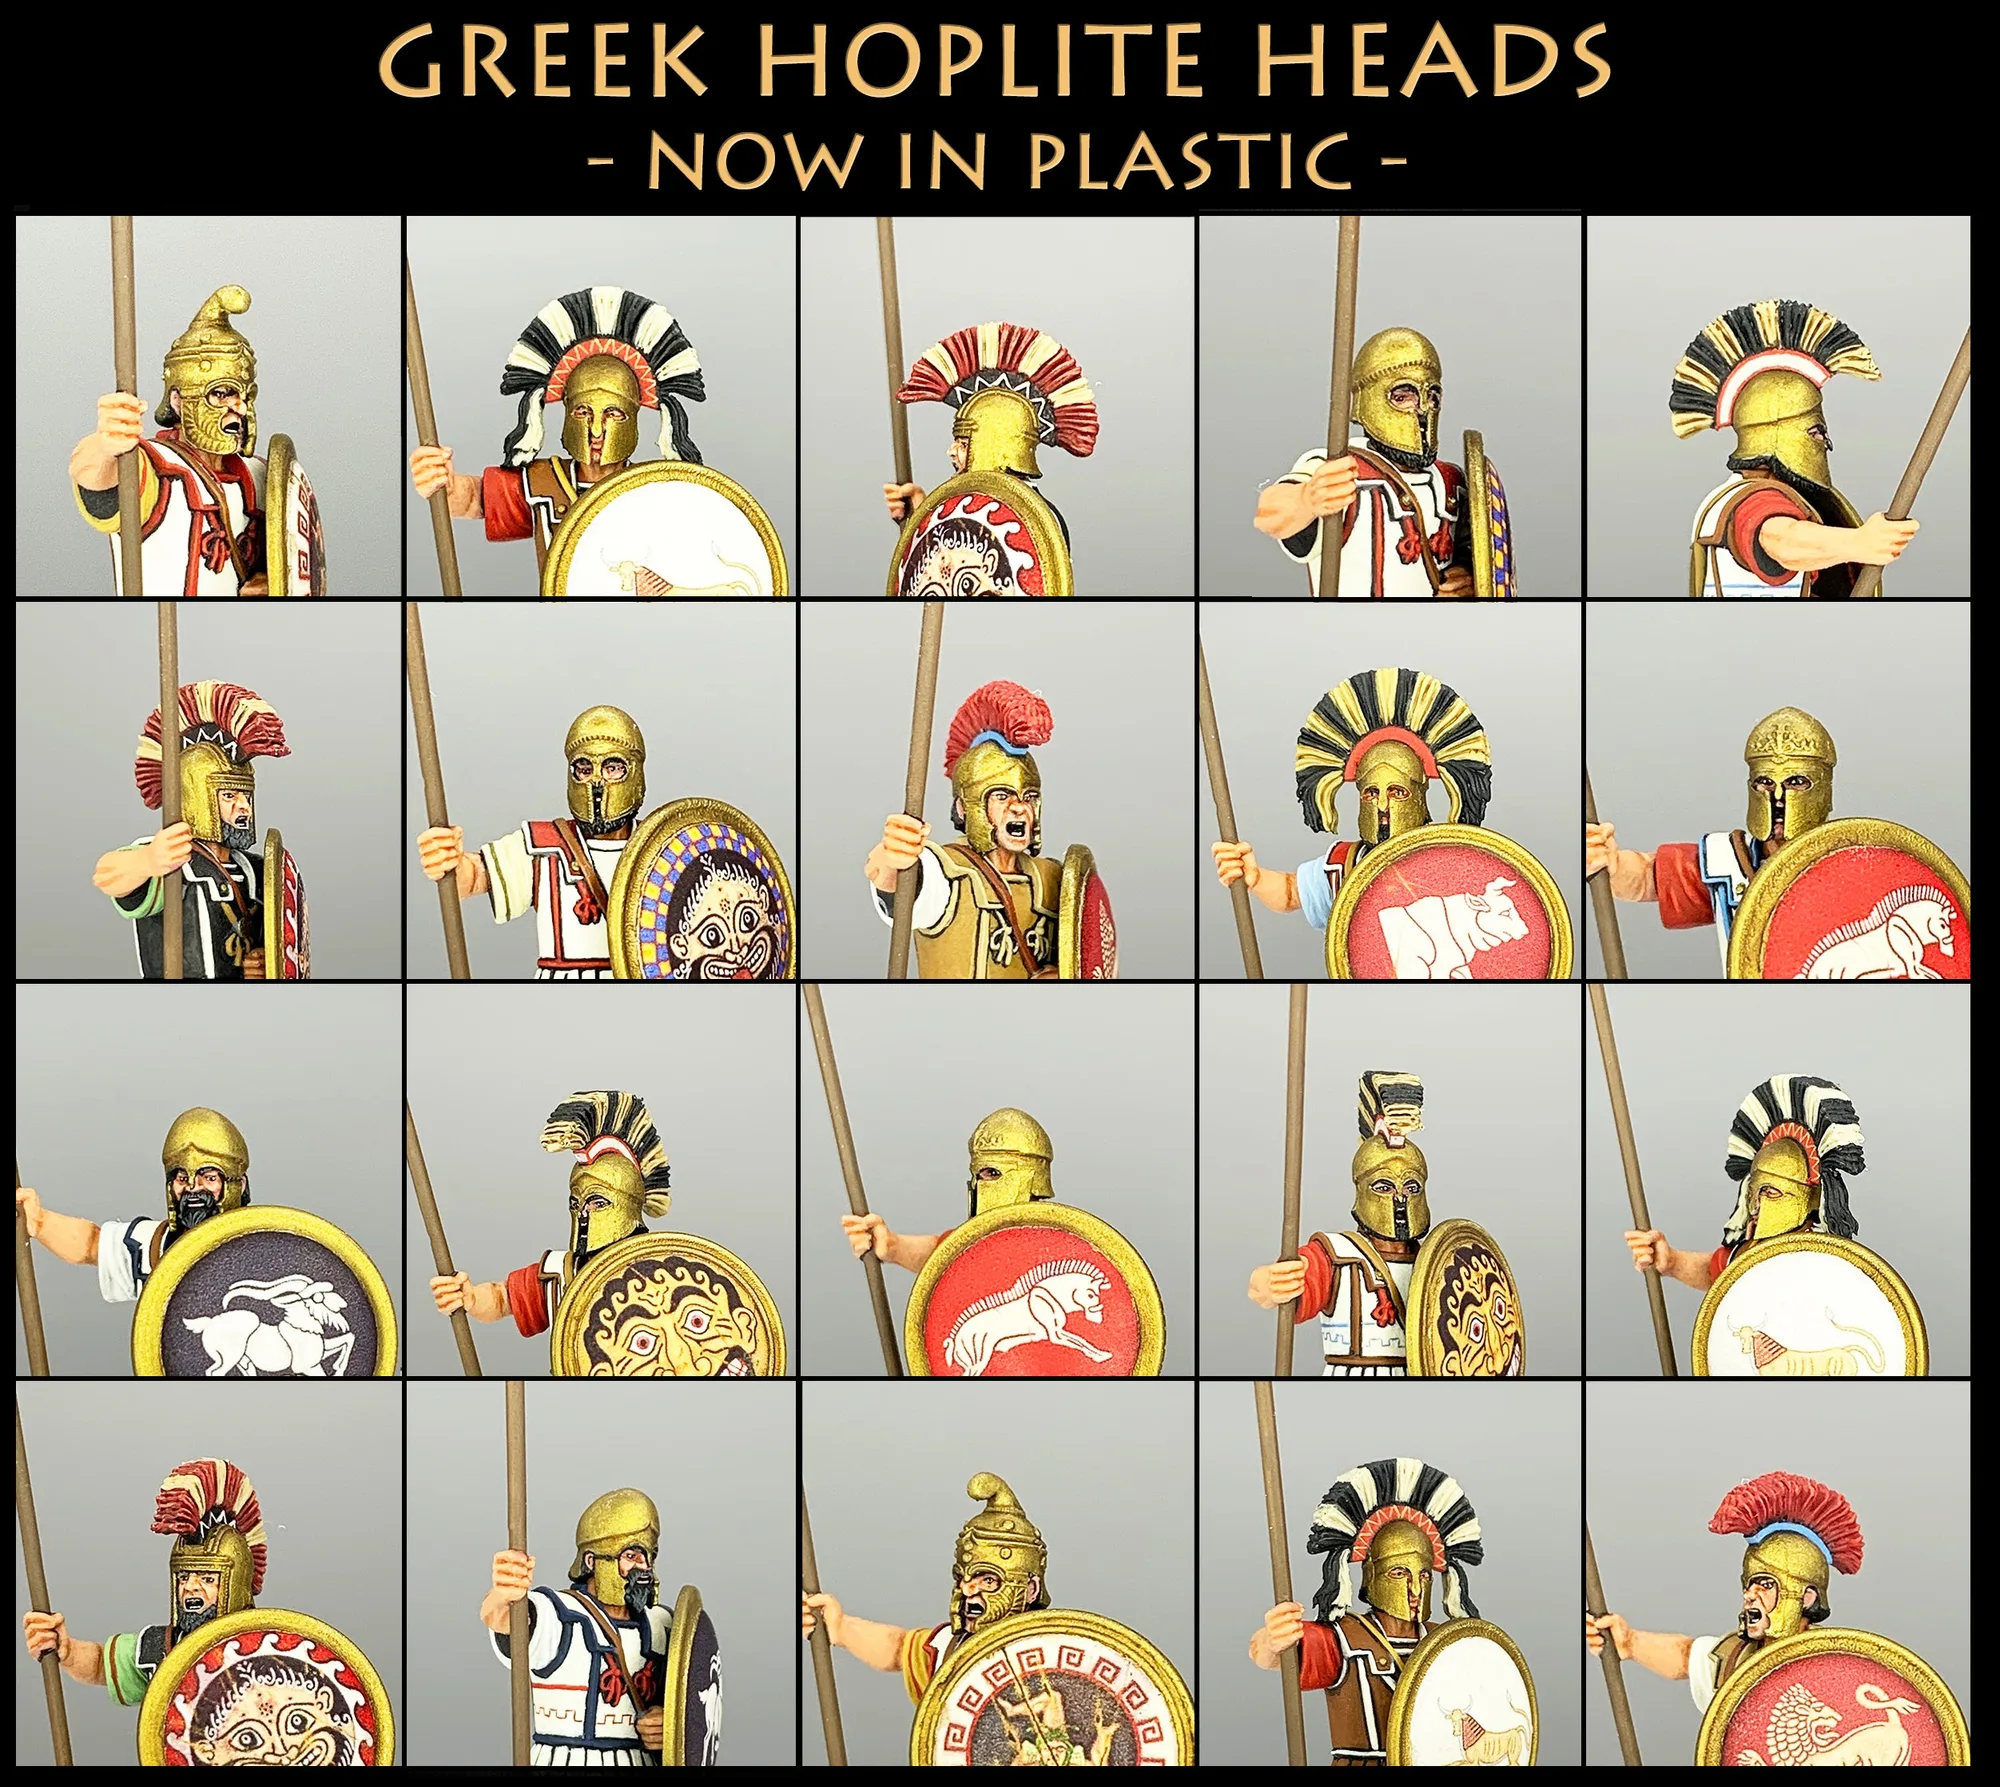
Greek Hoplite Heads x 56