Quick answer
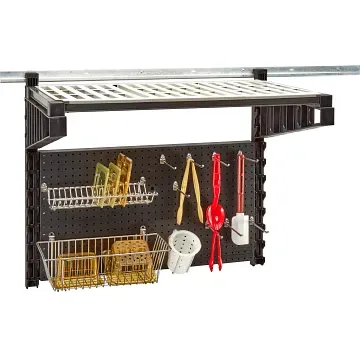
Mount pegboard on a clear wall at counter height, space it off the surface with furring strips so hooks seat properly, and map your most-used tools to the zones where you actually work. Anchor the panel into studs, keep heavy items low, and add hooks only after the board is secure. If you need shelving and pegboard together, a wall shelving station kit can simplify the job.
Plan the wall before you drill
Walk your line during a busy shift and note where hands reach most often: prep, expo, dish, and the pass. Pegboard kitchen storage works best when it shortens a motion, not when it fills an empty wall. Measure the clear wall area, subtract space for outlets, hoods, and swinging doors, and confirm the panel will not sit behind a heat source or constant splash zone.
Decide what belongs on the board versus in a drawer. Tools used every few minutes, such as tongs, ladles, spatulas, and measuring cups, earn a hook. Items used weekly are better in closed storage. This single decision prevents a pegboard from becoming a cluttered catch-all.
Choose a panel and mounting approach
Standard pegboard needs an air gap behind it; hooks pass through the holes and need room to seat. Furring strips or a wall shelving station kit create that gap and give you solid mounting points. If you are mounting directly to a finished wall, locate studs and mark them before drilling.
For heavy tools, a steel or heavier-duty panel holds up better than thin hardboard over time. Check the panel's stated capacity if it is supplied; when capacity is not listed, keep the heaviest items on lower hooks and add more mounting points than you think you need.
Lay out zones by task, not by tool type
Group hooks by station: one zone for prep tools, one for plating, one for cleaning. A cook should be able to grab and return a tool without crossing the kitchen. Keep the most frequently used items between waist and shoulder height, and reserve the top row for light, occasional items.
Leave breathing room. Crowding hooks makes tools collide and slows retrieval. A simple rule is to leave one empty hole between hook groups so you can shift items later without remounting.
How to install and set up a kitchen pegboard
- Mark the panel outline and stud locations: Hold the panel against the wall at your planned height, level it, and trace the corners. Mark stud centers with a stud finder. Common mistake: skipping the level check, which makes every hook row look crooked once tools hang. Checkpoint: the outline is level and at least two mounting points land on studs.
- Install furring strips or a mounting frame: Fasten horizontal strips to the studs so the pegboard sits about half an inch off the wall. This gap lets hooks seat fully and keeps the panel from bowing. Common mistake: mounting pegboard flush, which prevents standard hooks from locking in. Checkpoint: a hook inserted in a test hole sits flush and does not wobble.
- Secure the pegboard to the frame: Drive fasteners through the panel into the strips at every marked point, working from the center outward. Do not overtighten, which can crush the panel surface. Common mistake: too few fasteners on a wide panel, causing sag under load. Checkpoint: press firmly along the panel; there should be no flex or rattle.
- Place hooks by zone and load from the bottom up: Start with the lowest hooks and work upward, adding heavy items first so you can test stability. Group hooks by station and leave gaps between groups. Common mistake: loading the top row first, which makes the panel feel unstable before it is fully dressed. Checkpoint: each hook holds its item without sagging or pulling out.
- Label zones and set a weekly reset: Add small labels for prep, plating, and cleaning zones so the layout survives shift changes. Once a week, return stray tools and remove anything that has not been used. Common mistake: treating the board as permanent, which lets clutter rebuild. Next step: if you need shelf space too, plan a wall shelving station kit alongside the pegboard rather than adding hooks beyond capacity.
Product facts
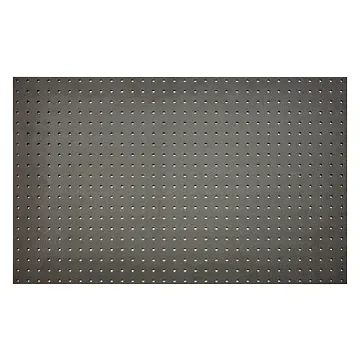
- Pegboards: Cambro Pegboards are designed for practical storage and offer a simple, effective way to hang tools and utensils for a tidy, efficient workspace. A ready-made pegboard removes the guesswork of sourcing a panel and keeps frequently used items visible instead of buried in drawers.
- Wall Shelving Station Kits: Cambro Wall Shelving Station Kits are wall-mounted and designed to help organize and maximize vertical space, keeping essentials within easy reach. If you want shelves and hanging storage in one install, a kit frees floor space and gives you a single mounting plan rather than two separate projects.
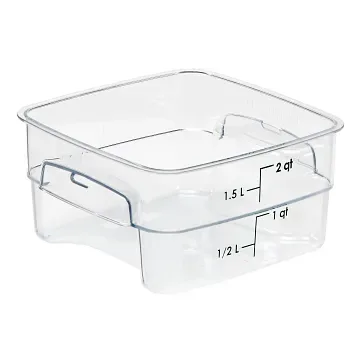
- Camsquares® FreshPro Food Storage Containers – Camwear®: Camsquares FreshPro Food Storage Containers are made from durable Camwear material with a square design that fits neatly into standard shelving and refrigerators. Square containers pair well with a pegboard-and-shelf setup because they use shelf depth efficiently and stay visible for quick identification.