Why stencils work well on bases and terrain
Miniature bases and small pieces of terrain often need repeating patterns—camouflage mottling, unit numbers, warning stripes, or emblems. Freehand painting these shapes consistently is slow and frustrating. A stencil gives you a fixed opening to work through, so the pattern lands in the same place and shape each time.
The PLASTIC STENCILS set from SCALE75 is designed for this job. The templates are washable, adhere to any surface of your figure or model, and work with both brushes and airbrushes. The set includes 10 templates covering themes such as camouflage, letters, numbers, emblems, badges, and symbols.
What you get in the PLASTIC STENCILS set
-
PLASTIC STENCILS: Set includes 10 templates with themes including camouflage, letters, numbers, emblems, badges, and symbols. Ten different themes cover most common base and terrain marking needs, from camo patterns to unit identifiers.
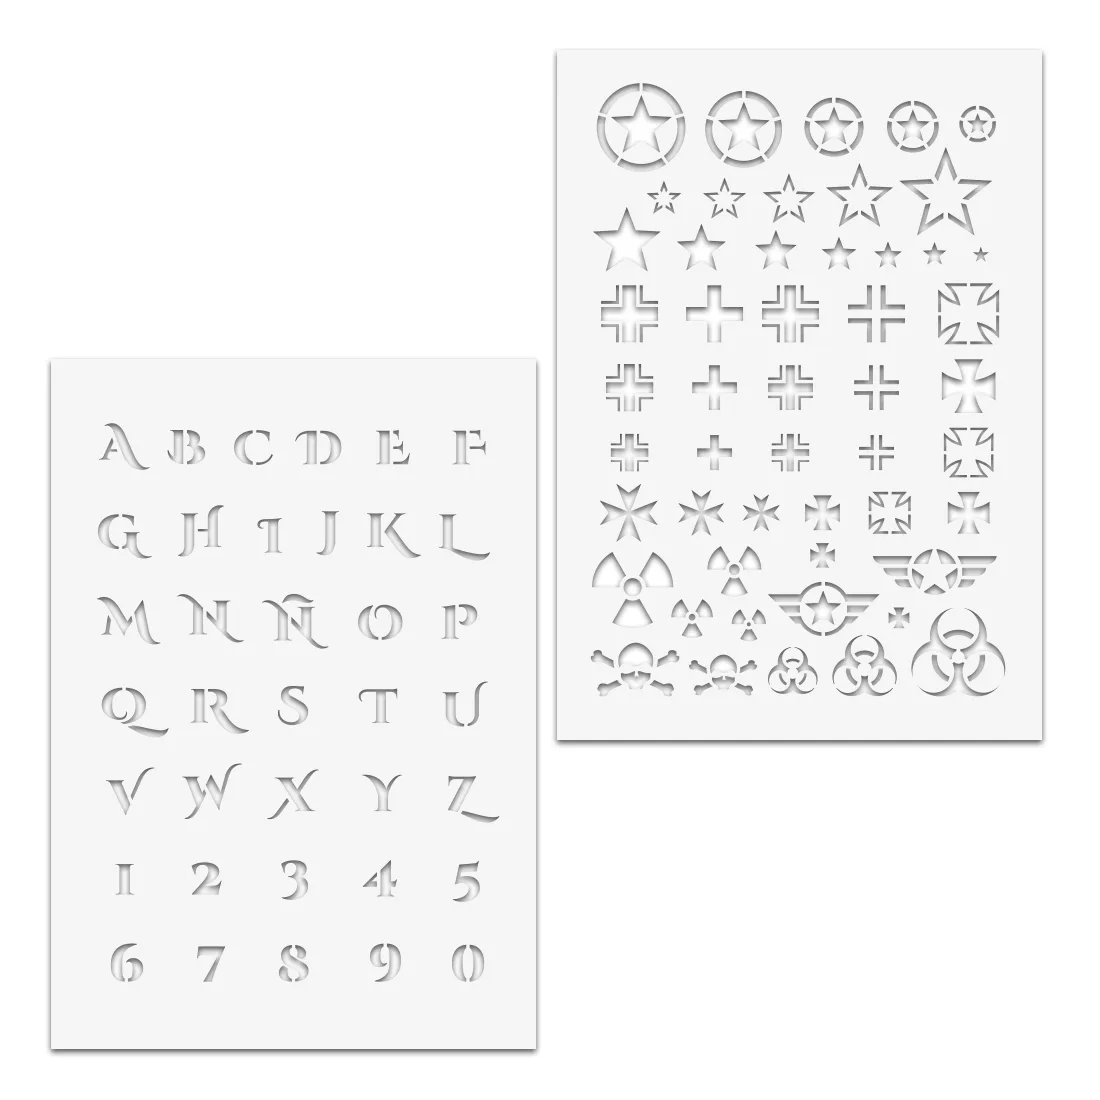
PLASTIC STENCILS
-
PLASTIC STENCILS: Templates are washable and easily adhere to any surface of your figure or model. Washable means you can reuse them across projects; adhesion helps them stay put while you work.
-
PLASTIC STENCILS: Suitable for brushes and airbrushes. You can choose the tool that fits your setup, whether you prefer brush control or airbrush speed.
Before you start: secure the template
The catalog recommends using the templates as they come or securing them with low-tack glue or power tack (ref: SCC-015) to keep them firm while you work. That advice matters most on curved or textured bases, where a stencil can lift at the edges and let paint creep underneath.
If you use an adhesive, choose a low-tack product and let it tack up slightly before pressing the stencil down. This reduces the risk of residue or tearing when you remove the template. The supplied information does not specify drying times or application amounts, so test on a spare surface first.
A practical order for stenciling a miniature base
- 1. Prepare the base surface: Make sure the base is clean and dry. Any texture or loose material can prevent the stencil from sitting flat.
- 2. Position and secure the stencil: Place the template where you want the pattern. Use it as it comes, or apply low-tack glue or power tack (ref: SCC-015) to hold it firm. Press down along the edges.
- 3. Choose your tool: For brushes, use a stippling or dabbing motion rather than a sweeping stroke to reduce paint forcing under the stencil. For airbrushes, work at low pressure and keep the nozzle perpendicular to the surface.
- 4. Apply thin layers: Build up color gradually. Thin layers dry faster and are less likely to bleed under the template edges.
- 5. Remove the stencil carefully: Peel the template away slowly while the paint is still slightly wet to avoid pulling dried film. Wash the stencil promptly if it is washable.
Brush vs airbrush: matching the tool to the pattern
- Brush: Better for small, controlled areas and for stencils with fine detail. Use a stippling motion and avoid overloading the brush.
- Airbrush: Faster for larger areas and soft camouflage patterns. Keep the airbrush moving and avoid spraying directly into the stencil edges, which can cause paint to creep underneath.
Getting clean edges: what the supplied information covers
The catalog does not provide specific recommendations for paint thinning, airbrush pressure, or drying times. Those variables depend on your paints and tools, so test on a spare base or piece of terrain before committing to a finished model.
What the catalog does confirm is that the templates are washable, adhere to surfaces, and work with both brushes and airbrushes. Combined with the recommendation to secure them with low-tack glue or power tack (ref: SCC-015), that gives you a reliable starting point for clean, repeatable patterns.