Quick answer
Charge the drive battery fully with the charger that came with your Sián kit, then check the wheels, body clips, and steering before the first run. Start on a smooth, clean surface at low speed, and stop immediately if you hear grinding or the steering sticks. A few minutes of prep prevents most first-run problems.
A scale RC car like the Revell Lamborghini Sián is fun out of the box, but the first 20 minutes decide whether it runs smoothly or sits on the bench. Most early problems come from a partly charged battery, a loose body, or a first run on gravel that jams the steering.
This guide walks through the practical order: charge, inspect, adjust, then drive. It covers how to charge an RC scale car safely, what to check on the chassis, and the habits that keep the car running well after the first pack.
Charge the battery before anything else
Plug the supplied charger into a wall outlet and connect the drive battery. Many scale RC cars ship with a partially charged pack, so a full charge is the first step, not an optional one. Check the charger indicator: most switch from red to green or stop blinking when the pack is full. If your kit uses a USB charger, use a 5V wall adapter rather than a laptop port, which can be slow or cut power.
While the battery charges, keep it on a non-flammable surface and away from anything that could be knocked over. Do not leave it charging unattended overnight. If the pack becomes hot to the touch, unplug it and let it cool before trying again.
- Common mistake: running the car on the factory partial charge and assuming the battery is weak.
- Checkpoint: the charger indicator shows full before you install the pack.
Inspect the car before the first run
Before you power on, look over the whole car. Press each wheel gently to check for wobble, and turn the front wheels by hand to feel for binding. Loose wheel nuts and grit in the steering linkage are two of the most common causes of poor handling on a new scale car. A small tool set helps here; the Revell Tweezer Set (1x Straight/Curved/Self-Close) is useful for pulling hair or carpet fibers out of the steering arms and for holding tiny body clips.
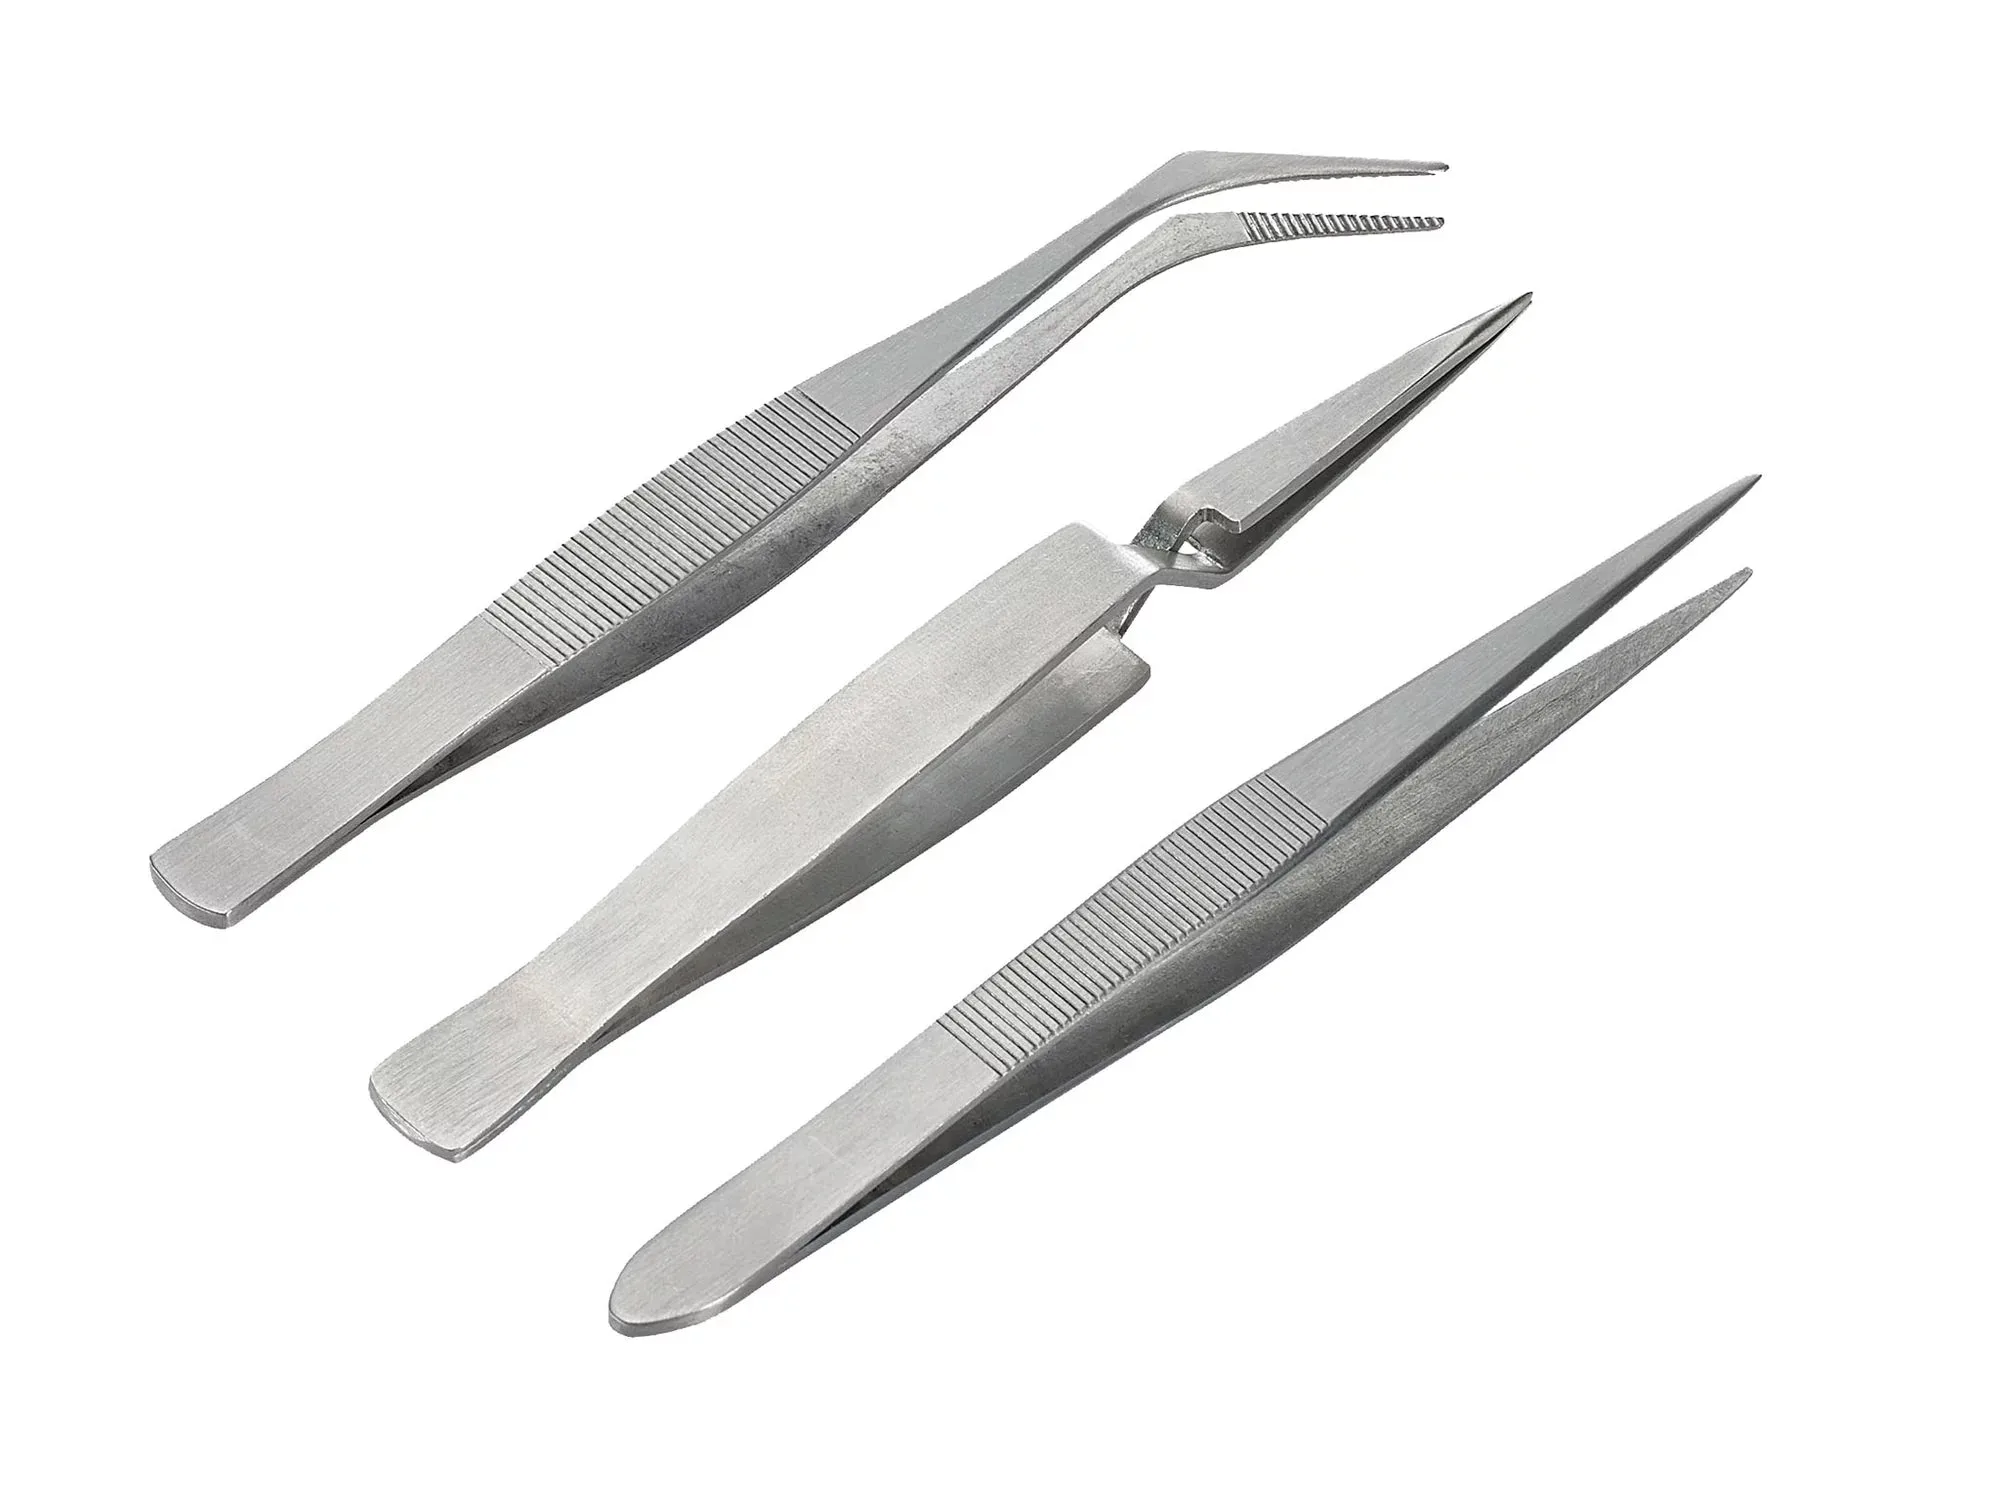
Revell Tweezer Set (1x Straight/Curved/Self-Close)
Check that the body is seated correctly and that all clips are in place. A body that rubs a tire will slow the car and scuff the paint. Also confirm the antenna is not trapped under the shell, because that shortens radio range.
- Common mistake: skipping the wheel check and discovering a loose nut after the first crash.
- Checkpoint: all four wheels spin freely by hand with no rubbing.
Set the steering trim and test the controls
Turn on the transmitter first, then the car, following the order in your manual. With the car off the ground, steer left and right and watch the front wheels. If the car pulls to one side when the steering wheel is centered, adjust the steering trim until the wheels point straight. This is a two-minute adjustment that prevents constant correction while driving.
Test the throttle gently. The wheels should spin up smoothly and stop when you release the trigger. If the car moves on its own with no input, re-bind or re-check the trim before driving. Never hold the car still at full throttle, as that stresses the motor and drivetrain.
- Common mistake: driving with the steering trim off-center and blaming the car for pulling.
- Checkpoint: wheels point straight with the transmitter steering centered.
Choose the right surface for the first run
Start on smooth, clean pavement, a gym floor, or short carpet. These surfaces let the car roll freely and reveal any steering or drivetrain issues without hiding them in dust and gravel. Avoid sand, long grass, and wet ground for the first run; fine grit works into the gears and bearings, and moisture shortens the life of the electronics.
Keep the first session short. Run for five to eight minutes, then stop and check the motor and battery temperature by touch. Warm is normal; hot means you should let it cool and shorten the next run. This also gives you a chance to re-check wheel nuts and body clips before they work loose.
- Common mistake: heading straight for gravel or grass and jamming the steering with debris.
- Checkpoint: after five minutes, the motor is warm, not hot, and all wheels are still tight.
Build a simple maintenance routine
After each session, wipe the car down with a dry cloth and use a soft brush or tweezers to clear dust from the steering and suspension. Check the wheel nuts and body clips, and store the car with the battery removed. If your kit uses a rechargeable pack, store it at roughly half charge rather than fully drained, which is easier on the cells over time.
For a longer life, keep the car away from extreme heat and never store it in a hot car. If you plan to paint or touch up the body later, Revell Aqua Color and Revell Email Color are both suitable for model work, but check compatibility with the body material before applying anything.
- Common mistake: storing the car with a fully drained battery and finding it will not hold a charge later.
- Checkpoint: car is clean, wheels are tight, and the battery is removed before storage.
First-run checklist in order
- Charge the drive pack fully: Use the supplied charger on a non-flammable surface and wait for the full-charge indicator. Do not run on a partial charge; it makes the car feel weak and shortens run time.
- Inspect wheels, steering, and body: Check wheel nuts, spin the front wheels by hand, and confirm the body clips are seated. Fix any binding or rubbing before you power on.
- Center the steering trim: Power on the transmitter first, then the car, and adjust trim until the wheels point straight. A centered trim means less correcting while you drive.
- Drive on a smooth surface: Start on clean pavement or short carpet and keep the first session to five to eight minutes. Check motor and battery temperature by touch before the next run.
- Clean and store correctly: Wipe down the car, clear debris from the steering, and remove the battery for storage. A two-minute routine after each run prevents most long-term problems.
Tools and paint worth knowing
- Revell Tweezer Set (1x Straight/Curved/Self-Close): Three-piece set with straight, curved, and self-closing tweezers for handling small, delicate parts. Useful for pulling debris out of steering arms and holding tiny body clips during setup and repairs.
- Revell Mixing Cups (15pcs): 15 robust plastic cups with ml and fl. oz. scales for mixing small or large amounts of paint. Handy if you touch up the Sián body or mix custom colors for details, with clear dosing and easy cleanup.
- Matt "Greyish Blue" (RAL 7031) Aqua Color - 18ml: Acrylic paint that can be diluted with water, has a mild odor, and is not flammable. A practical choice for brush touch-ups on scale car bodies where you want low odor and water cleanup.
The Revell Lamborghini Sián rewards a little patience before the first run. Charge fully, inspect the chassis, center the steering, and start on a smooth surface. Do that, and the car will drive predictably from the first pack and stay in good shape for many more.