What the RhinoCam Vertex does on an EOS M body
The RhinoCam Vertex is a rotating stitching adapter that mounts a Canon EOS (EF or EF-S) SLR lens on a Canon EOS M (EF-M) mirrorless camera. Instead of taking one exposure, you keep the lens fixed and rotate the camera platform to capture a linear array of overlapping frames. Those frames are later merged with flat-stitching software such as Adobe Photoshop to produce a larger image with reduced perspective errors compared with spherical stitching.
This guide covers the practical setup on an EOS M camera: checking lens compatibility, mounting the adapter, preparing the camera, and capturing the frames you need for stitching.
Mount and build details that affect setup
-
RhinoCam Vertex Rotating Stitching Adapter, Compatible with Canon EOS (EF / EF-S) D/SLR Lensto Canon EOS M (EF-M) Mount Mirrorless Cameras: Lens mount: Canon EOS (EF / EF-S) D/SLR lenses; camera mount: Canon EOS M (EF-M) mount mirrorless cameras. Confirms the two sides of the adapter so you can verify your lens and body before mounting.
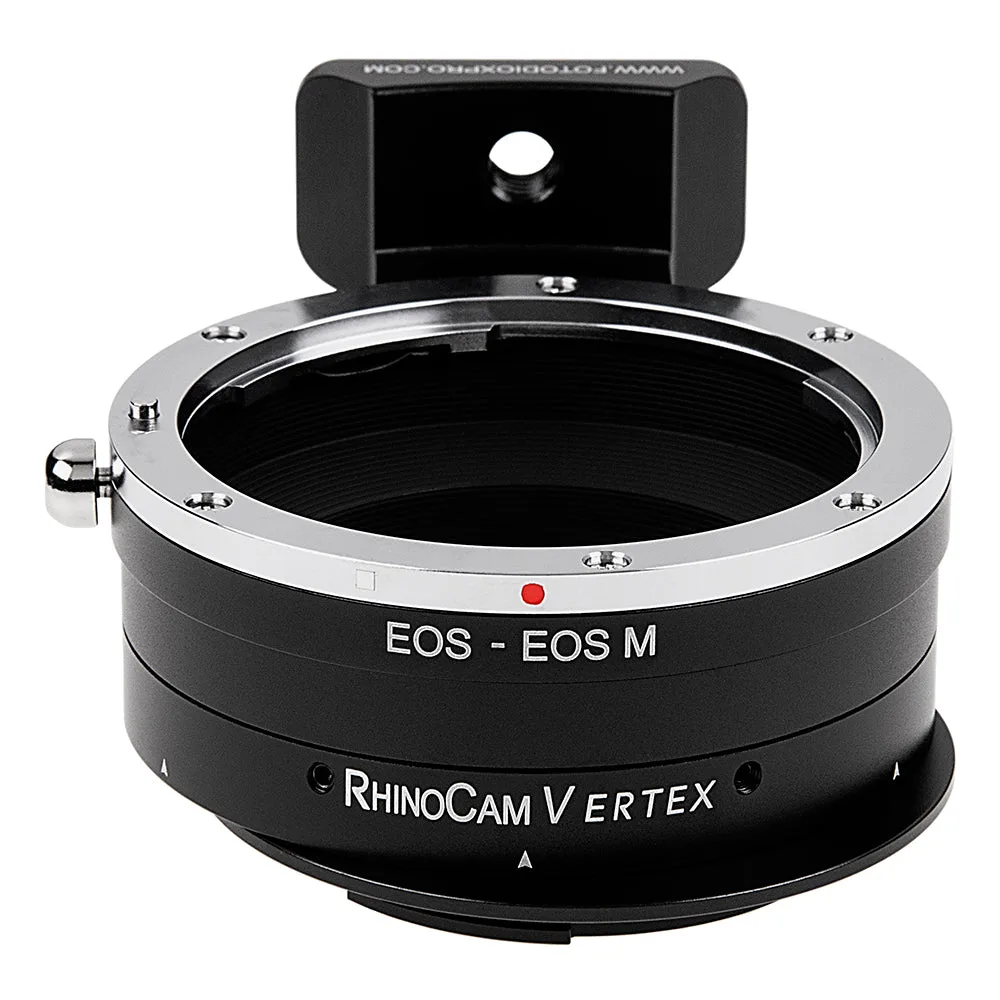
RhinoCam Vertex Rotating Stitching Adapter, Compatible with Canon EOS (EF / EF-S) D/SLR Lensto Canon EOS M (EF-M) Mount Mirrorless Cameras
-
RhinoCam Vertex Rotating Stitching Adapter, Compatible with Canon EOS (EF / EF-S) D/SLR Lensto Canon EOS M (EF-M) Mount Mirrorless Cameras: All-metal anodized aluminum construction with chrome-plated brass mounts and a built-in 1/4"-20 tripod mount. The tripod socket is part of the adapter, so you can support the rotating platform directly rather than hanging the load from the camera body.
-
RhinoCam Vertex Rotating Stitching Adapter, Compatible with Canon EOS (EF / EF-S) D/SLR Lensto Canon EOS M (EF-M) Mount Mirrorless Cameras: Product dimensions: 3.8 x 4 x 1.9 in (6.8 x 8.2 x 4.4 cm); weight 0.5 lb (5.2 oz). Gives you a realistic sense of the adapter's footprint on a compact EOS M body.
Setting up the adapter on your EOS M camera
Follow these steps in order. The adapter has no electronic contacts, so lens control and camera settings need to be sorted before you rely on the rig.
- 1. Confirm your lens has manual controls: The adapter does not power the lens. If your EF or EF-S lens is focus-by-wire (such as Canon STM lenses), the manual focus ring will not engage without power, so you will not be able to focus. Use a lens with a mechanical manual focus ring. If the lens has no manual aperture ring, the aperture will revert to its default position—either wide open or stopped down, depending on the lens.
- 2. Attach the lens to the adapter: Mount your EF or EF-S lens to the adapter's chrome-plated brass lens mount. The all-metal construction is designed to keep the connection secure.
- 3. Attach the adapter to the EOS M body: Fit the adapter's EF-M mount to your EOS M camera. Some cameras need to be set a certain way to work with adapters; if you see an 'Error Lens Not Attached - Check lens' message, adjust the camera's menu setting for shooting without a lens.
- 4. Support the rig from the adapter's tripod mount: Use the built-in 1/4"-20 tripod mount on the adapter to attach the rig to a tripod. This supports the rotating platform and lens together, which is more stable than mounting the camera body alone.
- 5. Compose and capture the first frame: The lens stays fixed while the adapter's moving platform positions the sensor for each exposure. Frame your scene, then rotate the platform to capture the next overlapping frame in the linear array. Repeat until you have covered the intended image area.
- 6. Stitch the frames: Merge the exposures using automated stitching in Adobe Photoshop or other software. The linear capture pattern is designed for flat stitching, which avoids the perspective errors and curvilinear distortion common in spherical stitching.
Checks before you shoot
- Lens type: Use a lens with a mechanical manual focus ring. Focus-by-wire lenses such as Canon STM models will not focus on this adapter because it does not supply power.
- Aperture control: If your lens lacks a manual aperture ring, the aperture will default to its largest or smallest f-stop. Plan your exposure around that fixed aperture or choose a lens with a manual aperture ring.
- Camera menu setting: Some EOS M cameras require a menu setting to shoot without a lens attached. If you see a lens error message, check the camera's custom function or menu for the 'release without lens' option.
- Tripod support: Mount the adapter's 1/4"-20 socket directly to your tripod head. This keeps the rotating platform and lens stable during capture.
What the supplied information does not cover
The supplied product information does not include step-by-step operating instructions, recommended overlap percentages, rotation increments, or camera-specific menu paths. It also does not confirm whether every EOS M model works without a menu adjustment. Treat the steps above as a general workflow and check your camera manual for the exact setting to enable shutter release without a lens.