Quick answer
Set aside 20–30 minutes once a month to clean, oil, and check your sewing machine. Remove the needle plate and bobbin case, brush out lint, add a drop of oil where your manual specifies, then test tension and stitches on a scrap. This routine prevents most skipped stitches, thread nests, and costly repairs.
Your sewing machine works hard every time you sit down to stitch. A monthly maintenance routine keeps it running smoothly and helps you avoid the frustration of skipped stitches, thread nests, or a machine that suddenly sounds rough. The good news is that most of the work takes less than half an hour.
This checklist walks you through the steps in order, from unplugging the machine to testing your stitches. Each step includes a common mistake to watch for, so you can build a habit that actually extends the life of your machine.
Before you start: gather your supplies
You do not need a specialty kit. A small, soft brush (often included with your machine), a lint-free cloth, and the oil your manual recommends are usually enough. If your machine uses a bobbin case with a removable race, keep the small screwdriver that came with it handy. A can of compressed air can seem convenient, but it often pushes lint deeper into the machine rather than removing it.
Check your manual for the oiling points and the type of oil to use. Not every modern machine needs oil; some are sealed and lubricated for life. If your manual does not mention oiling, do not add oil. The same goes for the bobbin area: follow the manual’s diagram rather than guessing.
- Unplug the machine before cleaning or oiling.
- Use a soft brush, not compressed air, to remove lint.
- Keep the manual nearby for oiling points and oil type.
Step 1: Unplug and remove the needle plate and bobbin case
Start by turning off and unplugging the machine. Remove the needle, presser foot, needle plate, and bobbin case. If your machine has a removable bobbin cover, take that off too. This gives you access to the feed dogs and the bobbin area, where lint and thread scraps collect fastest.
A common mistake is skipping the bobbin area because it looks clean. Even a small amount of lint under the bobbin case can interfere with stitch formation. Take a photo with your phone before you remove parts if you are unsure how they go back.
- Checkpoint: lay parts out in the order you removed them.
- Do not force the needle plate; if it resists, check for a hidden screw.
Step 2: Brush out lint from the bobbin area and feed dogs
Use your soft brush to sweep lint away from the feed dogs, bobbin case, and the area under the needle plate. Brush downward and outward, following the shape of the machine. If you have a small vacuum attachment for sewing machines, that works well too. Wipe the surfaces with a dry, lint-free cloth.
Avoid blowing into the machine with your breath or compressed air. Moisture and forced air can push lint into the gears. If you see a tangle of thread, use tweezers to pull it out gently rather than pulling hard, which can bend the bobbin case or damage the timing.
- Checkpoint: run your finger along the feed dogs to feel for stray threads.
- Do not use water or household cleaners inside the machine.
Step 3: Oil only the points your manual shows
If your manual calls for oiling, add one drop of sewing machine oil to each indicated point. Less is more: one drop per spot is enough. Over-oiling attracts lint and can stain fabric. After oiling, run the machine without thread for a few seconds to distribute the oil, then wipe away any excess with a soft cloth.
A common mistake is using the wrong oil. Do not substitute WD-40, cooking oil, or general-purpose lubricant. These can gum up the mechanism. If you are unsure whether your machine needs oil, check the manual or contact the manufacturer before adding any.
- Checkpoint: if oil drips onto the needle plate, wipe it before sewing.
- Never oil a machine that is still plugged in.
Step 4: Check the needle, tension, and belts
Replace the needle if it is dull, bent, or has a burr. A fresh needle prevents skipped stitches and fabric damage. Set the tension to the middle of its range and test on a scrap of the fabric you plan to use. If stitches loop underneath, rethread the machine with the presser foot up so the thread seats in the tension discs.
Inspect the handwheel and any visible belts for cracks or slack. If the machine sounds unusually loud or smells hot, stop and consult a technician. Do not tighten belts yourself unless your manual explains how; over-tightening can damage the motor.
- Checkpoint: stitch a test seam on scrap fabric before your next project.
- Do not adjust tension while the presser foot is down.
Step 5: Clean the exterior and test your stitches
Wipe the exterior with a damp cloth, then dry it immediately. Clean the handwheel and any dials with a soft brush. Reassemble the bobbin case, needle plate, and presser foot. Thread the machine and sew a test seam on a scrap of fabric, checking for even stitches and smooth feeding.
If the machine still skips stitches or makes noise, recheck the bobbin winding and threading path. Many issues come from simple threading mistakes rather than mechanical failure. If the problem persists, it is time for a professional service.
- Checkpoint: listen for unusual sounds during the test seam.
- Do not ignore a persistent problem; early repair is cheaper than replacement.
Monthly maintenance steps at a glance
- Unplug and disassemble: Turn off the machine, unplug it, and remove the needle plate, bobbin case, and presser foot. Checkpoint: keep small parts in a tray so they do not roll away.
- Brush out lint: Use a soft brush to sweep lint from the bobbin area, feed dogs, and under the needle plate. Mistake to avoid: blowing air into the machine, which pushes lint deeper.
- Oil only if your manual says so: Add one drop of sewing machine oil to each indicated point, then run the machine briefly without thread. Checkpoint: wipe away excess oil before sewing.
- Check needle, tension, and belts: Replace a dull or bent needle, set tension to the middle, and inspect belts for cracks or slack. Mistake to avoid: adjusting tension with the presser foot down.
- Reassemble and test: Put the machine back together, thread it, and sew a test seam on scrap fabric. If stitches are uneven, rethread before assuming a mechanical problem.
Tools that support your maintenance routine
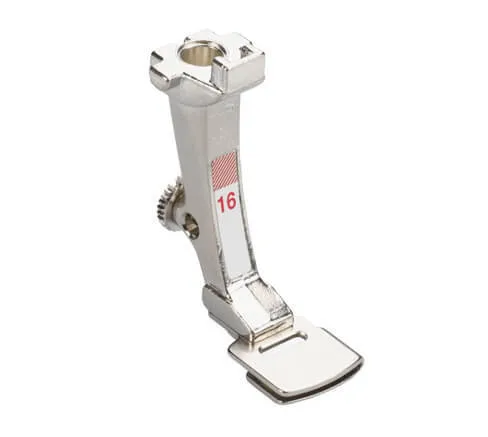
- #16 BERNINA Gathering Foot 5.5 mm Sole: Automatically gathers one layer of fabric while sewing it to a flat layer in one pass; adjust stitch length to control fullness. A specialized foot like this can add bulk and lint around the needle area, so check and clean the bobbin case more often when you use it.
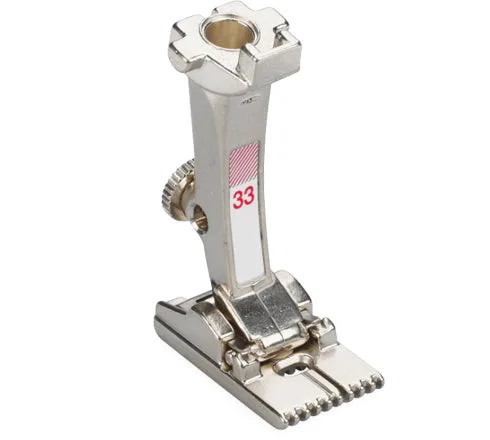
- #33 BERNINA Pintuck Foot 9-Groove: 9 grooves guide previously sewn pintucks for perfectly parallel rows; creates the finest, most closely spaced pintucks in the BERNINA range. Delicate fabrics and fine threads produce less lint, but the grooves can trap tiny fibers, so brush them out monthly.
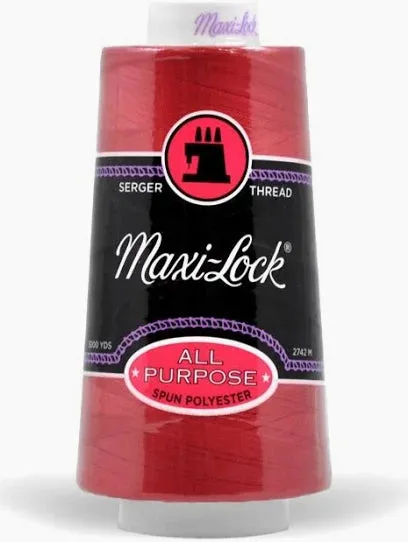
- Maxi-Lock Serger Thread 50wt 3000 yds – Artillery: 50wt polyester thread, 3000 yards per cone, smooth and lint-free for clean, consistent serged seams. Lint-free thread reduces buildup in your serger and sewing machine, making your monthly cleaning faster and more effective.
A monthly maintenance habit takes less time than a single repair visit. Follow these steps, and your machine will reward you with consistent stitches and a longer service life.