Quick answer
Most tension problems are caused by something other than the tension dial itself. Before you adjust anything, rethread the machine with the presser foot up, install a fresh needle, clean the bobbin area, and test on a scrap of your actual fabric. If the stitch is still unbalanced after those steps, adjust the top tension in small increments. Only touch bobbin tension if the top tension range is exhausted and you can test carefully.
Read the stitch before you touch a dial
The stitch itself tells you which thread is winning. Hold the fabric up and look at both sides under good light. Loose top thread shows up as loops or messy stitches on the underside, because the top thread is not being pulled up into the fabric. Loose bobbin thread shows up as loops or dots on the top side. If both sides look equally bad, the problem is usually threading or the bobbin case, not the tension setting.
Test on a scrap that matches your project: same fabric, same thread, same needle, same number of layers. A stitch that looks perfect on muslin can look terrible on batik or flannel. Make one change at a time and sew a few inches before you judge the result.
The four checks that fix most tension problems
Rethread the top thread with the presser foot up so the thread seats fully in the tension discs. Check that the bobbin is wound evenly and inserted in the correct direction for your machine. Replace the needle; a bent or dull needle can mimic tension problems by deflecting the thread. Clean lint from the bobbin case and under the needle plate, because packed lint changes how the bobbin thread feeds.
If those four checks do not fix it, then adjust the top tension. Turn the dial one number or one click at a time. Sew a test seam after each change. On most machines, higher numbers mean more top tension and lower numbers mean less. If the bobbin thread is looping on top, increase top tension. If the top thread is looping underneath, decrease top tension.
When to adjust bobbin tension — and when to stop
Bobbin tension is the last thing to touch, not the first. If you have moved the top tension through its full useful range and the stitch is still unbalanced, the bobbin case may need a small adjustment. On machines with a removable bobbin case, the tension screw is tiny and sensitive; a quarter turn is a lot. Mark the screw position with a fine marker before you move it so you can return to the starting point.
Stop and choose another option if the bobbin case is damaged, the screw will not hold a setting, or the machine has a factory-set bobbin case that is not meant to be adjusted. Front-loading bobbin systems often fall into that category. In those cases, the correct next step is a sewing machine repair service, not a deeper DIY adjustment. Forcing a stiff or stripped screw can turn a simple tension problem into a costly repair.
Keep a small kit for tension troubleshooting
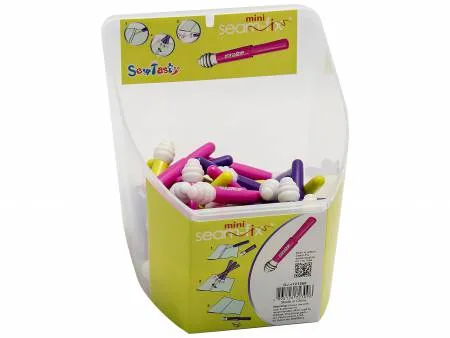
Tension problems often appear mid-project, when you least want to stop. A few small tools make diagnosis faster: a fresh pack of needles in the size you are using, a small brush for lint, and a reliable seam ripper for removing the bad test stitches without damaging the fabric. A seam ripper with a safety ball and a protective cap is easier to control near the needle plate and less likely to nick fabric when you are working close to a seam.
Keep these items in a small bag with your machine so you are not searching for them when a stitch goes wrong. The goal is to make the four basic checks so easy that you actually do them before you start turning dials.
Tension diagnosis: symptom, cause, fix, stop point
- Loops on the underside: The top thread is too loose or not seated in the tension discs. Rethread with the presser foot up, check the bobbin direction, then increase top tension one step at a time. If the top tension is at its highest useful setting and loops remain, stop and inspect the bobbin case before adjusting it.
- Loops on the top side: The bobbin thread is too loose or the top tension is too high. First lower top tension one step at a time. If the top tension is already low, check the bobbin for lint or a miswound bobbin. If lowering top tension makes the stitch worse, return to the starting setting and test a new bobbin before touching the bobbin screw.
- Both sides look loose or tangled: This is usually a threading or needle problem, not a tension setting. Rethread completely, replace the needle, and clean the bobbin area. If the problem persists after a full rethread and clean, the machine may need service. Do not keep adjusting tension to compensate.
- Stitch looks fine on scrap but bad on the project: Fabric weight, thread type, or needle size is mismatched. Test on the actual project fabric with the same thread and needle you plan to use. If the project fabric is much thicker or thinner than your test scrap, adjust needle size first, then recheck tension.
- Bobbin tension screw feels stuck or stripped: Do not force it. A damaged bobbin case can cause skipped stitches and thread breakage that no tension setting will fix. Stop here and contact a sewing machine repair service. A replacement bobbin case or a professional adjustment is the safer next step.
Tools that help with tension troubleshooting
- Mini Seam Fix Singles: Mini Seam Fix Singles are seam rippers with sharp blades, a safety ball, and a protective cap. The plastic tip is designed to grab and remove stray threads without marking or clinging to fabric. When you are testing tension adjustments, you will sew and remove several short seams. A controlled ripper with a safety ball helps you undo test stitches without damaging the fabric or the seam allowance.
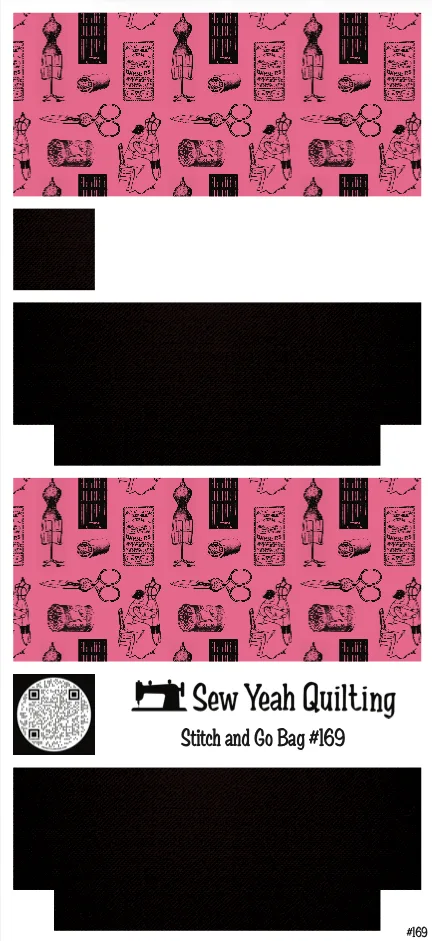
- Stitch & Go Bag #169 - Sewing Vintage Tools on Black: The Stitch & Go Bag #169 is made from durable waterproof canvas, designed and printed in-house in the USA, and sized for sewing supplies and crafting on the go. A dedicated bag keeps your needles, ripper, and small notions together so tension checks are quick and you are less tempted to skip them.