Quick answer
Place the two cameras to cover different approaches rather than the same view twice: put one at the main entry or driveway and the other along a side path, backyard gate, or secondary door. Before drilling, confirm each spot gets about three hours of direct sunlight daily and a usable Wi-Fi signal.
Why two cameras should not duplicate one view
A common mistake with a two-camera pack is aiming both at the same driveway or door. That doubles the footage of one approach while leaving another side of the home unwatched. Instead, think in terms of routes: where a person would walk, drive, or climb to reach your property. One camera can watch the most likely route, and the second can cover the next most likely route or a blind spot created by fences, hedges, or parked cars.
Because the SoloCam S220 is wire-free and small, you are not limited to spots near an outlet. That freedom makes it tempting to mount high for a wide view, but very high placement can make faces harder to recognize and may put the camera beyond easy reach for maintenance. A height of roughly 7 to 10 feet often balances a useful downward angle with reasonable access, though your roofline and landscaping will dictate the final choice.
Sunlight and Wi-Fi decide the spot as much as the view
The SoloCam S220 relies on solar charging, and the catalog notes that about three hours of sunlight daily keeps it running. A spot under a deep eave or in constant shade may look perfect for coverage but will leave the battery dependent on whatever charge it received before installation. Watch your candidate spots at different times of day, not just at noon, to see how shadows move.
Wi-Fi is the other practical limit. The camera connects to Wi-Fi, but no range specification is supplied, so treat signal strength as something to test rather than assume. A spot that gives a great view but sits at the far edge of your network may produce unreliable live viewing or alerts. If you cannot move the camera closer, you may need to improve Wi-Fi coverage rather than force the placement.
Step-by-step placement plan for two cameras
- 1. Map your two most important approaches: Walk your property as if you were a visitor. Note the main entry, driveway, side gate, backyard door, and any shed or garage. Pick the two routes that matter most and assign one camera to each. Common mistake: choosing two spots that both watch the front door. Checkpoint: each camera should have a different job, such as one for the driveway and one for the side yard.
- 2. Test sunlight at each candidate spot: Use a phone compass or simply observe the spot over a day. The SoloCam S220 needs roughly three hours of direct sunlight daily for solar charging to keep up. Look for a spot that is not permanently shaded by a roof overhang, tree, or fence. Common mistake: mounting under a deep eave because it is convenient. Checkpoint: if the spot gets less than about three hours of sun, consider a different location or plan to recharge the battery manually.
- 3. Check Wi-Fi signal before you drill: Take the camera to the intended spot and use the eufy app to check signal strength or live view. Because no Wi-Fi range is specified, real-world testing is the only reliable guide. Common mistake: assuming the signal will be fine because your phone shows Wi-Fi there. Checkpoint: if the live view stutters or drops, move the camera closer to the router or add a Wi-Fi extender before mounting.
- 4. Choose a height and angle that capture faces, not just heads: Aim for roughly 7 to 10 feet above the ground, angled slightly downward. This helps capture a person's face and upper body rather than the top of their head. Use the app's live view while holding the camera in place to confirm the framing. Common mistake: mounting too high for a sweeping view. Checkpoint: if you cannot see a test subject's face clearly in the app, lower the camera or adjust the angle.
- 5. Mount the first camera and verify coverage: Drill the single hole, secure the mount, and set the camera. Walk through the view to trigger human detection and confirm alerts arrive. Adjust the angle if needed. Common mistake: mounting both cameras before testing the first. Checkpoint: confirm the first camera's view covers its intended route and that you receive a test alert before moving to the second camera.
- 6. Mount the second camera to fill the gap: Repeat the sunlight, Wi-Fi, and framing checks for the second location. Ideally, the two views should overlap slightly at a key point, such as a gate, so you can follow movement from one camera to the other. Common mistake: placing the second camera so far away that there is no continuity between views. Checkpoint: review both live views together and confirm there is no large blind spot between them.
- 7. Fine-tune detection zones and check back after a week: Use the app to set activity zones or adjust sensitivity so each camera focuses on its route. After a week, check battery levels and review alerts. If a camera is draining faster than expected, the spot may not be getting enough sun or may be triggering too many recordings. Common mistake: setting both cameras to maximum sensitivity and ignoring alerts. Checkpoint: adjust zones or sensitivity if you see repeated irrelevant alerts or battery drain.
Product facts that affect placement
-
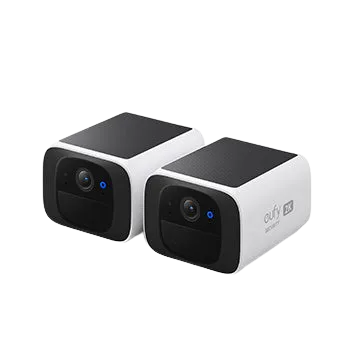
SoloCam S220 (2-Cam Pack): Solar charging keeps the battery full with about three hours of sunlight daily. Choose a mounting spot that receives direct sun for part of the day, or plan to recharge the camera manually if shade is unavoidable.
SoloCam S220 (2-Cam Pack)
-
SoloCam S220 (2-Cam Pack): The camera is wire-free and small, and installation requires drilling one hole. You can place it on a fence, shed, or eave without routing power, but you still need to commit to the hole, so test the view and signal before drilling.
-
SoloCam S220 (2-Cam Pack): Infrared LEDs and an f/1.6 aperture support night vision. A spot that works in daylight may still be usable at night, but avoid aiming directly at a bright light source that could wash out the image.
-
SoloCam S220 (2-Cam Pack): AI human detection alerts you to people in the camera's view. Aim each camera at a walking route rather than a wide empty area to reduce irrelevant alerts and make the most of person detection.