Quick Answer
To paint a tabletop stag miniature, start with a brown basecoat, layer fur tones, shade with a dark wash, and finish with drybrushing and antler highlights for a natural look.
Why a Stag Miniature Stands Out on the Tabletop
A stag miniature can be a striking centerpiece for fantasy games, whether it's a forest guardian, a druid's companion, or a heraldic beast. Its long neck, antlers, and muscular build give you a chance to practice smooth blends and textured fur techniques on a single model.
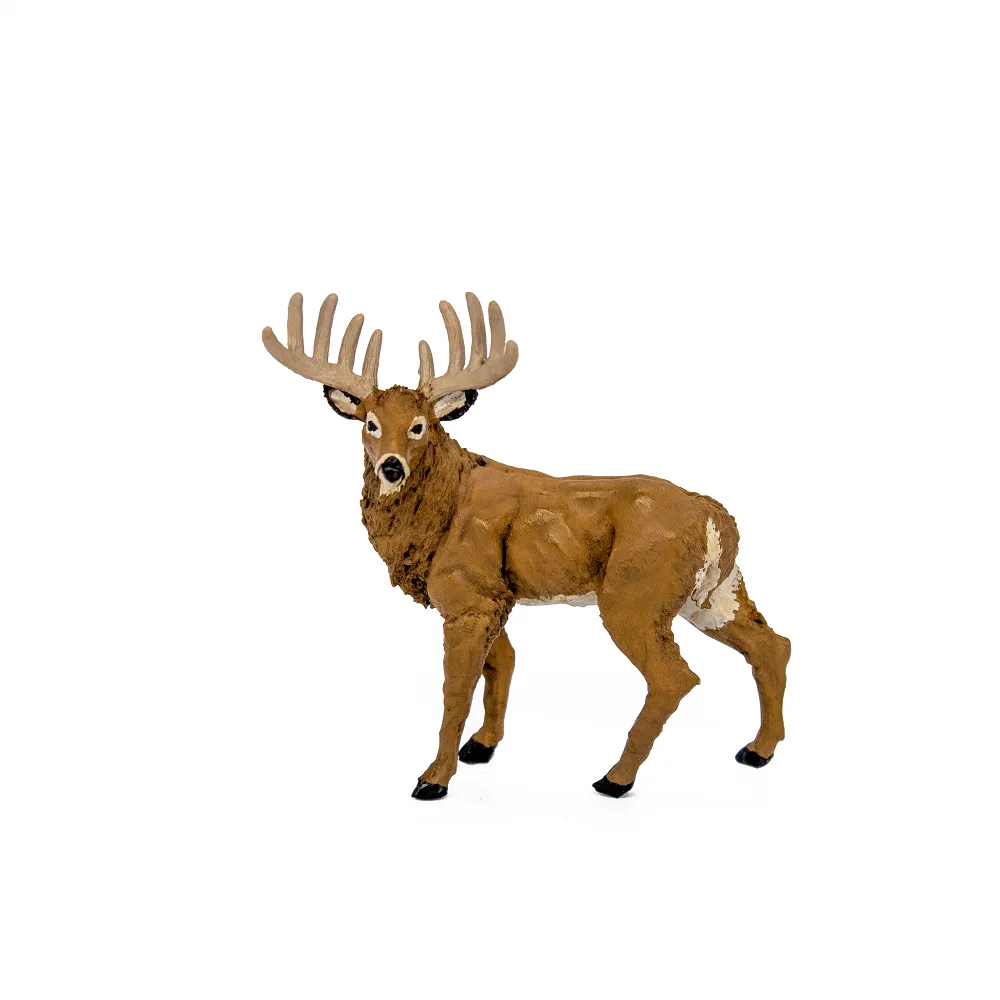
The Stag from the Ice Wilds Kickstarter is a great option because it comes from a limited stretch goal set, so it adds a rare touch to your collection. Since it's sold without packaging, you'll want to handle it carefully during prep—check for any loose parts or mold lines before you start.
Why fur direction matters more than color
Painting an animal miniature is less about the exact shade and more about how you build layers. The direction of your brushstrokes should follow the fur growth: from the neck down the back, and from the chest down the legs. This creates a sense of motion and realism even with simple colors.
Another reason fur direction matters is that it affects how light reads on the model. Consistent strokes catch light the same way real hair does, making the miniature look more natural. If you paint across the fur, the effect flattens and looks like a solid color block.
Choosing a Palette That Reads Well on the Table
A stag reads best when the fur has contrast. A warm brown base with a lighter belly and darker legs gives depth without extra effort. For a winter or Ice Wilds theme, cool greys and pale blues work, but keep the antlers a contrasting bone or ivory tone so the head stays readable.
Think about the tabletop distance: if the mini is small, strong highlights and shadows matter more than fine detail. Use a limited palette of three browns plus a bone color for the antlers to keep the scheme cohesive.
Paint the body in layers for natural depth
Start with a dark brown basecoat over the entire stag. This gives you a natural shadow in the recesses and makes the raised fur pop when you add lighter layers.
Apply a mid-brown layer to the main muscle groups, leaving the darkest brown in the deep creases. Then highlight the top edges of the shoulders, haunches, and head with a lighter tan. The goal is a smooth gradient, not a patchy look.
If you want a winter or Ice Wilds theme, shift the mid-tone toward a cool grey-brown and add subtle blue-grey shadows. This matches the frosty scenery common in tabletop setups without overcomplicating the palette.
Why fur texture matters more than color
A stag miniature reads as believable when the fur has direction and depth. Flat color looks toy-like; drybrushing and layering create the illusion of soft, dense fur that catches light the way real pelts do.
Work in short, overlapping strokes that follow the natural flow of the animal's coat. This adds realism even with a limited palette and keeps the model readable from tabletop distance.
How to Paint Your Stag Miniature
- Clean and prime the miniature: Wash the stag miniature in warm soapy water, rinse, and let dry. Apply a thin coat of primer—gray or brown works well for a natural animal—and let it cure completely. Skipping the wash can leave mold release residue that prevents paint from adhering.
- Basecoat the body: Apply a solid basecoat of a mid-brown or dark tan over the entire body. Use thin, even layers and let each dry before adding the next. This creates a smooth foundation for shading and highlights. Check for any missed spots or pooling before moving on; thin coats are better than one thick layer.
- Shade the recesses: Use a dark brown or black wash in the muscle creases, under the belly, and around the face to add depth. Wipe away excess with a clean brush to avoid staining the raised areas. Keep the wash controlled—too much can make the miniature look dirty instead of shaded.
- Build up fur texture: Drybrush a lighter brown over the raised fur areas, then add a final highlight of a warm tan on the topmost points. This creates depth without over-blending. Use a stiff brush and wipe off most paint before drybrushing to avoid chalky streaks.
- Paint the antlers and face: Basecoat the antlers with a bone or off-white, shade with a warm brown wash, then drybrush with the base color. For the face, use a darker brown around the eyes and muzzle, and add a small dot of dark paint for the eye. Keep the eye small and sharp; a tiny highlight dot brings life to the miniature.
- Add fur texture and highlights: Use a drybrush with a lighter brown to bring out fur texture on the body and neck. Focus on raised areas like shoulders and haunches, and keep the brush nearly dry to avoid streaks. Build highlights in thin layers rather than one heavy pass to keep the fur natural.
- Finishing and sealing: Apply a matte varnish to protect the paint from handling during games. For a subtle sheen on the eyes or antlers, use a gloss varnish on those spots only. Let the varnish cure fully before storing or playing with the miniature.
About the Stag miniature
-
Stag: The Stag is from a Stretch Goal of the Ice Wilds Kickstarter campaign and includes 1x Stag. It has limited availability while supplies last and is sold without packaging. Because it comes without packaging, handle the miniature carefully and keep it in a safe tray while painting; its limited availability means you may want to buy it before it sells out.
Stag