Quick Answer
To use a red dot finder for quick alignment, mount it securely, align it to your telescope's main optics using a distant target, and then use it to center objects in your eyepiece. This process takes less than five minutes and saves you from frustrating searches.
Why Red Dot Finders Beat Traditional Finderscopes
Red dot finders project a glowing dot or reticle onto a glass window, letting you keep both eyes open while you aim. Unlike magnifying finderscopes, they don't invert or reverse the view, so what you see is what you get in the sky. That makes them far more intuitive for beginners and faster for anyone who wants to hop between bright targets.
The trade-off is that a red dot finder won't reveal faint objects or show you star fields. It's purely a pointing tool. If you need to identify deep-sky objects, you'll still want a magnifying finder or a smartphone app. But for quick alignment and centering bright stars, planets, and the Moon, a red dot finder is hard to beat.
Choosing the Right Red Dot Finder
Most red dot finders attach via a standard dovetail base, but not all bases match your telescope. Check whether your scope has a shoe or rail that accepts the finder's bracket. If not, you may need an adapter or a finder with a different mounting style.
Consider the reticle options. Some finders, like the Deep Sky MRF Deluxe, let you switch between a simple dot, a crosshair, a circle, or a larger dot. This flexibility helps in different situations: a small dot for precise centering, a circle for framing a wide area, or a crosshair for tracking. Others offer a fixed dot, which is simpler but less adaptable.
How to Align Your Red Dot Finder in 5 Steps
- Mount the finder securely: Attach the red dot finder to your telescope's dovetail base or shoe. Tighten any screws or knobs so it doesn't wiggle. If your finder uses a quick-release bracket (like the Red Dot Finder Kit), make sure it clicks into place. A loose finder will lose alignment every time you touch it.
- Choose a distant daytime target: During the day, point your telescope at a distant, fixed object like a telephone pole, a rooftop antenna, or a tall tree. Use your lowest-power eyepiece to center it exactly in the field of view. Pick something at least 100 meters away; closer targets cause alignment errors.
- Turn on the red dot and adjust its brightness: Power on the finder and set the brightness so the dot is clearly visible but not glaring. For daytime use, you may need a higher setting. At night, turn it down to the lowest usable level to avoid hiding faint stars. If the dot is too bright at night, you'll lose your target against the sky glow.
- Align the dot to the eyepiece center: Without moving the telescope, look through the red dot finder and adjust its altitude and azimuth controls (the knobs on the bracket) until the dot sits exactly on the same object you centered in the eyepiece. Make small adjustments and recheck through the eyepiece after each one.
- Verify and refine at night: After dark, point your telescope at a bright star like Polaris or Vega. Center it in your eyepiece, then check that the red dot is on the same star. If not, repeat the adjustment with the star instead of the daytime target. A final night-time check ensures your alignment is accurate for real observing.
Red Dot Finder Options
-
Deep Sky MRF Deluxe Red Dot Finder (F002): This multi-reticle finder lets you switch from a red dot to a crosshair, circle, or larger red dot using a lever on the back. Having multiple reticle patterns means you can adapt to different targets and magnifications without changing equipment.
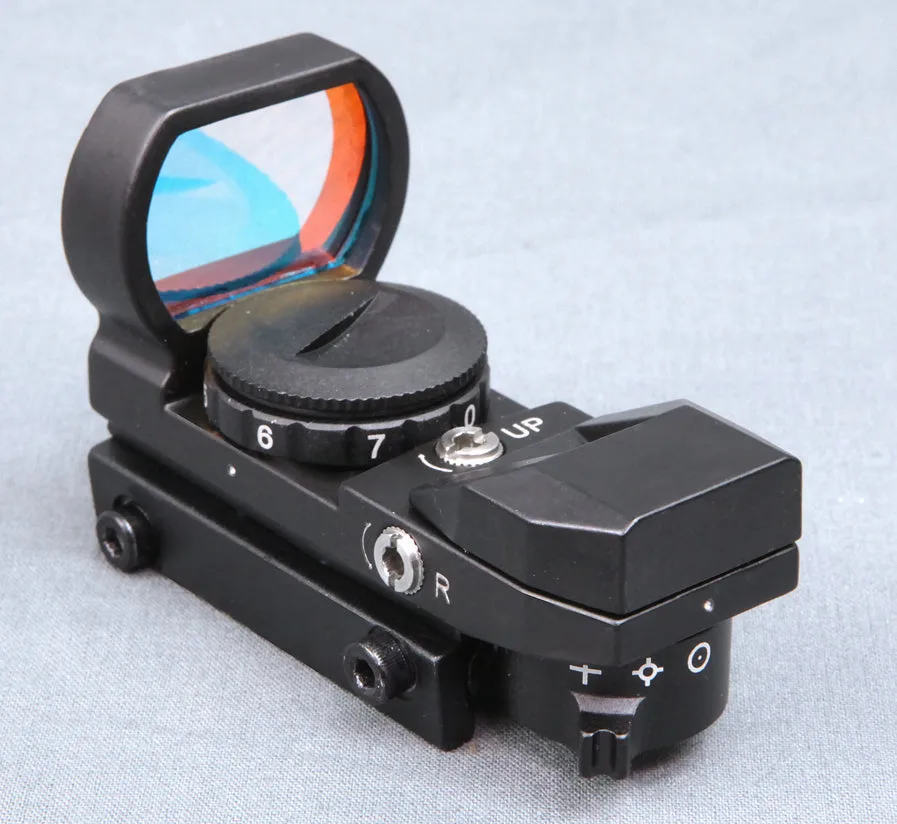
Deep Sky MRF Deluxe Red Dot Finder (F002)
-
Red Dot Finder Kit with Vixen Style Mounting Base: This Red Dot Finder kit includes a quick-release bracket and offers four selectable LED shapes. The quick-release bracket lets you remove the finder when not in use, and the four LED shapes give you flexibility for different observing conditions.
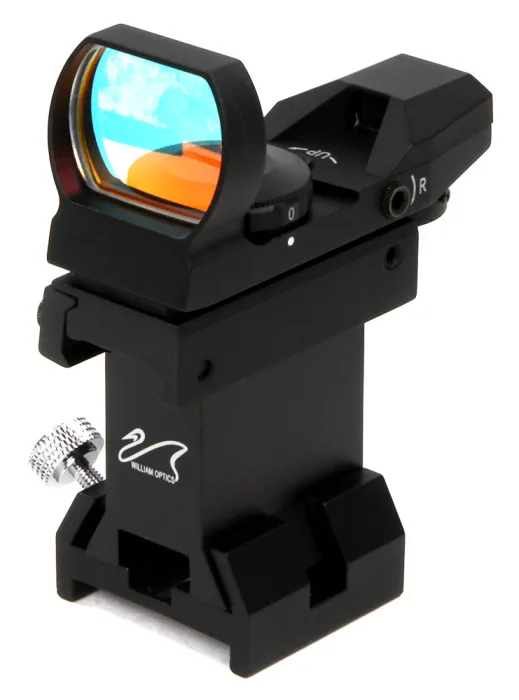
Red Dot Finder Kit with Vixen Style Mounting Base
Once your red dot finder is aligned, you'll be able to point your telescope at any bright object in seconds. Keep the alignment in mind and recheck it occasionally, especially if you transport your scope or bump the finder. Happy observing!