Quick answer
Stitch the Vintage Mixing Bowls Butterprint needlepoint canvas by following a simple order: prepare your stretcher bars, organize the thread kit, stitch the main motif, then add background and finishing touches.
Why this kit works for a retro kitchen motif
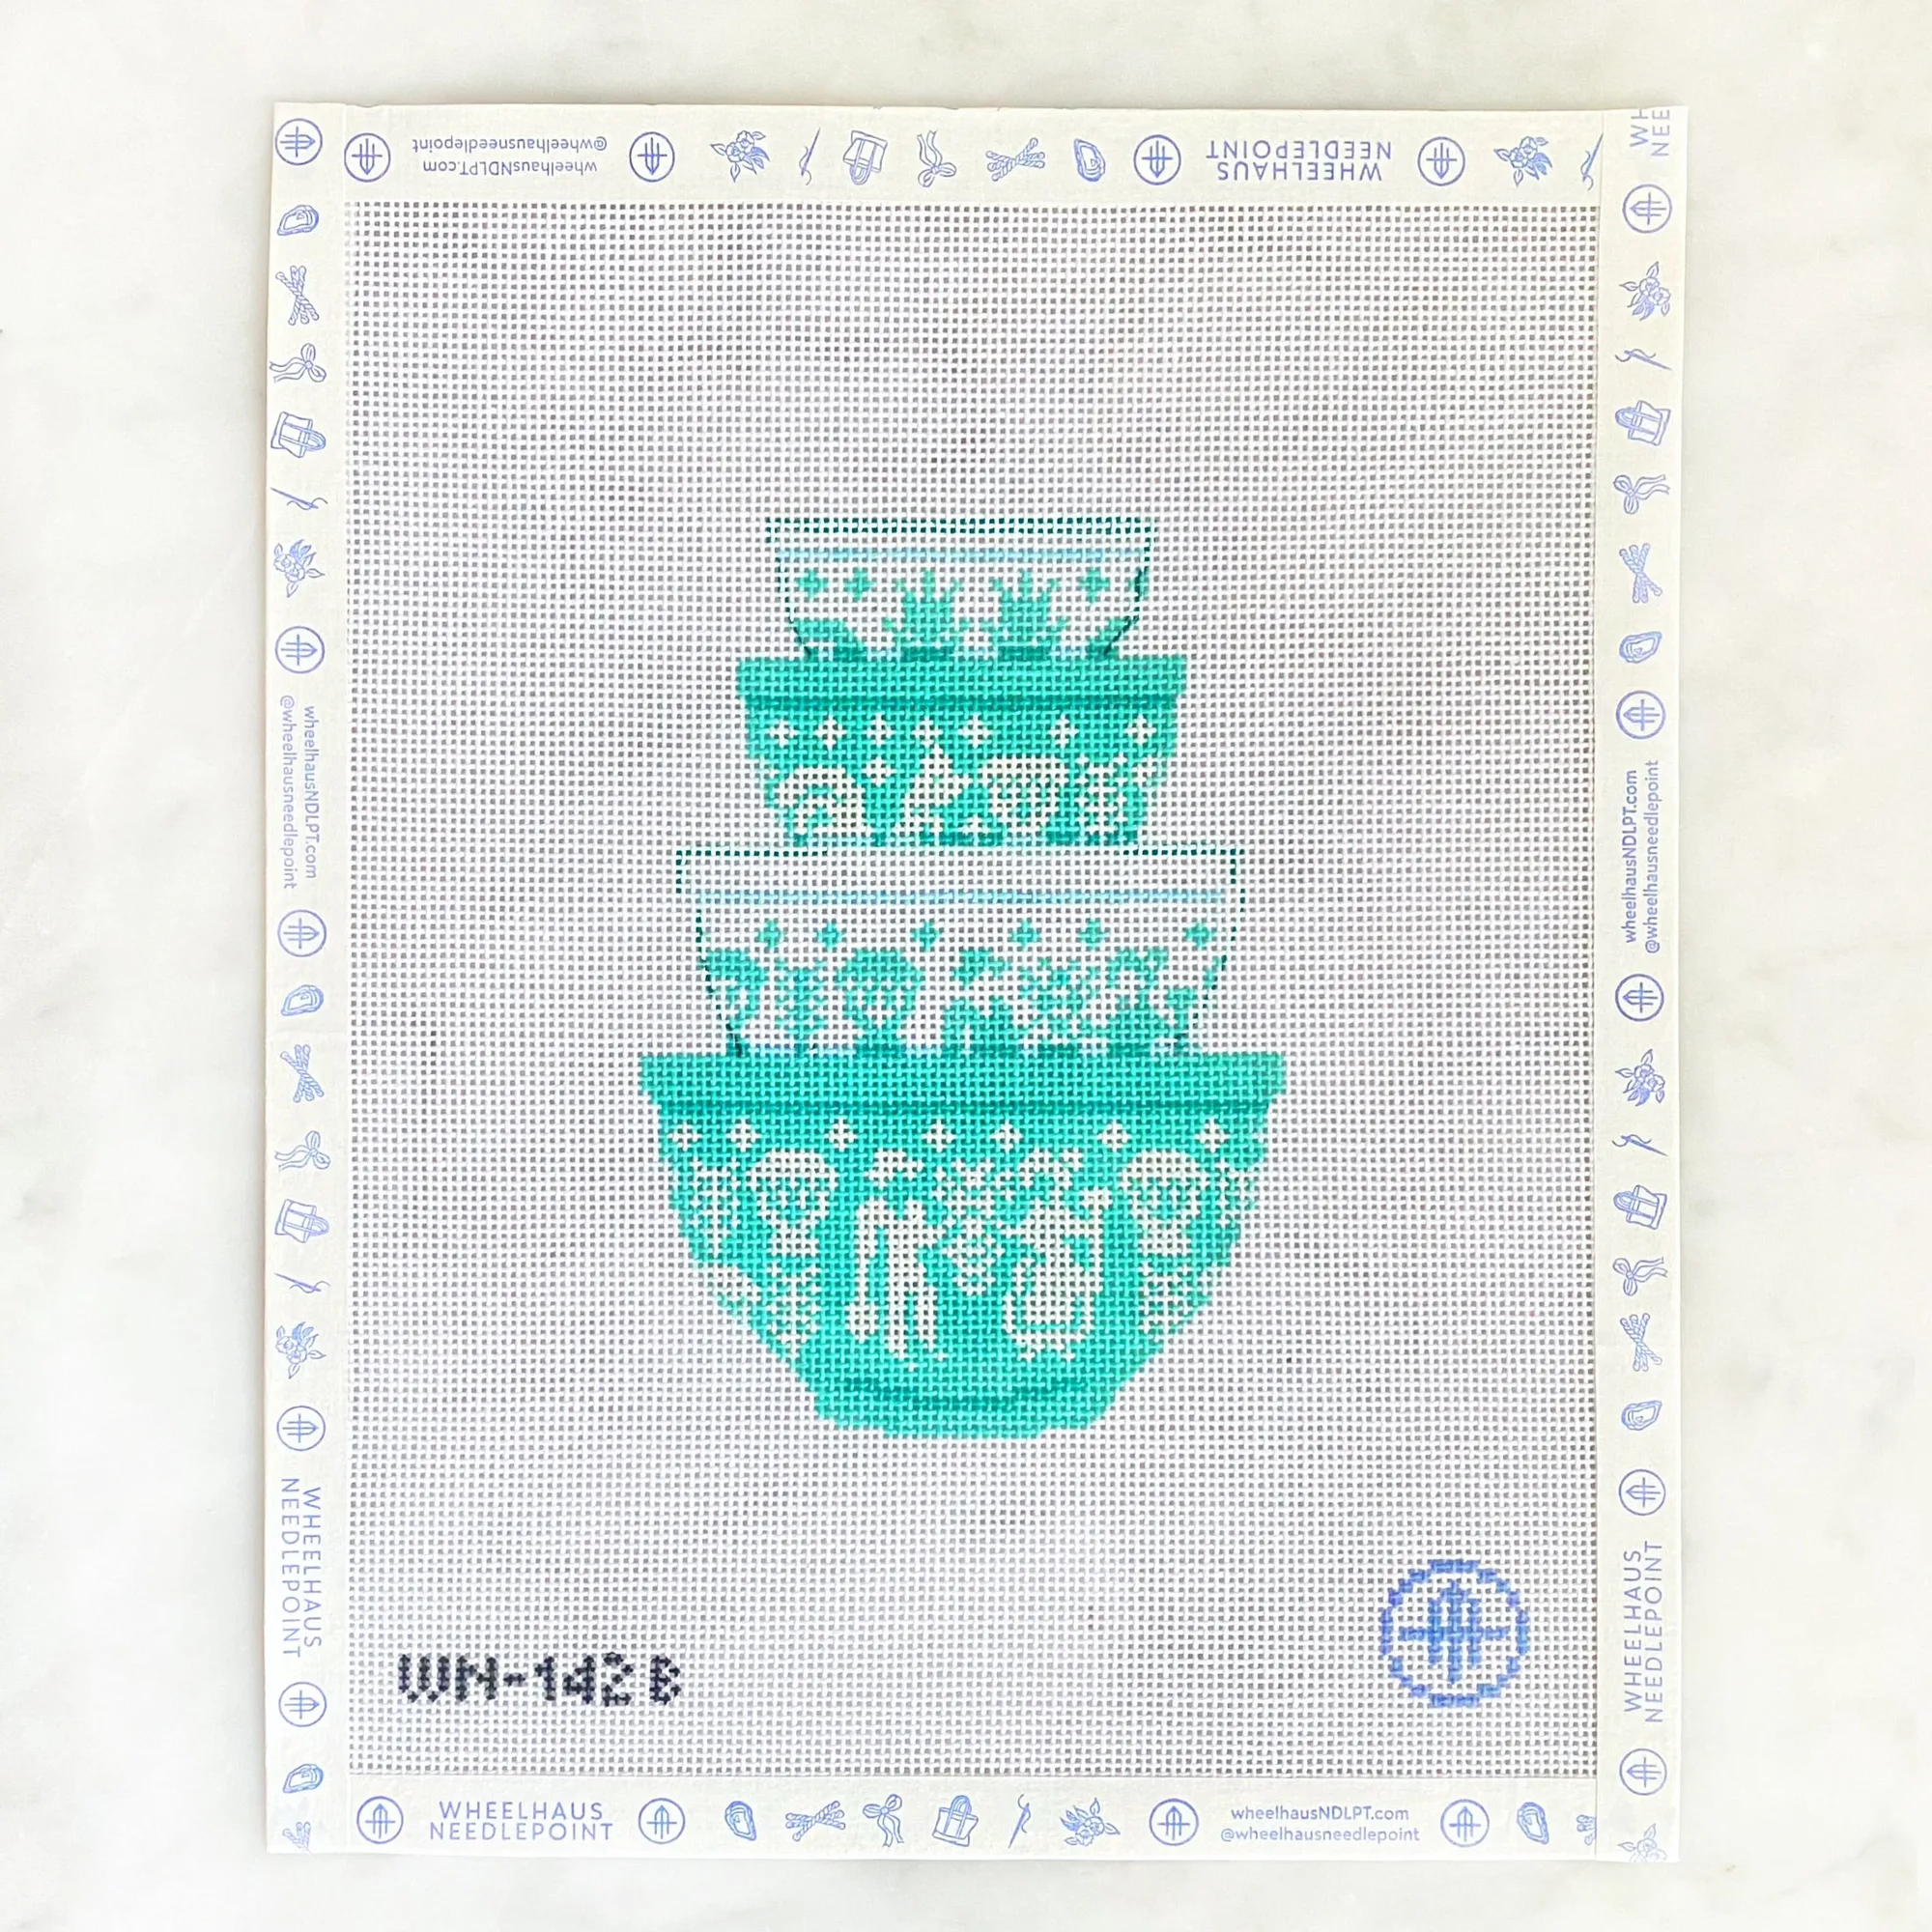
The Butterprint pattern, with its iconic mid-century mixing bowls and kitchen tools, translates beautifully to needlepoint. The 18-mesh canvas gives enough detail for the bowls’ curves and the printed text, while the stitch-painted design removes guesswork. The included thread kit provides all the silk and wool fibers needed, so you don’t have to source colors separately.
What to know before you start
The canvas measures 4 x 5.5 inches, making it a compact project that works well as a framed piece or a pillow top. The recommended stretcher bar size is 8 x 9 inches, which gives enough margin to tape or lace the canvas. Because the canvas is hand-painted, colors may vary slightly from the photo, but the stitch-painted guide keeps each area clearly marked.
Step-by-step stitching guide
- Prepare the canvas and stretcher bars: Mount the canvas on 8 x 9 inch stretcher bars using thumbtacks or a staple gun, pulling the canvas evenly so the design stays square. A common mistake is over-stretching, which can distort the 18-mesh grid. Check that the canvas is taut but not warped before you start stitching.
- Organize your thread kit: Remove the silk and wool fibers from the kit. Use the thread ring to separate colors by area (bowls, background, text). Label each strand with its corresponding section on the stitch-painted canvas. A common mistake is mixing similar shades, especially in the butter-yellow and cream areas. Keep a small labeled bag for each color group to avoid confusion.
- Stitch the main motif first: Begin with the mixing bowls and any printed text, using continental or basketweave stitch for solid coverage. The hand-painted guide shows exactly where each color goes. A common mistake is stitching the background first, which can make it harder to align the bowls’ edges. Work from the center outward to keep the design balanced.
- Add the background and details: Once the bowls and text are complete, fill in the background using the remaining fibers. Use a consistent stitch direction (e.g., all tent stitches slanting the same way) for a clean finish. A common mistake is changing stitch direction mid-section, which creates visible texture differences. If you run low on a background color, consider a subtle substitution from your stash rather than leaving gaps.
- Finish and display your piece: After the last stitch, block the canvas to straighten any distortion. Trim the excess canvas, leaving a 1-inch border, and frame or finish as desired. A common mistake is skipping blocking, which can leave the final piece uneven. Let the blocked canvas dry completely before cutting or framing.
Product details
-
Vintage Mixing Bowls Butterprint: 18-mesh canvas, design 4 x 5.5 inches, recommended stretcher bar size 8 x 9 inches. The finer mesh allows crisp detail for the bowls and text, while the stretcher bar size ensures the canvas stays taut without distorting the design.
Vintage Mixing Bowls Butterprint
-
Vintage Mixing Bowls Butterprint: The thread kit includes a curated selection of silk and wool fibers, a thread ring, a tapestry needle, and a reusable PVC project bag. Having all fibers pre-selected saves color-matching time, and the thread ring keeps strands organized while you stitch.