Quick Answer
Use a window sash router bit set to mill matching sash parts for divided light windows and doors. Start with a test piece, set the router depth correctly, and route in multiple passes to avoid tear-out.
Why Use a Dedicated Window Sash Bit Set?
A window sash bit set is designed to produce the complex profiles needed for traditional divided light windows and doors. Instead of piecing together multiple bits, a matched set ensures the rail and stile parts fit together perfectly, saving time and reducing errors.
These sets are especially useful if you're rebuilding old windows or building custom French doors, as they let you create authentic-looking sash parts without hunting for salvage materials.
Choosing the Right Stock Thickness
Window sash bits are available for different stock thicknesses. Using the wrong thickness can result in loose joints or a profile that doesn't align. Always check the bit set's specifications and match them to the material you plan to use.
If you're unsure, test on scrap wood of the same thickness before committing to your actual workpieces.
Step-by-Step Guide to Using a Window Sash Router Bit Set
- Set up your router table: Install the window sash bit in your router table with the correct bearing and shank adapter. Ensure the bit is tightly secured and the table is flat. Set the fence so the bit is just proud of the fence face. Check that the bit spins freely and the fence is parallel to the table slots.
- Adjust the bit height: Raise or lower the bit so the profile matches your stock thickness. Use a setup block or test piece to dial in the exact height. A common mistake is setting the bit too high, which can cause the profile to be too deep and weaken the joint. Always verify the height with a test cut before routing your actual workpieces.
- Set the router speed: Use a slower router speed for larger bits to reduce vibration and tear-out. A typical range is 8,000 to 12,000 RPM, but check your router's manual. Too fast can burn the wood or cause chatter. Match the speed to the bit size and wood type; harder woods may need slower speeds.
- Route the sash parts: Feed the workpiece against the rotation of the bit, using a push stick for safety. Make multiple passes, increasing the depth of cut gradually if the profile is deep. A common mistake is taking too deep a cut, which can cause burning or tear-out. Keep a steady feed rate and avoid stopping mid-cut to prevent burn marks.
- Test fit the joints: After routing, dry-fit the rail and stile pieces to check the joint. The profiles should match snugly. If the fit is too loose, adjust the bit height slightly; if too tight, sand lightly or adjust the fence. Always test-fit before gluing to avoid wasting material.
Product Facts
-
Infinity Tools 1/2" Shank Window Sash Router Bit Sets: The Infinity Tools 1/2" Shank Window Sash Router Bit Sets are 2-piece sets designed to mill sash parts that offer traditional beauty and function, and also produce matched rail and stile parts for custom-built doors and windows. This set gives you the matched profiles needed for both sash and rail/stile joints, so you can build complete divided light windows and doors without multiple bit purchases.
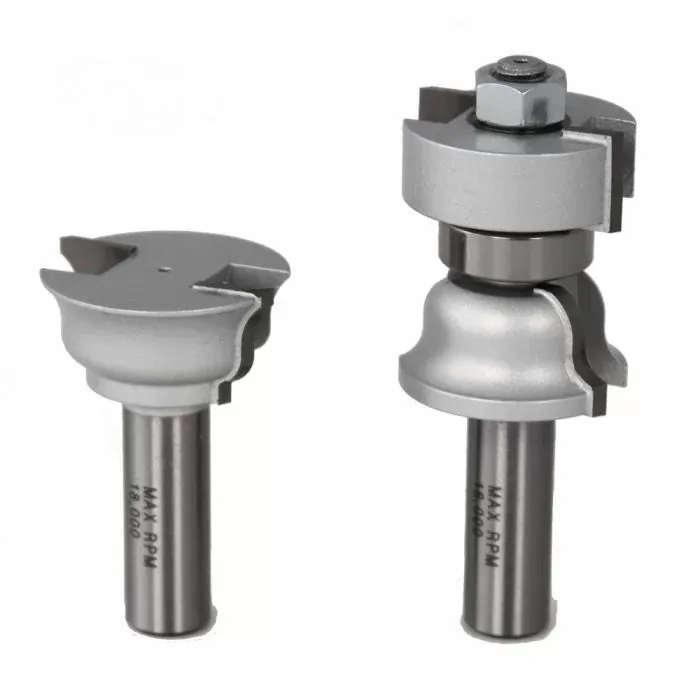
Infinity Tools 1/2" Shank Window Sash Router Bit Sets