Quick answer
Set up the Baby Brezza Formula Pro Advanced by assembling the powder container and water tank, placing the machine on a level surface within reach of a plug, powering on, running a water-only test cycle, then making your first bottle with the correct formula setting and temperature. Most setup problems come from a wrong formula setting or a tank that is not fully seated.
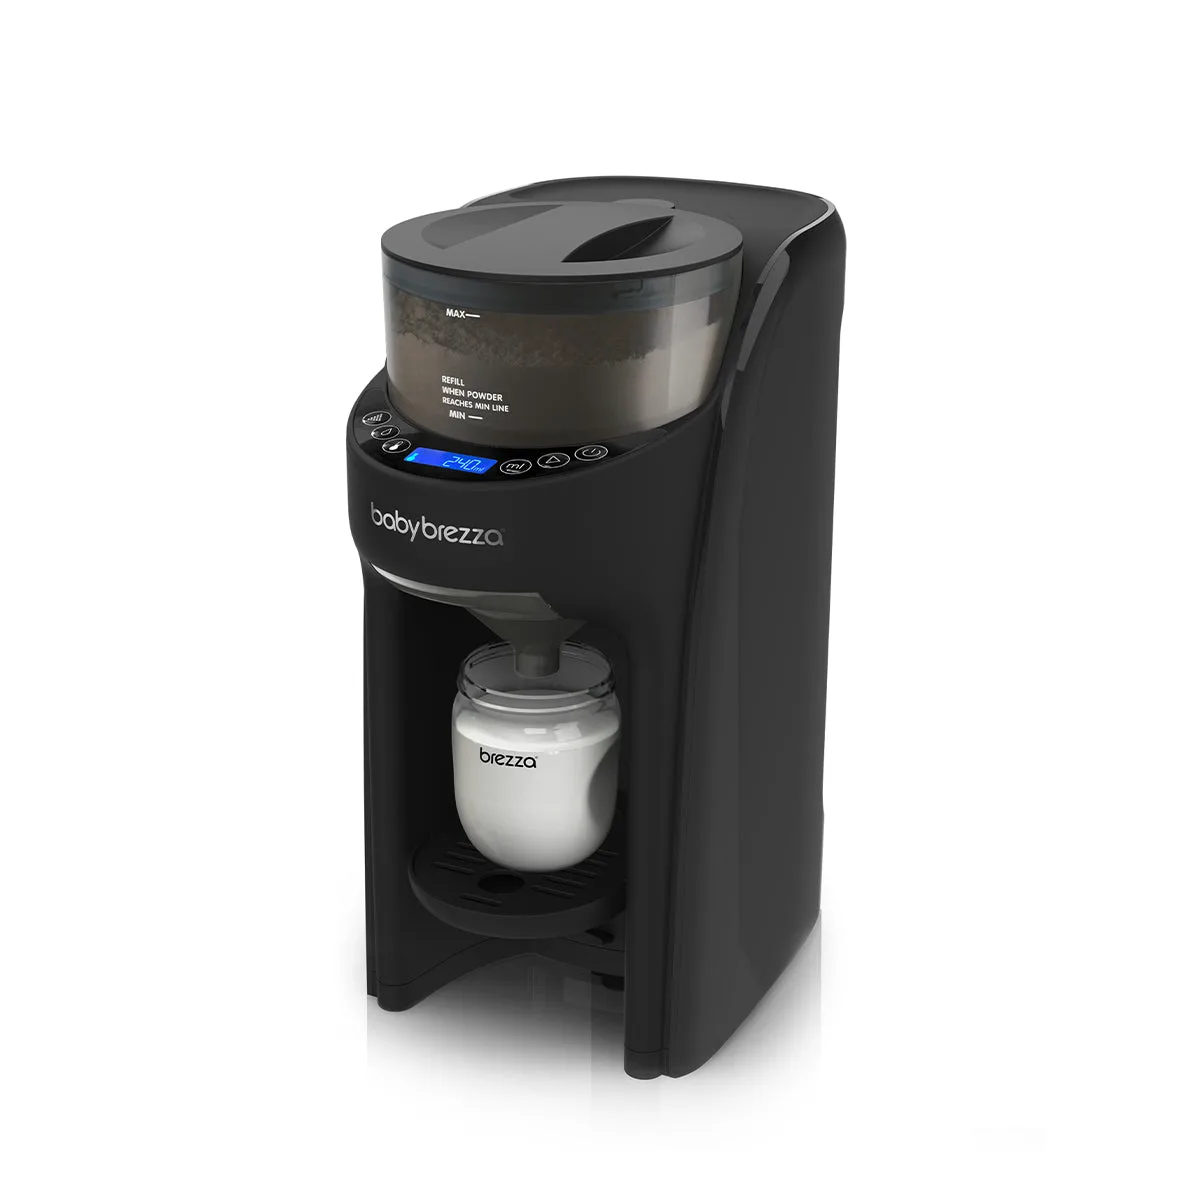
Baby Brezza Formula Pro Advanced
Before you start: what the box contains and what you need
Unbox on a stable counter near a power socket. The Formula Pro Advanced mixes formula and water automatically, so it needs clear space above the powder container for you to lift the lid and refill. You also need a clean water supply and your usual formula. The machine is designed to mix to a consistent consistency without measuring or manual shaking, so you do not need a separate pitcher or whisk.
Check the parts against the manual before plugging in. If any part is missing or damaged, stop and contact the retailer rather than improvising. The powder container lid is a separate spare part if yours arrives cracked or you lose it later.
How to assemble the powder container and water tank
Fit the powder container onto the base so it sits flush, then seat the lid until it clicks or sits evenly. A lid that is not fully seated can let powder escape or prevent the machine from mixing correctly. Fill the water tank to the marked line and push it fully into place; a partly inserted tank can cause the machine to run dry or stop mid-bottle.
Do not overfill the powder container above its maximum mark. Overfilling can compact the powder and affect how much is dispensed. If you are setting up for the first time, add only enough formula for a test bottle, then top up once you know your settings work.
Power on and choose your settings
Plug in and power on. The Formula Pro Advanced has three temperature settings: body temperature, warmer than body temperature, and room temperature. For a first bottle, body temperature is the usual starting point; if your baby prefers a cooler feed, you can change it later without reinstalling anything.
Set the formula setting for your specific brand and type using the machine's guidance. This is the step most likely to cause a bad first bottle: the wrong setting changes the powder-to-water ratio, so the bottle can come out too thin or too thick. If your formula is not listed, check the manual for how to handle that rather than guessing.
Run a water-only test before the first formula bottle
With the powder container empty or removed as instructed, run a cycle using water only. This flushes the system and confirms the water tank, heater, and dispensing path work before you add powder. Discard the test water; do not feed it to your baby.
Watch for steady flow and no leaks around the tank or base. If the machine stops early, check that the tank is fully seated and that the water level is above the minimum. A water-only test takes only a minute and saves you from wasting formula on a setup problem.
Make your first bottle and check the result
Add formula to the powder container, place a clean bottle under the dispenser, and select your bottle size. The machine mixes formula and water automatically, so let it finish the full cycle before removing the bottle. Do not add extra scoops or water afterward; that changes the ratio the machine just made.
Check the bottle for consistency and temperature. If it looks wrong, recheck the formula setting and the powder container seating before making another bottle. Once the first bottle is right, refill the water tank and powder container so the next feed is faster.
Setup steps at a glance
- Unbox and position: Place the machine on a level counter near a plug, with clearance above the powder container for refilling. Checkpoint: the machine should not wobble or sit under low cabinets.
- Assemble powder container and water tank: Seat the powder container and lid fully, then fill the water tank to the marked line and push it in until it stops. Common mistake: a partly seated tank or lid causes dry runs or powder spills.
- Power on and set temperature: Choose body temperature, warmer than body temperature, or room temperature based on your baby's preference. Start with body temperature for a first bottle, then adjust.
- Set the formula setting: Select the setting for your exact formula brand and type using the machine's guidance. Checkpoint: a wrong setting is the most common cause of a bad first bottle.
- Run a water-only test: Run a cycle with water only, then discard the water. Do not feed it to your baby. Checkpoint: steady flow and no leaks mean the setup is ready for formula.
- Make the first bottle: Add formula, place a clean bottle, select the size, and let the full cycle finish before removing the bottle. Do not add extra scoops or water after the cycle; recheck settings if the result looks wrong.
Product facts
- Baby Brezza Formula Pro Advanced: The Formula Pro Advanced mixes formula and water to the perfect consistency without measuring, mixing, waiting, or fuss, using patented mixing technology that avoids air bubbles. You do not need to shake or whisk bottles by hand, but you do need to set the correct formula setting so the automatic mix matches your formula.
- Baby Brezza Formula Pro Advanced Black Replacement Powder Container Lid: The Baby Brezza Formula Pro Advanced Black Replacement Powder Container Lid is a single spare lid for the powder container in black. If your lid is damaged or lost during setup, this is the specific replacement part rather than a whole new machine.
- Rockit Rocker - Portable Baby Rocker - Rechargeable: The Rockit Rocker is a portable, rechargeable baby rocker that attaches to prams and strollers and runs for up to 60 hours on its internal battery. Useful if you want to soothe your baby while you finish setting up the Formula Pro Advanced, especially when you are away from a fixed sleep space.