Quick Answer
To set up your Connect 2-Person Tree Tent, start by finding two sturdy trees 10-15 feet apart, attach the tension straps at head height, then connect the tent and adjust until the floor is level and taut.
Why the Connect 2-Person Tree Tent Is a Great Choice for Beginners
The Connect 2-Person Tree Tent is designed with simplicity in mind, making it an excellent entry point into tree tent camping. Its award-winning build combines spacious comfort with durability, so you can focus on learning the setup without worrying about fragile components. The tent's cloud-like floor and stargazing mesh roof also reward your effort with a unique camping experience right from your first trip.
What You Need Before You Start
Gather the Connect 2-Person Tree Tent, two 3-meter (10-foot) ratchet straps (included), and the rainfly if rain is forecast. Choose two healthy, living trees at least 12 inches in diameter, spaced roughly 10 to 15 feet apart. Avoid trees with loose bark, dead branches, or signs of disease. Bring a ground tarp to protect the tent while you work.
Step-by-Step Setup Guide
- 1. Choose and Inspect Your Trees: Select two healthy trees 10-15 feet apart. Wrap the ratchet strap around each trunk at about head height (5-6 feet up). Make sure the strap sits flat against the bark and does not dig into the tree. Check for loose bark or dead branches above the strap—they can fall and damage the tent.
- 2. Attach and Tension the Straps: Thread the strap tail through the ratchet buckle and pull it snug. Use the ratchet to tighten until the strap is firm but not squeezing the tree. Leave the buckles hanging freely on each side. Do not overtighten—the strap should be snug, not crushing the bark. A good rule: you can still slide a finger under the strap.
- 3. Connect the Tent to the Straps: Unfold the tent and lay it on a clean ground tarp. Locate the two corner webbing loops at the head end. Clip each loop into the carabiner on its respective ratchet strap. Repeat for the foot end loops. Make sure all four corners are clipped before lifting. A common mistake is clipping only two corners and letting the tent drag.
- 4. Lift and Level the Tent: Stand at one side and gently lift the tent by its center ridge. Walk around and adjust each ratchet strap in small increments until the tent floor is horizontal and the fabric feels taut. The tent should sit about 2-3 feet off the ground. If the floor sags in the middle, raise both ends equally. Uneven tension twists the tent and makes sleeping uncomfortable.
- 5. Stake the Guy Lines (Optional but Recommended): Attach the four corner guy lines to the tent's D-rings and stake them into the ground at 45-degree angles. This stabilizes the tent in wind and keeps the walls from flapping. Use the included stakes only in soft soil. On rocky ground, tie guy lines to heavy rocks or logs instead.
- 6. Install the Rainfly (If Needed): Drape the rainfly over the tent's ridge, aligning the center seam. Clip the fly's corner loops to the tent's corner D-rings. Tighten the fly's own guy lines and stake them out to create a gap for airflow. A loose rainfly flops in the wind and lets in rain. Pull it taut so water runs off, not through.
About the Connect 2-Person Tree Tent
-
Connect 2-Person Tree Tent (3.0): Award-winning design built for years of heavy use with cloud-like comfort and stargazing views. You get a durable, comfortable shelter that makes your first setup feel rewarding and ensures the tent lasts through many trips.
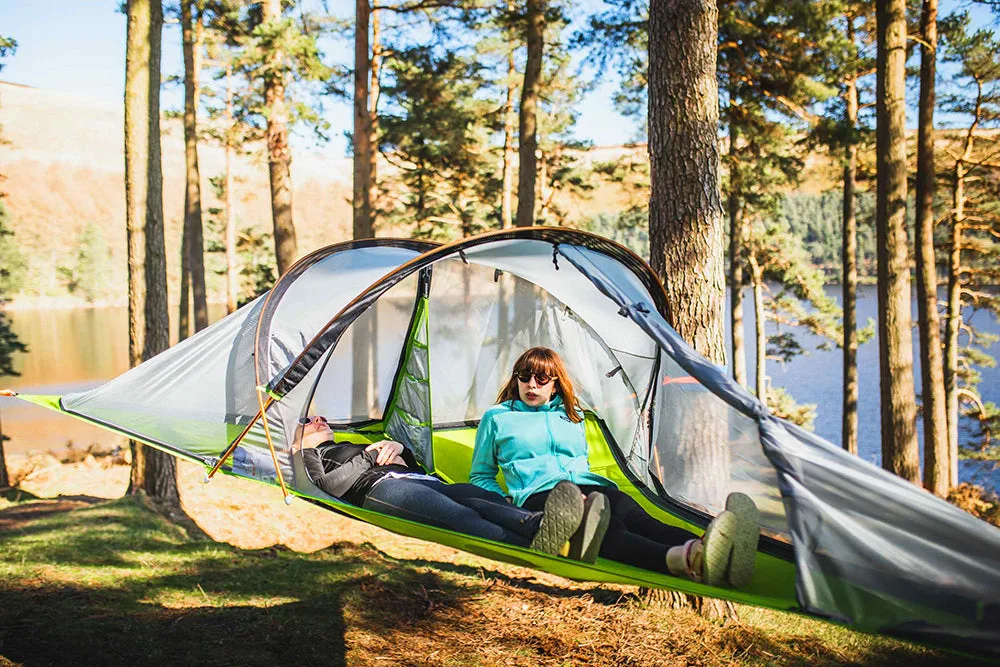
Connect 2-Person Tree Tent (3.0)
Once your Connect 2-Person Tree Tent is set up, test the tension by gently pushing the floor. If it dips more than a few inches, adjust the straps until it feels solid. Now climb in, zip up, and enjoy your first tree-top night.