Quick Answer
Paint your Wargames Atlantic German Infantry in field-gray with muted earth tones, then base them on textured trench-style bases to match the 1916-1918 period. Follow the steps below for a reliable, tabletop-ready finish.
Why Field Gray and Muted Earth Tones Work
German infantry of 1916-1918 wore field-gray (feldgrau) uniforms that varied from green-gray to brown-gray depending on dye lots and wear. Muted earth tones like leather brown for belts and gear, plus rust for metal, keep the miniatures looking historically grounded without distracting from the game table.
Avoid bright or contrast-heavy color schemes—these miniatures represent soldiers in the mud and grit of trench warfare, not parade-ground dress.
The 1916-1918 Equipment Look
By 1916, German infantry carried the M1916 stahlhelm, often painted in the same field gray or a darker slate. The box includes rifles, MP-18 submachine guns, MG-08/15 light machine guns, grenades, and hand-to-hand weapons—each benefits from a simple metallic base and a brown wash to simulate grime.
Keep leather items (ammo pouches, belt, boots) a consistent dark brown; avoid black unless you want a late-war replacement look.
Step-by-Step Painting and Basing Guide
- Step 1: Prime and Basecoat: Spray the assembled miniatures with a matte gray or brown primer. Apply a basecoat of field gray (e.g., Vallejo German Field Grey or a 2:1 mix of olive gray and neutral gray) to all uniform areas. Paint leather items dark brown, metal parts gunmetal, and skin with a basic flesh tone. Avoid black primer—it darkens the field gray too much and makes details harder to see.
- Step 2: Wash and Shade: Apply a dark brown or black wash (thinned 1:3 with water or medium) over the entire miniature. Let it pool in recesses like the folds of the uniform, the eye sockets, and between the fingers. Wipe excess from raised areas with a damp brush. A brown wash looks more natural on field gray than a black wash, which can look too stark.
- Step 3: Highlight Uniform and Gear: Drybrush or edge-highlight the uniform with the base color mixed with a little ivory or buff. Highlight leather items with a lighter brown, and metal with a silver edge. Keep highlights subtle—these soldiers are dirty, not polished. Less is more; over-highlighting makes the miniatures look like parade-ground troops.
- Step 4: Weathering and Mud: Mix a small amount of fine sand or static grass with brown paint and water to create a thin mud paste. Stipple it onto the lower legs, boots, and the bottom of the greatcoat. For extra grime, use a sponge to dab on a dark brown or rust color on the helmet and gun. Don't mud the entire miniature—focus on areas that would touch the trench floor or parapet.
- Step 5: Base the Miniature: Glue the miniature to a 25mm or 20mm base. Apply a layer of PVA glue, then dip in a mix of fine ballast and sand. Once dry, paint the base a muddy brown, drybrush with a lighter tan, and add a few tufts of static grass or small stones. For a trench look, add a tiny piece of corrugated plastic or a sandbag bit. Keep basing materials low-profile so the miniature's feet stay flush with the table surface.
- Step 6: Final Seal and Touch-Ups: Spray the finished miniature with a matte varnish to protect the paint and reduce shine. Check for any missed spots or mold lines you might have missed earlier; touch up with matching paint before varnishing. Use a spray varnish in a well-ventilated area—brush-on varnish can leave streaks on textured bases.
Product Facts
-
German Infantry (1916-1918): This hard plastic box set lets you build up to 30 German infantry with rifles, MP-18, MG-08/15, grenades, pistols, and hand-to-hand weapons. You get enough bodies for a full platoon, with weapon options that reflect the late-war shift toward automatic and close-assault gear.
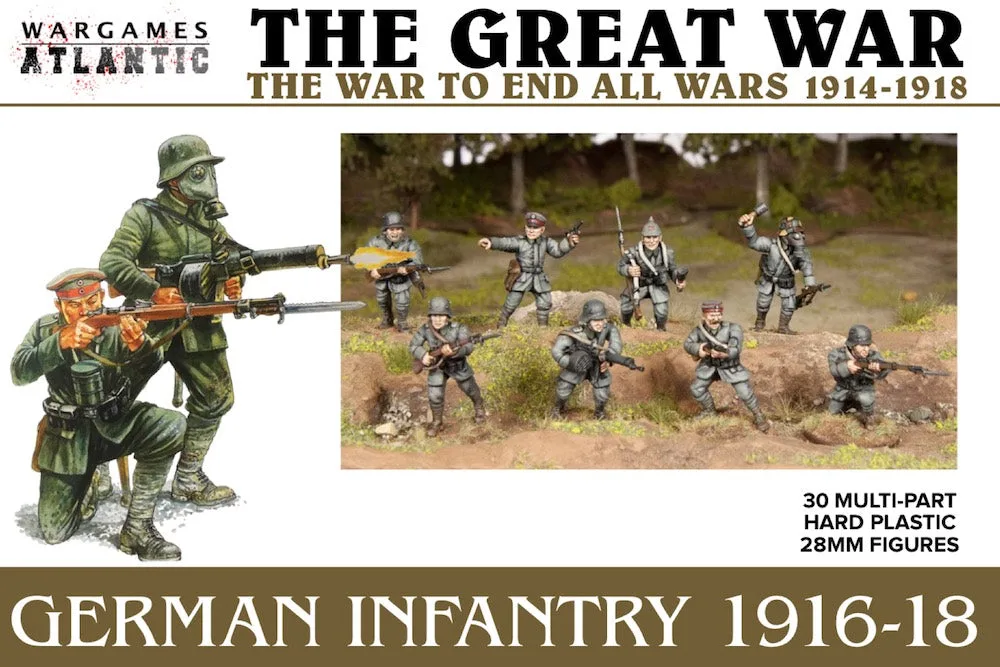
German Infantry (1916-1918)