Quick answer
Modular terrain changes encounter design by making the battlefield itself a variable you can tune, rather than a fixed backdrop. Instead of drawing a room and placing monsters inside it, you choose the walls, elevation, doors, and hazards first, then write the encounter around what that space allows. Start with one modular set you can rebuild quickly, and design encounters that use its specific features.
Encounter design used to mean sketching a room on a mat and filling it with monsters. Modular terrain flips that order. When walls, platforms, doors, and scatter pieces can be rebuilt between sessions, the space itself becomes part of the encounter's difficulty, pacing, and story rather than a neutral container.
That shift is practical, not just aesthetic. A raised platform changes who has cover. A removable door changes how a fight starts. A set of freestanding walls lets you build negative space that reads as a cave mouth or a collapsed hallway. This article walks through a repeatable process for designing encounters with terrain, using real modular pieces as examples.
Why terrain-first encounter design works
When you design terrain first, you solve the hardest part of encounter building early: what does this space actually do? Elevation, chokepoints, line of sight, and exits are all physical decisions. If you place them before you pick monsters, the encounter writes itself around real constraints instead of abstract ones.
It also saves table time. A modular set you can assemble in minutes means you can prep two or three encounter variants from the same pieces and choose one based on how the session is going. That flexibility is the real trend driving terrain for game masters right now.
- Design the space before the stat blocks; the space suggests the fight.
- Keep one set assembled as a baseline so you always have a fallback encounter ready.
Match the terrain to the encounter's job
Not every encounter needs a full build. A chase needs open lanes and scattered obstacles. A boss fight needs a focal platform and clear sightlines. A dungeon crawl needs doors, corners, and tight corridors that force decisions. Deciding the encounter's job first tells you which pieces to reach for.
This is where modular sets earn their shelf space. A pack like the Trifecta Terrain Pack (Unpainted) is built around negative space: you can use freestanding walls or ledges for cave mouths and broken ground, or assemble the pieces into basic building elements. One pack supports several encounter shapes, which is exactly what terrain-first design needs.
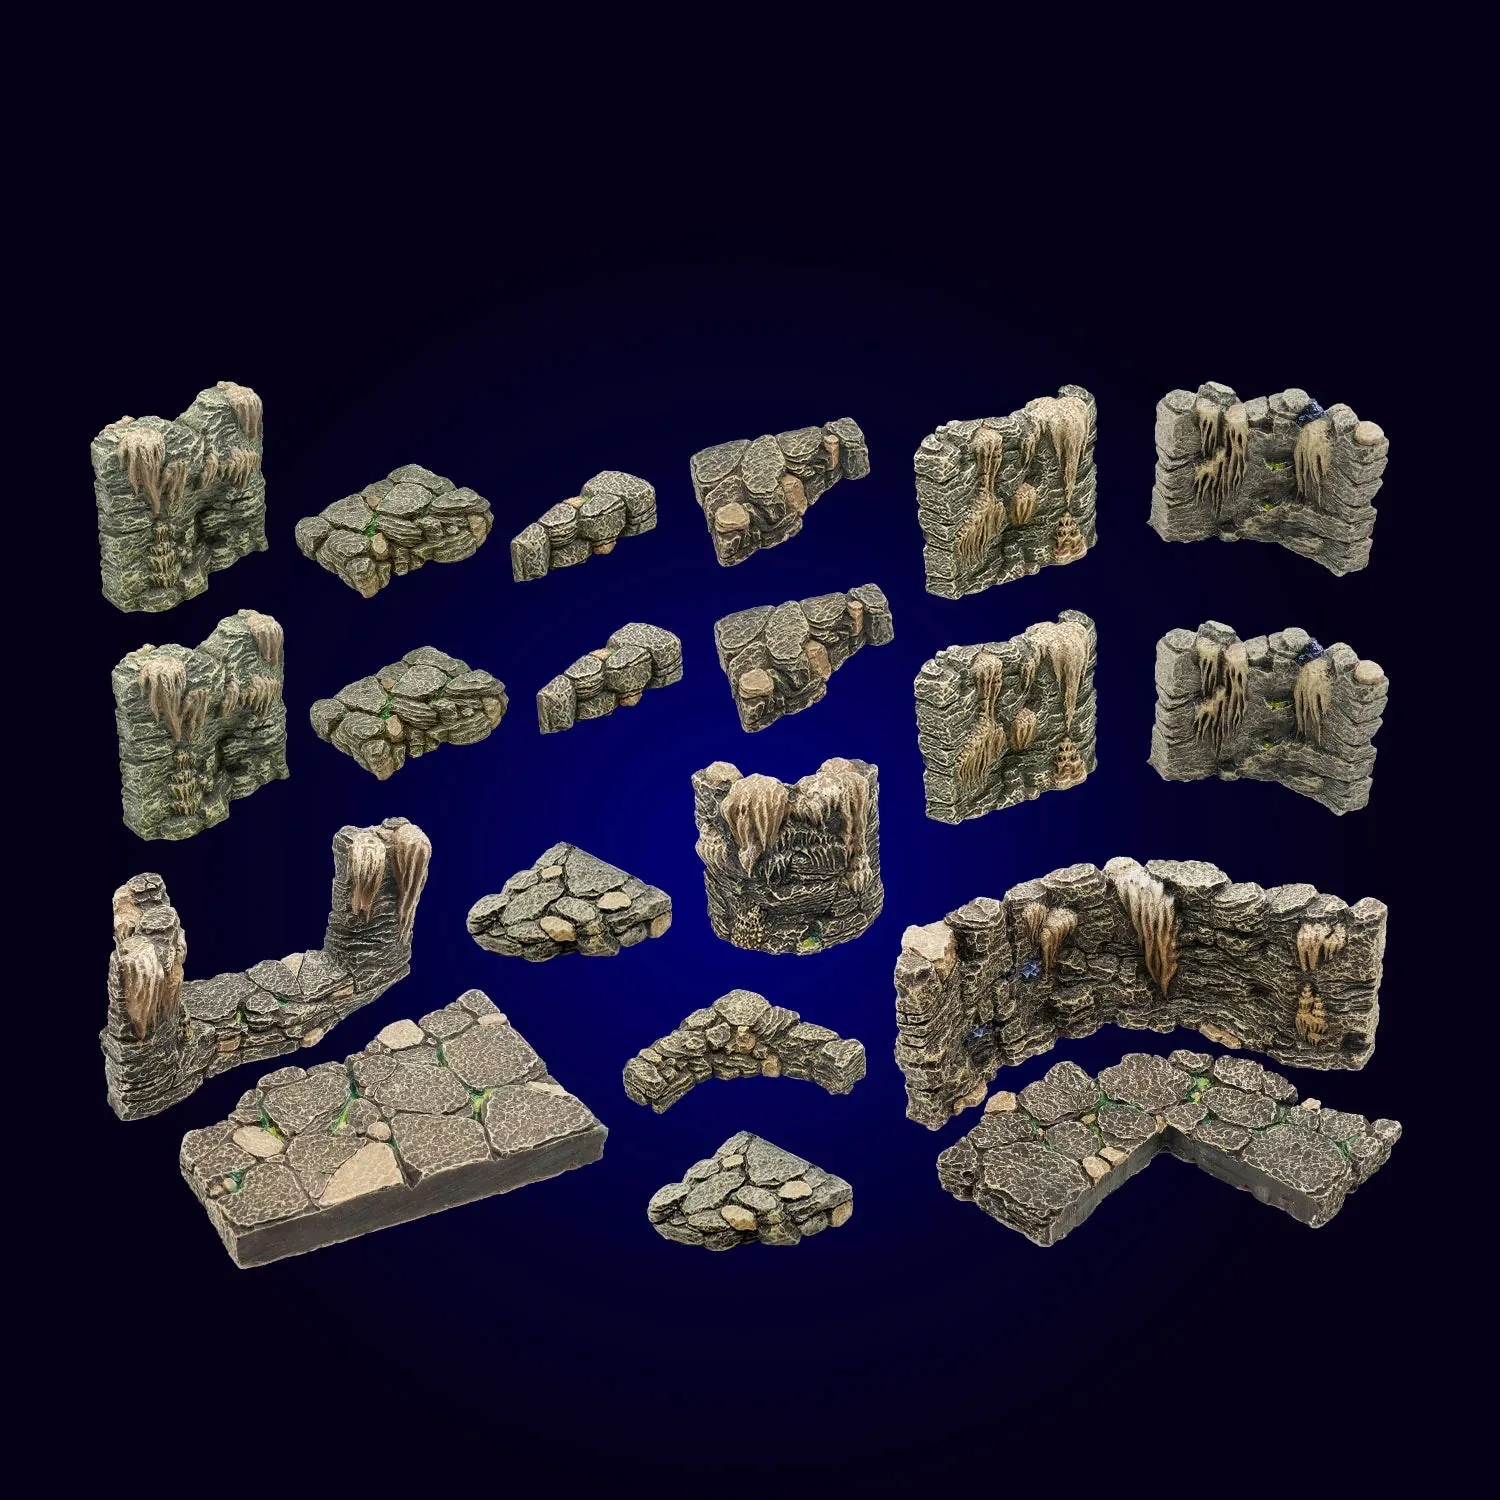
Trifecta Terrain Pack (Unpainted)
- Write the encounter's job in one sentence before you place a single wall.
- If a piece does not change a decision the players make, it is decoration, not design.
Use elevation and doors as encounter levers
Elevation is the cheapest difficulty dial you have. A platform that takes movement to reach changes ranged combat, cover, and retreat options without adding a single monster. Doors are the second lever: a door controls when a fight starts and whether reinforcements join it.
The Dungeon Double Doors - Vaulted (Unpainted) pack shows how much a door can do. It includes two door frames and five sets of doors, so you can theme the same doorway differently between sessions. You can also remove the doors and fill the opening with the included Magnetic Plinth Arch to create an ornate wall cubby, or reverse the Plinth to use it as a magnetic wall. That turns one doorway into a door, a secret alcove, or a display wall depending on the encounter.
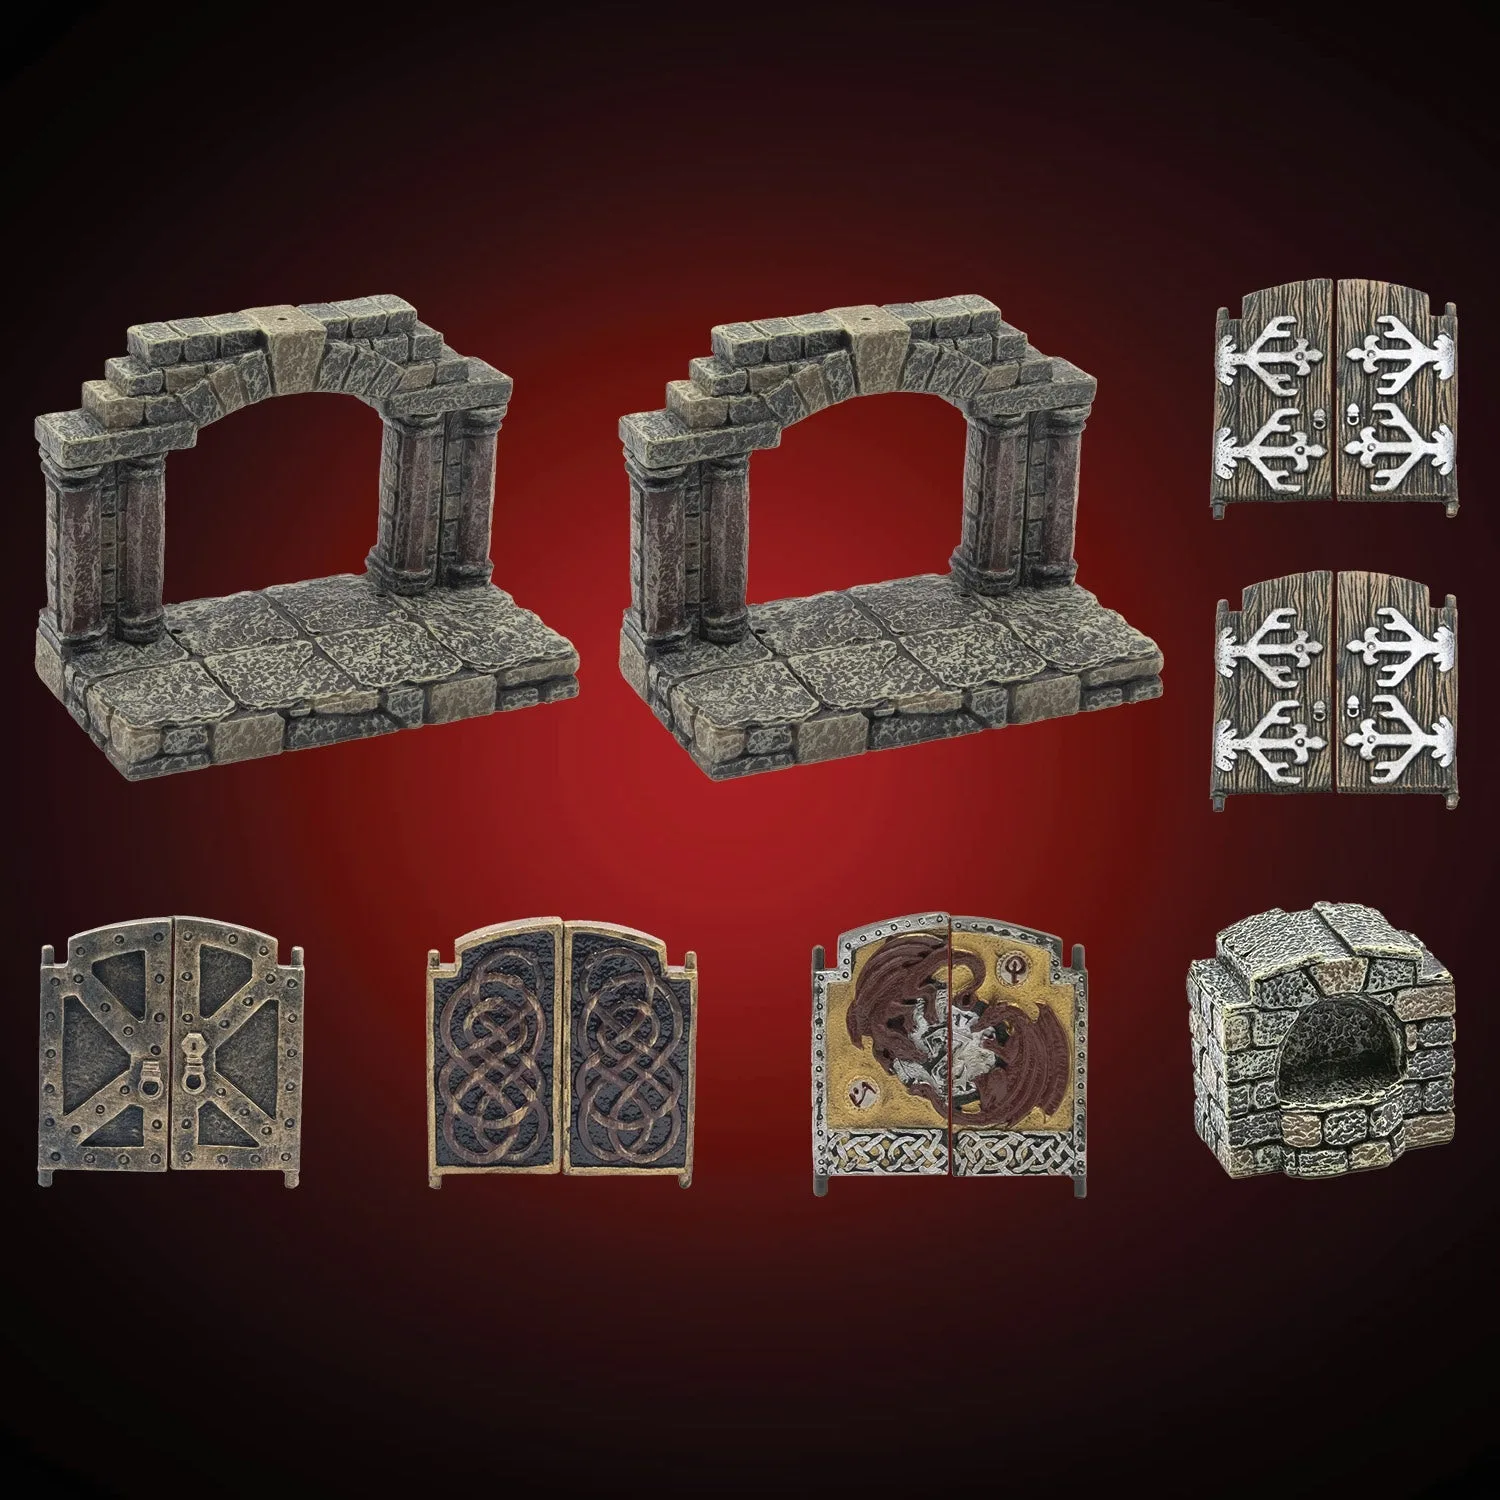
Dungeon Double Doors - Vaulted (Unpainted)
- Place at least one piece of elevation in every set-piece encounter; it changes movement decisions immediately.
- Treat doors as pacing tools, not just scenery. A locked door can delay a fight by a full round.
Add interactive pieces that players can manipulate
The biggest change modular terrain brought to encounter design is physical interactivity. When a piece can be moved, rotated, or removed, players can interact with the battlefield itself. A functional siege engine or a scatter piece with moving parts gives the table something to do beyond rolling attacks.
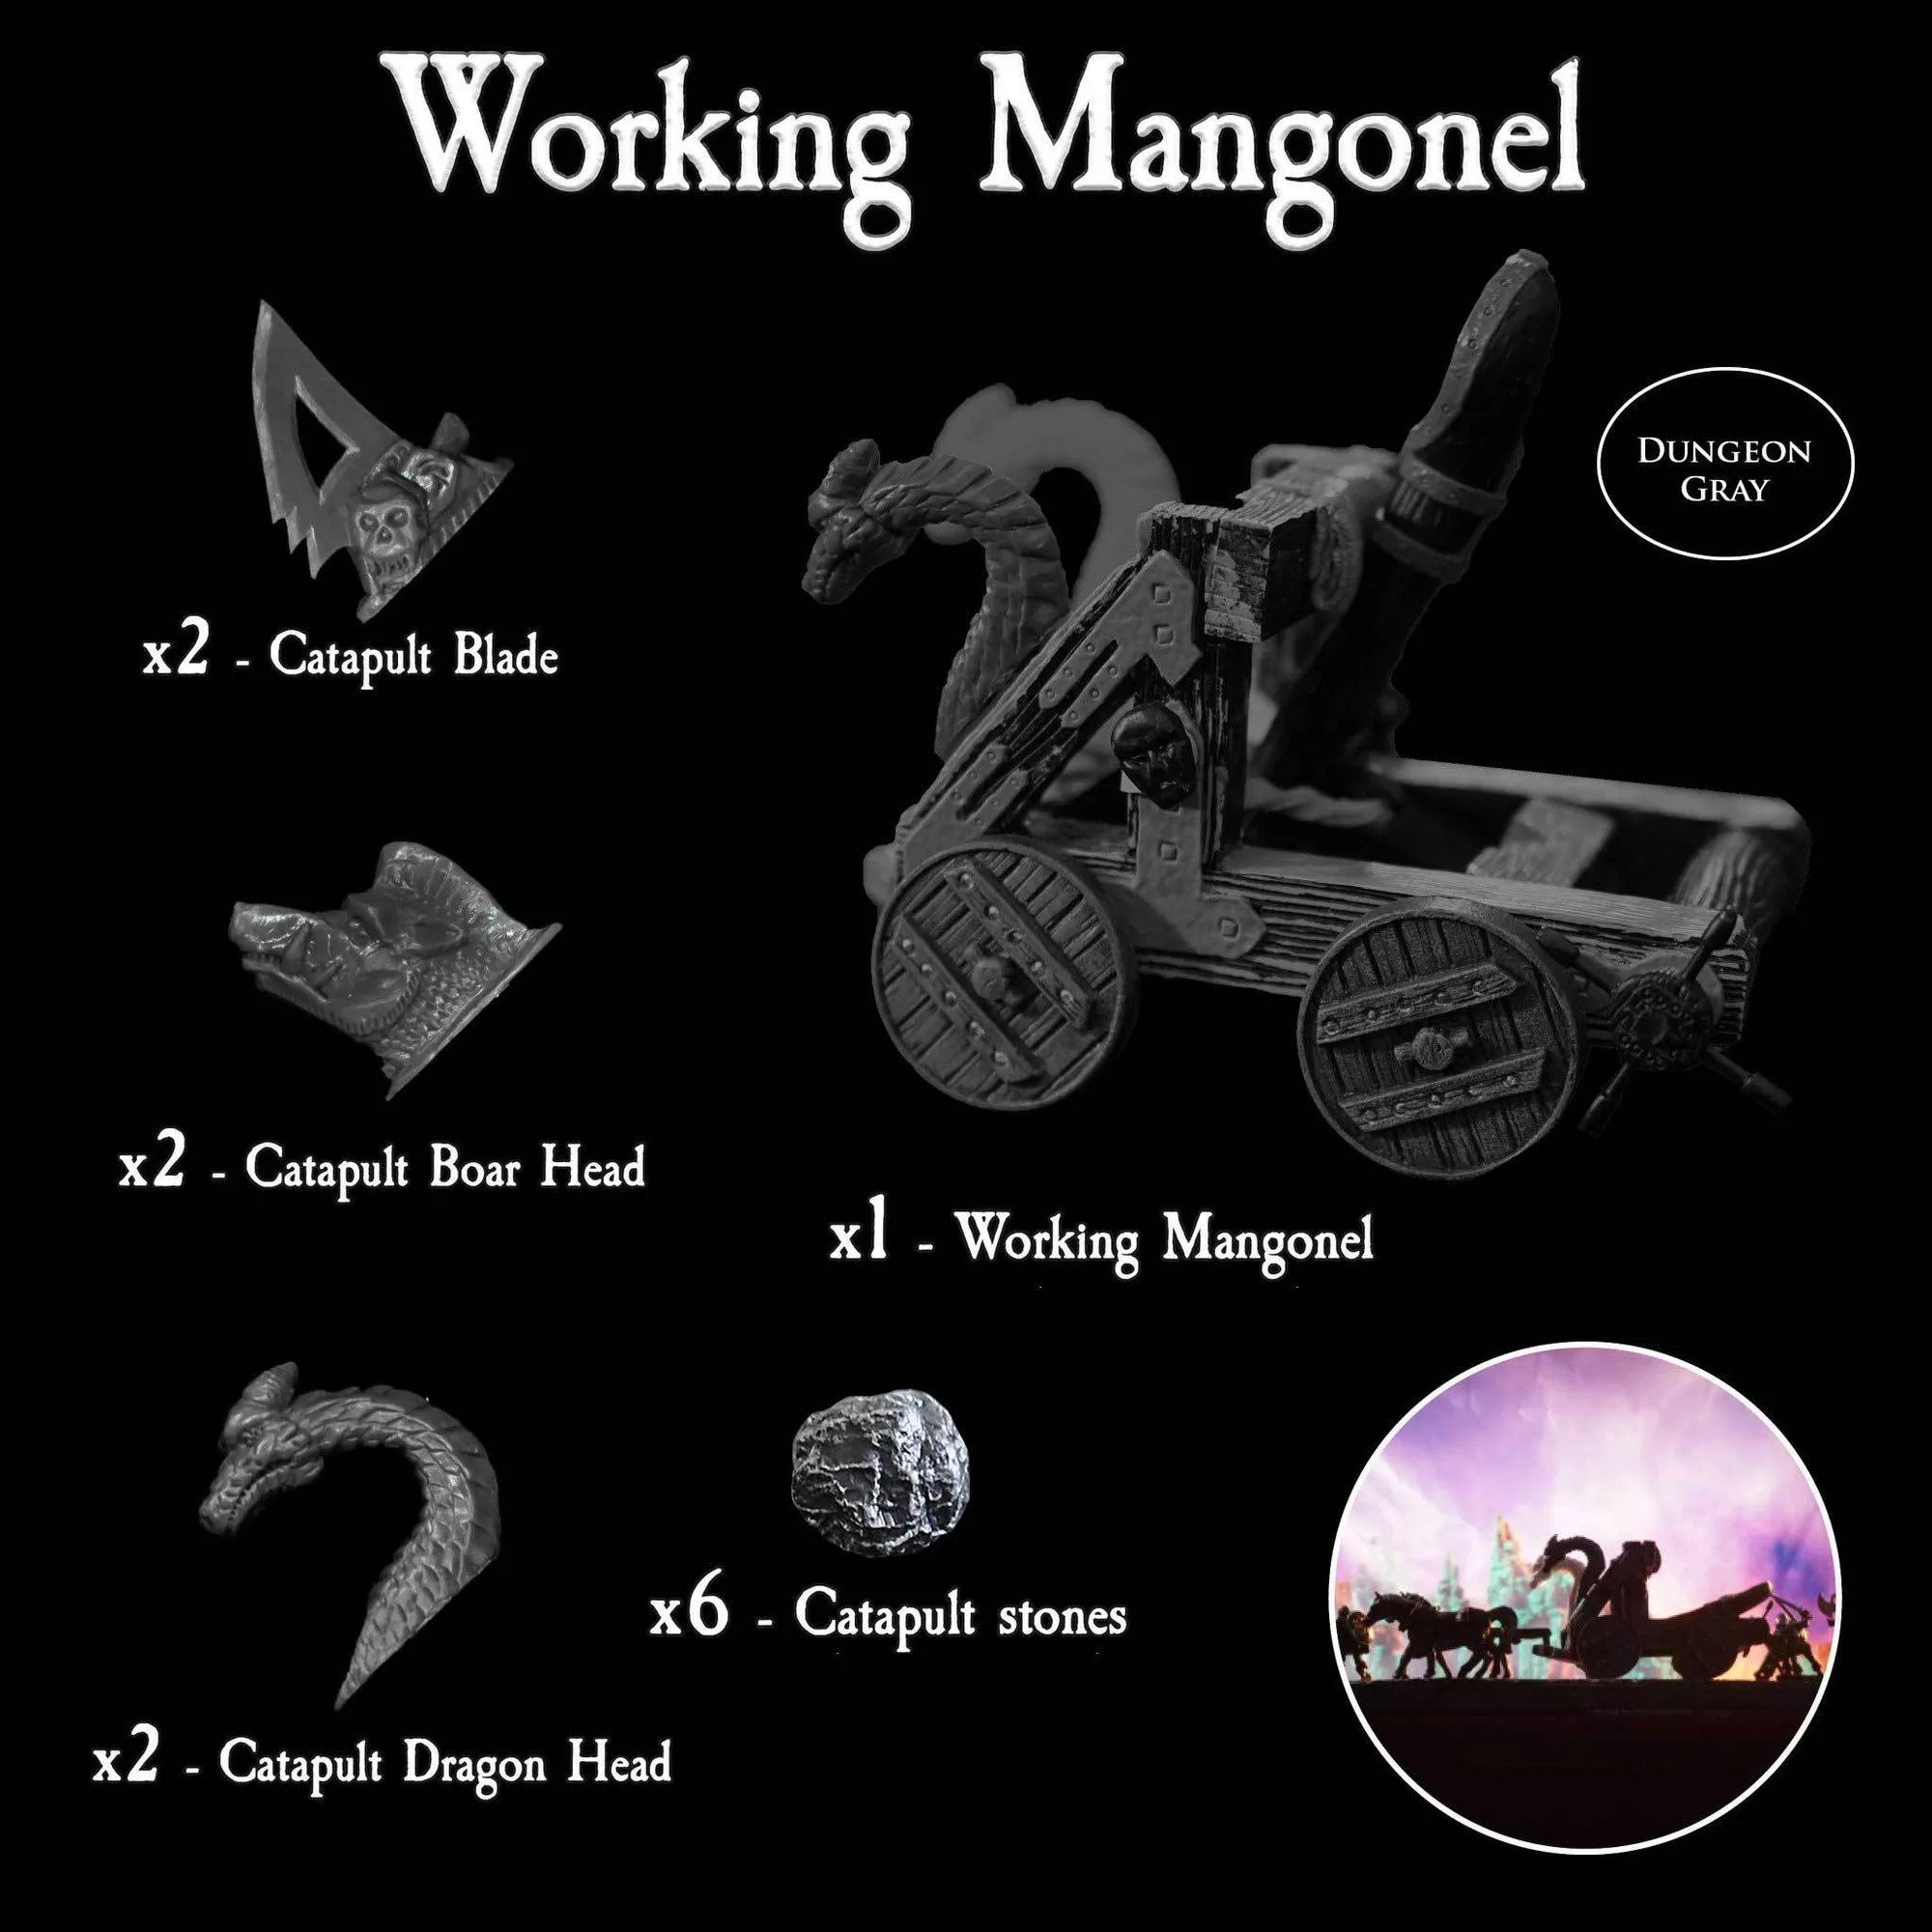
The Working Mangonel (Unpainted) is a good example: it is fully functional and can hurl stone over battlements. It comes with decorative attachments in three styles, iron dragons, war boars, and necromantic blades, plus ammo and an attachment point for a team of horses (horses sold separately). In an encounter, that piece becomes an objective, a hazard, or a prize, depending on who reaches it first.
- Give interactive pieces a clear owner or trigger so the table knows when they matter.
- If a piece can be captured or destroyed, it is a built-in objective for the encounter.
Keep a modular kit that covers the common cases
You do not need a wall for every situation. Most encounters reuse a small vocabulary: a doorway, a corner, a platform, a scatter cluster, and a hazard. Build a kit around those five and you can assemble most encounters in a few minutes.
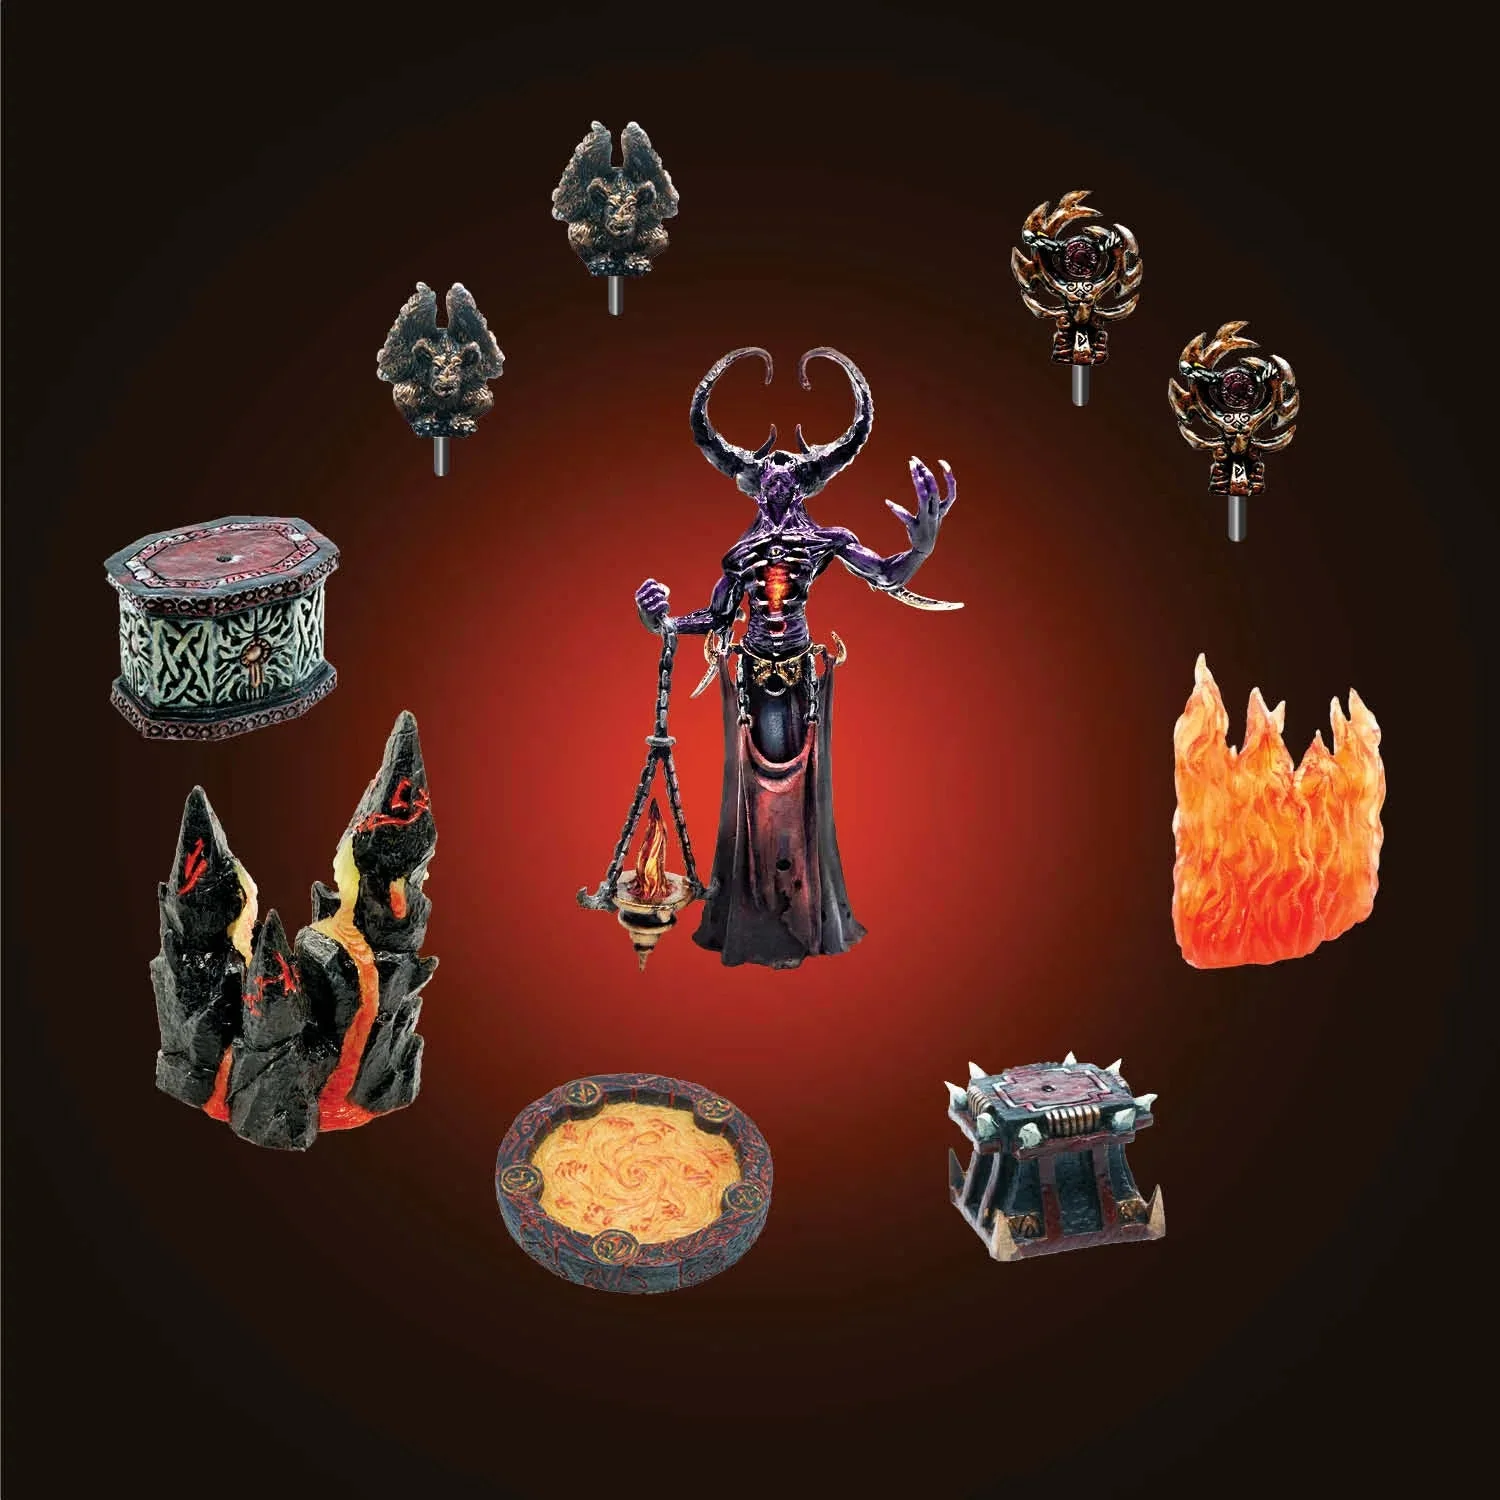
Scatter packs are efficient here because they add theme without demanding a full rebuild. The Hellraiser (Unpainted) set is a starter pack with ten painted Hellscape scatter pieces and pole accessories, including a Soulcage Portal, Devil Talisman poles, a Tri-Spire with LED, a Howling Devil Statue, Imp Gargoyle poles, a Devil's Plinth, an Infernal Altar, and a Wall of Fire. It works as a stand-alone set or as an accessory layer on larger builds, which makes it a fast way to change an encounter's tone.
- Store your kit by encounter role, not by product line, so you can grab what you need fast.
- One scatter pack can reskin a room without rebuilding the walls.
Plan for rebuild time at the table
The tradeoff of modular terrain is assembly time. A detailed build takes longer to set up than a drawn map, and that cost lands during the session if you are not careful. Design encounters so the rebuild happens between scenes, not mid-combat.
A practical habit is to pre-build the next encounter during a break or while players are resolving downtime. If a set is slow to assemble, save it for a planned set-piece and use a simpler configuration for random encounters. Matching build complexity to scene importance keeps the pace intact.
- Pre-build the next room before the current fight ends.
- Reserve your most complex builds for encounters that deserve the table time.
A step-by-step process for terrain-first encounter design
- Step 1: Write the encounter's job in one sentence: Before you place any terrain, decide what the encounter must accomplish: teach a mechanic, drain resources, introduce a villain, or force a moral choice. This sentence filters every later decision. Checkpoint: if you cannot state the job in one sentence, the encounter will sprawl.
- Step 2: Choose the space shape before the monsters: Pick a configuration that supports the job: open lanes for a chase, tight corridors for a crawl, a focal platform for a boss. Build the rough shape with modular walls and floors first. Common mistake: picking monsters first and then forcing the terrain to fit, which produces flat, forgettable fights.
- Step 3: Place one elevation change and one chokepoint: Add a platform, ledge, or raised area, then add a doorway or narrow passage. These two features create most of the tactical decisions players will make during the fight. Checkpoint: if players have no reason to move, add elevation or a hazard.
- Step 4: Add one interactive or objective piece: Include something players can manipulate, capture, or destroy, such as a functional siege engine or a scatter piece with moving parts. This gives the encounter a physical goal beyond reducing hit points. Common mistake: treating interactive pieces as pure decoration and never giving the table a reason to touch them.
- Step 5: Test the rebuild time before game night: Assemble the encounter once on your own and time it. If it takes longer than a few minutes, simplify the build or pre-assemble it before the session. Checkpoint: if setup eats into play time, the encounter is too complex for a random night.
- Step 6: Sketch a second variant from the same pieces: Before you tear down the build, note one alternate configuration using the same set, such as reversing a door frame or swapping a scatter pack. Keep it as a backup if the session goes off-script. Next step: store the variant sketch with the set so you can rebuild it in minutes.
Terrain pieces that support encounter-first design
- Trifecta Terrain Pack (Unpainted): A pack of Trifecta Terrain that can build negative space with freestanding walls or ledges, or assemble into basic building element pieces. A painted version is available in Std Cavern, Ice, and Underdoom colors. The size and price of this pack were cut in half from the Kickstarter campaign. One pack supports both cave-mouth negative space and standard rooms, so you can change an encounter's shape without buying a second set.
- Dungeon Double Doors - Vaulted (Unpainted): Provides two door frames and five sets of doors for thematic options. The doors can be removed and the doorway filled with the included Magnetic Plinth Arch to create an ornate wall cubby, or the Plinth can be reversed to use as a magnetic wall. A single doorway can become a door, an alcove, or a display wall, giving you three encounter functions from one pack.
- Working Mangonel (Unpainted): A fully functional Mangonel capable of hurling stone over battlements, customizable with included decorative attachments in three styles (iron dragons, war boars, and necromantic blades), and comes with ammo and an attachment point for a team of horses. Horses are available separately. A functional siege piece turns a static battlefield into an objective players can crew, capture, or sabotage.
- Hellraiser (Unpainted): A starter pack containing an assortment of 10 painted Hellscape scatter terrain pieces and pole accessories, including Soulcage Portal, Devil Talisman Pole Accessory X2, Tri-Spire (LED), Howling Devil Statue, Imp Gargoyle Pole Accessory x2, Devil's Plinth, Infernal Altar, and Wall of Fire. Works as a stand-alone set or to accessorize larger builds. A single scatter pack can re-theme a room for a hellscape encounter without rebuilding the walls.
Modular terrain did not just change how battlefields look; it changed the order in which encounters get designed. Build the space first, give it one elevation change, one chokepoint, and one interactive piece, and the encounter will do more work than any stat block. Start with a single set you can rebuild quickly, and let the terrain write the fight.