Quick Answer
To get a comfortable hiking backpack fit, start by setting the torso length to match your back, then adjust the hip belt so it sits on your hip bones, and finally fine-tune the shoulder straps and load lifters. A properly adjusted pack should feel like the weight is carried by your hips, not your shoulders, with no pressure points or chafing.
A hiking backpack that fits well can make the difference between a joyous trek and a miserable one. When your pack is properly adjusted, it moves with your body, keeps you balanced, and prevents unnecessary strain on your shoulders and back. This guide will walk you through the essential adjustments—torso length, hip belt, shoulder straps, and load lifters—so you can hit the trail with confidence.
Whether you're a day hiker or a multi-day backpacker, understanding how to fit your pack is crucial. Many hikers make the mistake of over-tightening their shoulder straps, which leads to discomfort and fatigue. Instead, the key is to let your hips do the heavy lifting. Follow these steps to achieve a comfortable, secure fit every time.
Step 1: Measure Your Torso Length
The first step in adjusting your hiking backpack is to ensure the torso length matches your body. Your torso length is measured from the bony bump at the base of your neck (C7 vertebra) to the top of your hip bones. This measurement determines where the hip belt should sit relative to your shoulders.
Most packs have an adjustable torso length system, often with hook-and-loop or ladder-lock adjustments. Loosen the straps and adjust the shoulder harness so that the hip belt rests comfortably on your hip bones when you put the pack on. The shoulder straps should wrap around your shoulders without gaping or digging in.
- Have a friend help you measure your torso length for accuracy.
- Check the manufacturer's sizing chart to find your pack size.
Step 2: Position the Hip Belt Correctly
The hip belt is the most critical component for carrying weight comfortably. When adjusted properly, the hip belt should sit snugly over your hip bones, not your waist. The padded part of the belt should wrap around your hips, with the top of the belt about an inch below your navel.
Once the pack is on, fasten the hip belt and tighten it evenly. You should feel the weight transfer from your shoulders to your hips. A common mistake is to leave the hip belt too loose, which causes the pack to sway and puts unnecessary strain on your shoulders.
- The hip belt should be snug but not so tight that it restricts breathing.
- If you have a pack with a load-lifter strap on the hip belt, adjust it to pull the pack closer to your body.
Step 3: Adjust the Shoulder Straps
After securing the hip belt, adjust the shoulder straps so they lie flat across your shoulders. The straps should follow the natural contour of your shoulders without pinching or sliding off. The webbing should be snug, but you should be able to slide a hand between the strap and your shoulder.
Tighten the shoulder straps by pulling the webbing downward and backward. Avoid over-tightening, as this can cause shoulder fatigue and restrict circulation. The goal is to have about 20-30% of the pack's weight on your shoulders, with the rest on your hips.
- If you feel pressure on your shoulders, loosen the shoulder straps and tighten the hip belt more.
- Check that the straps are not twisted and that the sternum strap (if present) is at chest level.
Step 4: Fine-Tune the Load Lifters
Load lifter straps are the small straps that connect the top of the shoulder straps to the top of the pack. They help pull the pack's weight closer to your body, improving stability and balance. Adjust them so they angle at about 45 degrees from the shoulder straps to the pack.
Tighten the load lifters slightly to bring the pack's weight onto your hips and off your shoulders. Be careful not to over-tighten, as this can cause the pack to pull backward and create pressure on your shoulders. The straps should be snug but not taut.
- If your pack has a sternum strap, adjust it to a comfortable height across your chest.
- After adjusting load lifters, check that the pack feels stable and doesn't sway when you walk.
Step 5: Check the Fit and Make Final Adjustments
Once you've made the initial adjustments, put on the pack and walk around to test the fit. Pay attention to any pressure points, chafing, or movement. The pack should feel like an extension of your body, with no bouncing or shifting as you move.
Make small adjustments as needed. If the pack feels too high, loosen the shoulder straps and lower the hip belt. If it feels too low, tighten the shoulder straps and raise the hip belt. Take the time to fine-tune until you find the sweet spot.
- Have a friend check the fit from behind to ensure the pack is level.
- Re-adjust after you've been hiking for a while, as your body and clothing may change.
Step-by-Step Adjustment Process
- Measure torso length: Find the C7 vertebra and measure to your hip bones. Adjust the pack's torso length to match. Checkpoint: The hip belt should sit on your hip bones when the pack is on.
- Secure the hip belt: Fasten the hip belt and tighten it evenly so it wraps snugly over your hip bones. Common mistake: Leaving it too loose causes shoulder strain.
- Tighten shoulder straps: Pull the webbing down and back to snug the straps, ensuring they lie flat without digging in. You should be able to slide a hand under the strap.
- Adjust load lifters: Tighten the load lifter straps to pull the pack closer to your body, at a 45-degree angle. Don't over-tighten; the pack should feel balanced.
- Test and fine-tune: Walk around and check for pressure points or sway. Make small adjustments as needed. Re-check after hiking for a while.
Products That Support a Great Fit
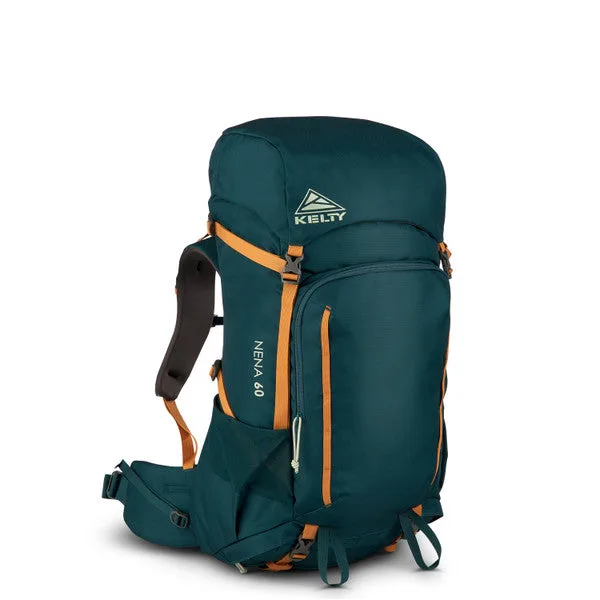
- Nena 60L: Specifically designed for the... (as per catalog: 'YOUR GATEWAY TO A GREATER OUTDOORS In 1953, Kelty was founded by the dynamic duo, Nena and Asher "Dick" Kelty, who were not only married, but partners & innovators within the emerging outdoor industry. Their mission was to encourage others to embrace the outdoors and get outside! This commitment to adventure is embodied in the Nena 60 backpack, named after the remarkable Nena Kelty.') The Nena 60L is a spacious backpacking pack that, when adjusted correctly, provides ample room for gear while maintaining a comfortable fit on the trail.
- Asher 24: From day hikes to backpacking ventures, Asher packs are designed to get you into the backcountry with minimal fuss and maximum fun. The Asher 24 is a versatile daypack that responds well to proper fit adjustments, ensuring comfort during shorter adventures.
A well-fitted hiking backpack is essential for a comfortable and enjoyable outdoor experience. By following these steps, you can ensure your pack carries the load efficiently, reducing strain and preventing discomfort. If you're in the market for a new pack, consider the Nena 60L for multi-day trips or the Asher 24 for day hikes—both are designed with comfort in mind. Remember, the right fit makes all the difference.