Quick Answer
Assemble your 1/80 plastic railway signal kit by carefully removing parts from the sprue, cleaning mold lines, dry-fitting, then gluing and painting. Pay close attention to the signal arm alignment to ensure smooth operation.
Why This Kit Works for Beginners and Experts
The 1/80 Plastic kit Railway Signal Set from PLUM PMOA is a re-run of a popular model, offering a manageable project that adds authentic detail to any model railroad layout or diorama. Its small part count makes it ideal for beginners learning basic assembly and painting techniques, while experienced builders can use it as a quick accent piece. The kit requires assembly and painting (not included), so you have full control over the final look.
Step-by-Step Assembly Guide
- Step 1: Prepare Your Workspace and Tools: Set up a clean, well-lit area with a cutting mat. Gather side cutters, a hobby knife, fine sandpaper or files, plastic cement, tweezers, and paints (acrylics work well). Organizing tools beforehand prevents losing small parts.
- Step 2: Remove Parts from the Sprue: Use side cutters to snip each piece from the sprue, leaving a small nub. Trim the nub flush with a hobby knife. Avoid cutting too close to the part to prevent stress marks. A common mistake is cutting flush immediately, which can crack the plastic.
- Step 3: Clean Mold Lines and Flash: Lightly sand or scrape any mold lines from each part. For tight corners, use a fine file. Rinse parts with warm soapy water to remove dust and oils, then let dry. Skipping this step leaves visible seams after painting.
- Step 4: Dry-Fit Before Gluing: Assemble the signal without glue to check fit and alignment. Adjust any tight connections by sanding slightly. Mark any areas that need paint before final assembly. Dry-fitting reveals if parts need trimming or if the signal arm will move freely.
- Step 5: Glue the Main Structure: Apply a small amount of plastic cement to the mating surfaces of the signal post and base. Hold firmly for 30 seconds. Let cure fully before handling. Too much glue causes oozing and visible residue; use a toothpick for precision.
- Step 6: Paint the Signal Components: Paint the signal head, arm, and post separately for best coverage. Use thin coats of acrylic paint. Typical colors: red or yellow for the signal arm, black or dark gray for the post, and silver for the ladder (if included). Painting before final assembly prevents brush marks in tight joints.
- Step 7: Assemble Moving Parts (if applicable): If the signal arm is designed to pivot, attach it with a tiny drop of glue on the pivot pin, then move it back and forth until the glue sets to maintain free movement. Avoid gluing the arm solid. A frozen signal arm is a common result of over-gluing; test motion immediately.
Product Facts
-
1/80 Plastic kit Railway Signal Set(re-run): This 1/80 scale plastic kit from PLUM PMOA is a re-run of a railway signal set, perfect for adding realistic detail to your model railway diorama or scale scene. It provides a historically accurate signal design that fits standard 1/80 scale layouts, making it a versatile addition to most model train projects.
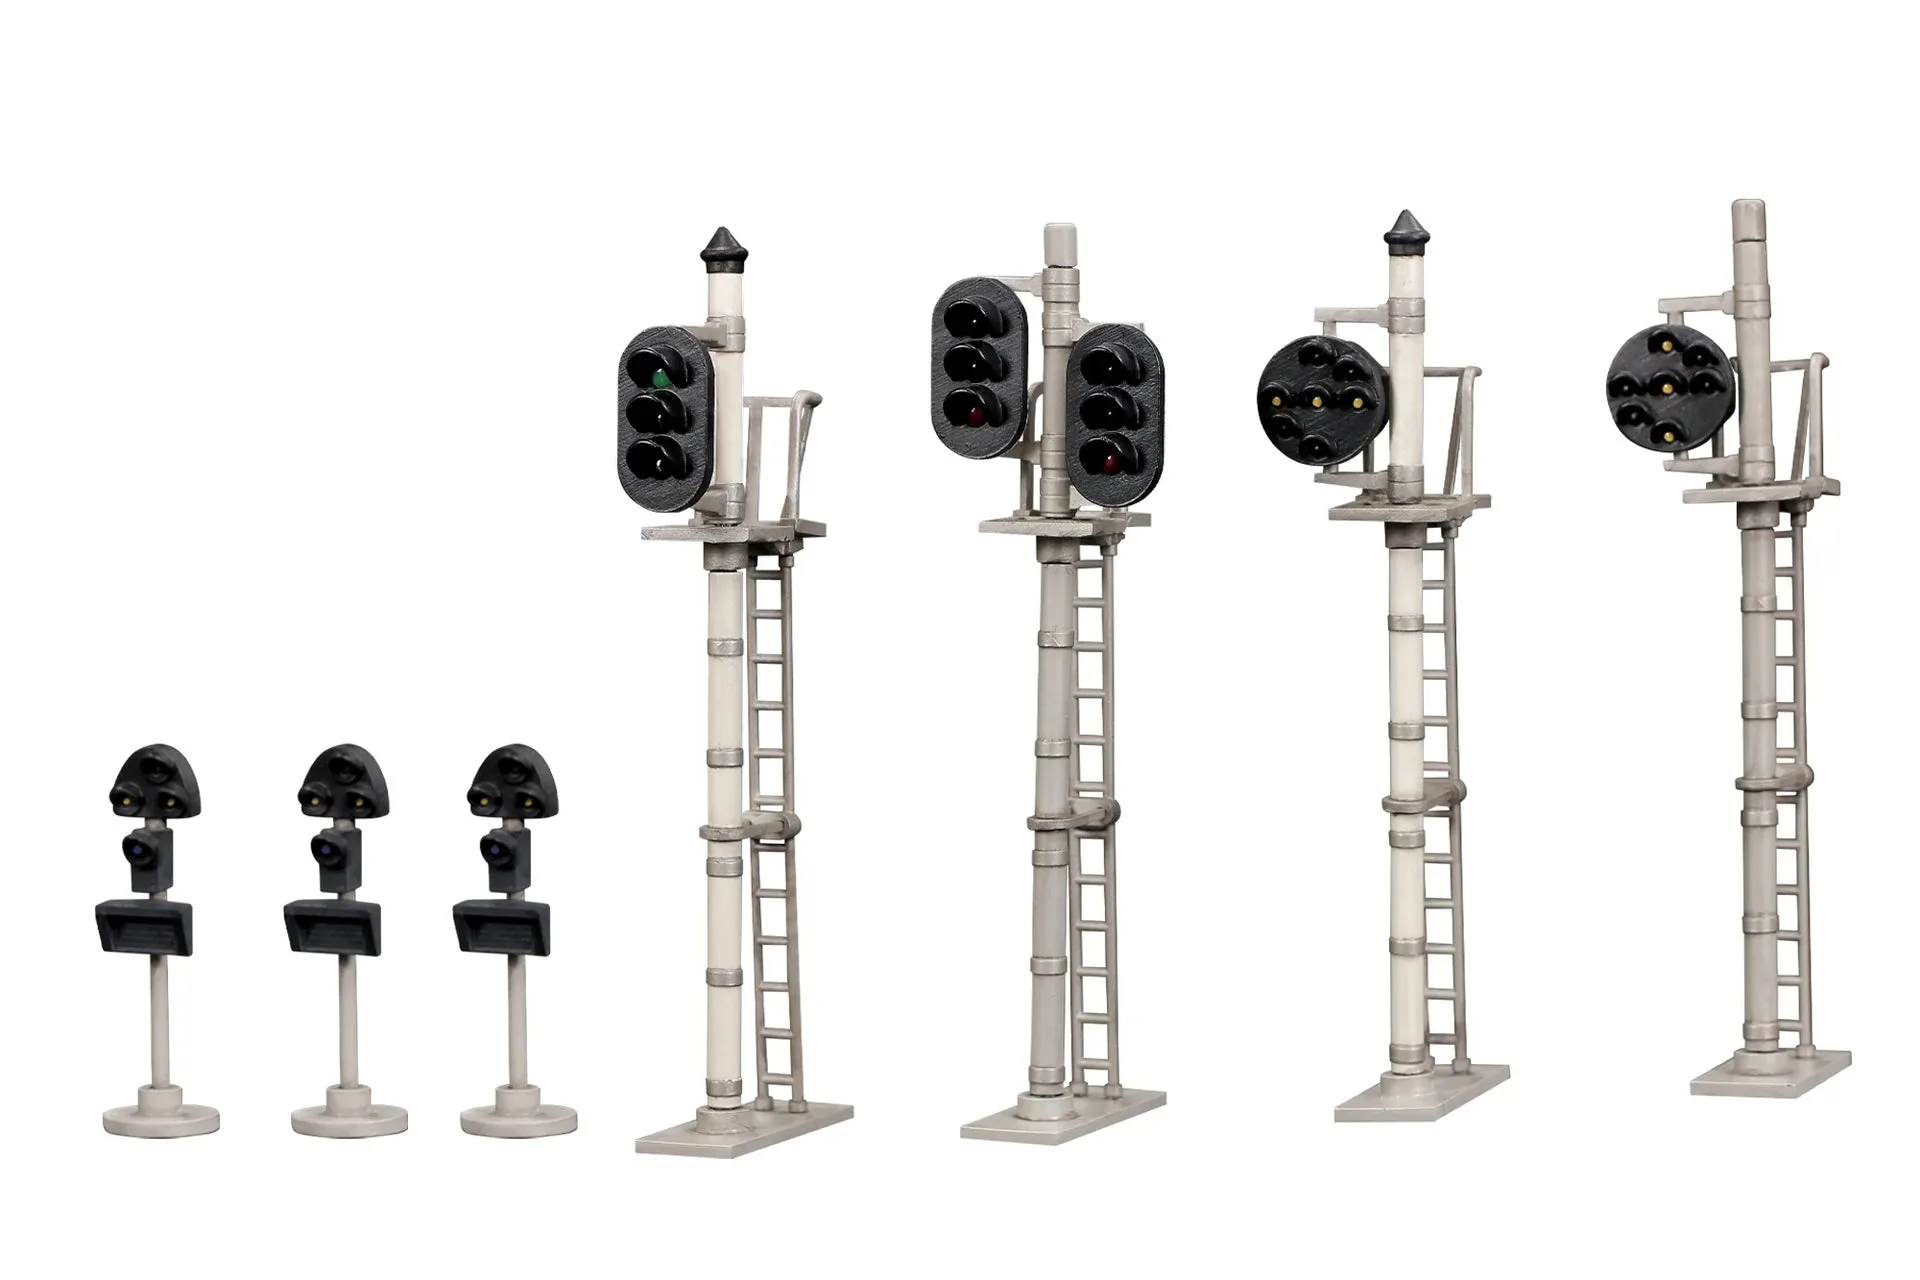
1/80 Plastic kit Railway Signal Set(re-run)