Patches are more than just decoration—they identify your team, showcase your personality, or mark your gear. But if you've ever peeled off a patch and found frayed fabric or a stretched-out loop field, you know the struggle. Attaching patches to tactical gear requires a balance between security and preserving the integrity of your equipment.
Whether you're adding a morale patch to your plate carrier or a callsign to your helmet cover, the method you choose matters. In this guide, we'll walk you through the best practices for attaching patches without causing damage, so your gear stays in top condition for years to come.
Understanding Hook-and-Loop: The Basics
Most tactical gear uses hook-and-loop (Velcro) for patch attachment. The 'loop' side is the soft, fuzzy material that covers many plate carriers, chest rigs, and helmet covers. The 'hook' side is the rough part typically found on the back of patches. When pressed together, they create a secure bond that's easy to remove.
However, not all hook-and-loop is created equal. High-quality loop fields, like those on Agilite's gear, are designed to withstand repeated use. Cheaper materials can pill or lose their grip over time. Understanding the quality of your gear's loop field is the first step to damage-free attachment.
- Always check the condition of the loop field before attaching a patch—if it's already worn, consider using a patch panel instead.
- Avoid placing patches on curved or high-stress areas where the hook material can pull and distort the fabric.
Best Practices for Attaching Velcro Patches
The most common method is simply pressing the patch onto the loop field. But to avoid damage, you need to do it right. First, make sure both the patch backing and the loop field are clean and free of debris. Dirt and sand can cause abrasion, wearing out the loops over time.
When pressing the patch, use even pressure across the entire surface. Avoid sliding the patch into place, as this can stretch the loops. Instead, align it and press firmly from the center outward. If you need to adjust the position, lift the patch straight off rather than sliding it.
For patches that you plan to leave on for extended periods, consider using a patch keeper or a thin backing layer to reduce stress on the loop field. This is especially useful for heavier patches that can pull on the fabric.
- Clean the loop field with a lint roller or soft brush before each attachment.
- Press patches on in a cool, dry environment—heat can soften the adhesive backing and cause residue.
When to Sew Patches Instead
Some patches are too large, heavy, or oddly shaped for hook-and-loop. In these cases, sewing is the best option. Sewing provides a permanent, secure attachment that won't shift or peel, even under heavy use.
To sew a patch without damaging your gear, use a needle and thread that match the patch's edge. Start from the inside of the garment to hide the knot, and use small, even stitches around the border. Avoid pulling the thread too tight, as this can pucker the fabric. For tactical gear with multiple layers, you may need a heavy-duty needle.
If you're not comfortable hand-sewing, a sewing machine with a walking foot can handle thick materials. Just be sure to test on a scrap piece first to avoid damaging your gear.
- Use a thimble to protect your fingers when sewing through tough materials like Cordura.
- For waterproof gear, consider using a seam sealer after sewing to prevent moisture from entering the stitch holes.
Patch Placement: Strategic and Safe
Where you place your patches matters not only for visibility but also for the longevity of your gear. High-friction areas, such as the shoulders of a plate carrier or the top of a helmet, are prone to wear. Instead, opt for flat, stable surfaces like the front of a chest rig or the center of a back panel.
When attaching patches to helmet covers, like the Ops-Core FAST BUMP/Carbon High Cut Helmet Cover-Gen4, ensure the loop field is properly aligned with the helmet's shape. Avoid stretching the cover to make a patch fit—this can distort the cover and affect its ballistic performance.
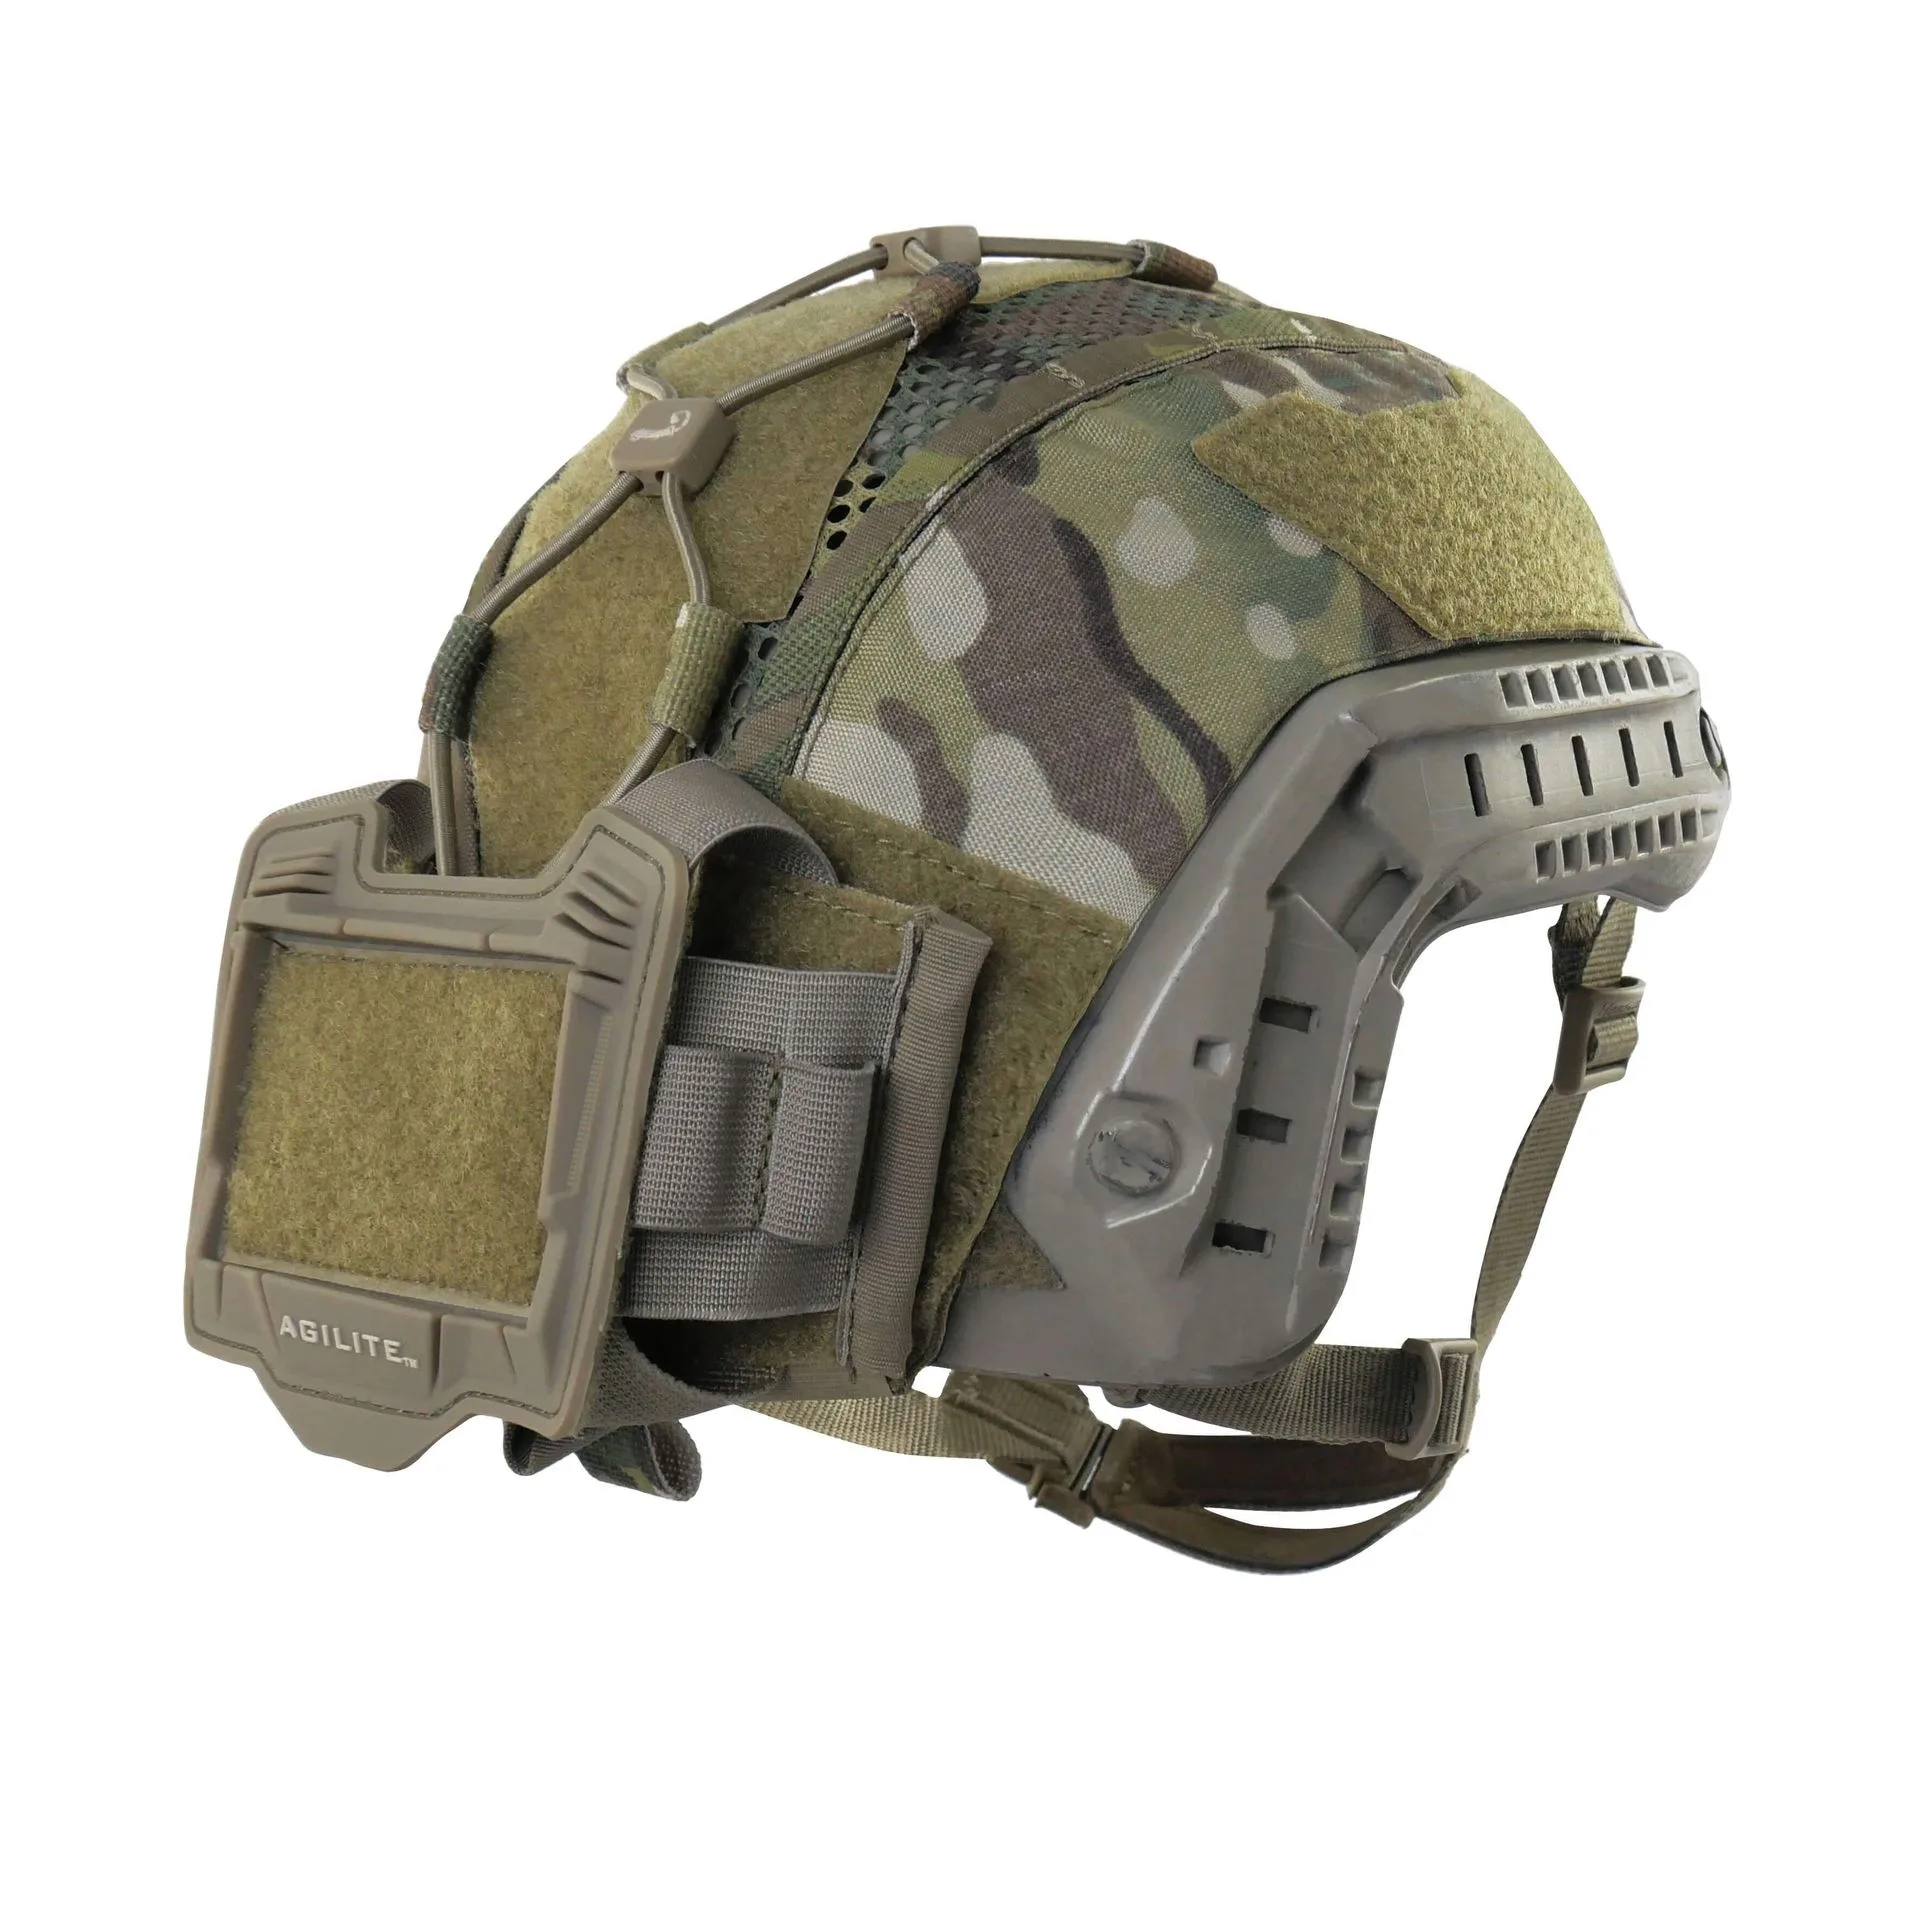
Ops-Core FAST BUMP/Carbon High Cut Helmet Cover-Gen4
For plate carriers, the front plate bag is a popular spot for patches. The K19TM 3.0 Front Plate Bag offers a large loop field that's perfect for showcasing your team patches or identifying information. Just be mindful of any quick-release features—don't cover them with a patch that could snag.
- Place patches away from zippers, buckles, and Velcro closures to prevent interference.
- Consider the overall layout: balance patches symmetrically to avoid unnecessary stress on one side.
Removing Patches Without Leaving a Trace
Eventually, you'll want to swap out patches or clean your gear. Removing a patch incorrectly can pull loops or leave adhesive residue. To remove a velcro patch, gently peel it from one corner, lifting slowly. If it resists, use a plastic spudger or a credit card edge to separate the hook and loop without yanking.
For sewn patches, use a seam ripper to carefully cut the stitches. Work from the backside to avoid cutting the fabric. Once the patch is off, you may have small holes—these can be closed with a fabric repair kit or by applying a small amount of fabric glue.
If your patch leaves a sticky residue from adhesive backing, use a small amount of isopropyl alcohol on a cotton swab to dissolve it. Test on an inconspicuous area first to ensure the color doesn't fade.
- Store patches on a patch panel or spare loop fabric to keep the hook side from collecting lint.
- Rotate patches regularly to prevent permanent indentation on the loop field.
Attaching patches to your tactical gear doesn't have to be a destructive process. By understanding hook-and-loop, choosing the right method for each patch, and being mindful of placement, you can keep your gear looking sharp and performing at its best. Whether you're outfitting a new plate carrier or updating your helmet cover, these tips will help you do it safely. For high-quality gear with durable loop fields, check out the K19TM 3.0 Front Plate Bag or the Ops-Core FAST BUMP/Carbon High Cut Helmet Cover-Gen4—both are perfect canvases for your patches.


